Wondering how to hide the edge of your pond liner so it looks natural and seamless? The good news is, with a few simple techniques, you can make it disappear completely.
From shaping the liner to blending it with rocks, plants, and mulch, there are easy ways to create a polished, integrated look.
Keep reading to see how you can achieve a flawless finish.
Prepare Your Pond Site for Seamless Liner Installation
To prepare your pond site for seamless liner installation, start by outlining your desired shape with a garden hose or spray paint. This helps you visualize the final design and ensures accuracy before digging. Determine the appropriate depth based on your pond size and the type of aquatic life or plants you plan to include. Remove sharp objects, rocks, and debris from the site to prevent punctures in the liner. Clear the area thoroughly, especially around potential trouble spots, to protect the liner during installation. Level the ground for an even surface and remove roots or vegetation that could grow through later, which might cause damage over time. Compact the soil to create a stable base, filling voids larger than 2.5 centimeters with sand or soil for added support. Construct a trench around the pond’s edge, filling it with soil or rocks to anchor the liner securely and improve pest and wildlife barriers. Spread two to three inches of sand over embedded rocks to create a smooth surface. This initial prep work minimizes stress points, reduces wrinkles, and provides a sturdy foundation for a leak-proof, professional-looking liner installation. Additionally, ensuring proper ground preparation helps enhance the longevity and durability of your pond liner over time. Incorporating a proper site assessment before installation can identify potential challenges early, saving time and effort later. Furthermore, paying attention to soil stability can prevent settling issues that might compromise the liner’s integrity in the future.
Lay and Overhang Your Pond Liner Correctly
To lay and overhang your pond liner correctly, measure the pond dimensions carefully. Add at least 15 to 20 centimeters of overhang around the entire edge; for easier anchoring in a perimeter trench, up to 50 centimeters is recommended. Larger overlaps not only provide a better seal but also help conceal the liner edge. When positioning the liner, leave some slack—do not pull it tight—since tension can cause stress points, wrinkles, or tears. Gently smooth the liner into the contours, pressing into corners and shelves without forcing it flat. Secure the edge temporarily with small weights like rocks or bricks, which allows slight movement during filling. This prevents uneven thickness, reduces the risk of damage, and ensures the liner settles properly.
Build Rock Ledges and Shelves to Hide the Liner
Building rock ledges and shelves around your pond helps conceal the liner and creates a natural, attractive edge. A shallow shelf, positioned about 3 to 12 inches below the water surface, provides space for hiding liner material and supporting aquatic plants. Use a two- or three-course stone stack, overlapping stones by at least 6 inches, to ensure stability and visual depth. Incorporate a mix of stone sizes—such as flat flagstones, river rocks, or boulders—to mimic a natural environment and avoid a uniform, “wedding-cake” look. Backfill behind the rocks to lock the liner in place, preventing water runoff from flowing directly into the pond. Leave small gaps filled with gravel or cobbles around the edges to hide the black liner lines and promote moss growth. These gaps also add texture and create habitats that invite local wildlife to use the shelf area. Using natural stones enhances the camouflage and contributes to the pond’s overall harmony with its environment. When stacking stones, properly securing the structure is crucial to prevent shifting over time and ensure the stability of your structures.
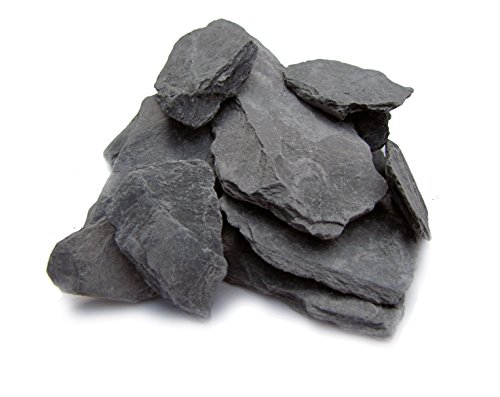
100% natural stone that is safe for your aquarium and has been sourced, tumbled, washed, and packaged by our family-owned business in the USA. Tumbling smooths sharp edges for the safety of your tank inhabitants and gives a more weathered look for your terrarium or moss bottle/jar garden (mossarium). The color is a matte slate grey with a hint of blue that holds up over time and won't fade. Each package is a mix of stone from 1 to 3 inches (some stones may be slightly above or below this range)

Comes with NEW SMART DISPENSER Straw

100% real natural slate stone will add beauty and realism to your creations, Natural grey slate that are darker when wet.
Backfill and Blend the Edges for a Natural Finish
To achieve a seamless, natural appearance along your pond’s edge, backfilling with materials like sand, soil, gravel, or mulch is essential. Use soil to bury the liner and create a smooth connection with the landscape. Slope grading helps form a gentle slope that mimics natural shorelines and prevents erosion.
Layer and compact the backfill to prevent shifting or gaps over time. Soil can be employed to hold stones securely in place and help the liner blend into the surroundings. Gravel fills gaps between larger rocks, providing an organic, textured look that appears more natural. Leave a small liner flap—about 12 to 18 inches—before trimming, which allows for a cleaner finish and easier adjustment if needed.
Finish by blending the backfill with smaller stones, gravel, and edging details. This layered approach creates a stable, natural shoreline that effectively conceals the liner edge and integrates seamlessly with your landscape.

【Well Drainage】This succulent gritty mix is super well in water drainage, best for drought tolerant succulents and cactus, help your plants grow beautiful colors and also effective prevent rover water

Colorful & Natural: Mix Horticultural Lava Rocks blend six natural stones for colorful gardening. Sized at 3/8" (6-9mm), they darken when used in water. Eco-friendly, non-staining and non-fading, maintaining enduring beauty at home.
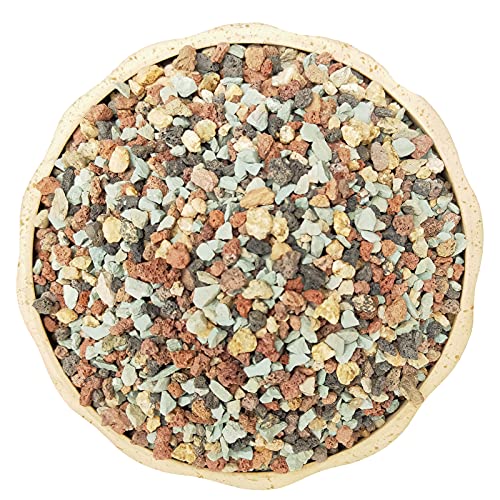
【Well Drainage】This succulent potting soil is super well-draining, best for drought-tolerant succulents and cactus, helps your plants grow beautiful colors, and also effectively reduces the risk of rotting roots and overwatering.
Plant Ground Cover and Organic Materials to Conceal Seams
Plant ground cover and organic materials are your best natural tools for concealing pond liner seams. Low-growing creeping ground cover spreads horizontally, softening the visible liner line and making it easier to blend into the surrounding landscape. Bog plants with a trailing habit thrive at moist margins, draping over the edge to create a seamless connection from land to water. Evergreen ground cover ensures year-round concealment, even during seasonal dieback.
Choose plant varieties suited to the specific edge zone, ensuring they tolerate both shallow water and damp soil conditions. Organic layering materials such as soil, mulch, or gravel can be applied behind or around the plants to hide seams further. These layers establish a gentle slope that naturally integrates the liner into the landscape. Proper establishment and consistent maintenance allow roots and foliage to gradually cover the seam, resulting in a natural, cohesive pond edge that remains concealed over time. Incorporating aquarium plants that thrive in moist or submerged conditions can also enhance coverage and concealment efforts. Additionally, understanding waterproofing techniques can further improve how well the liner remains hidden and protected in the landscape. Using proper planting methods greatly improves the longevity of cover and ensures the seam remains concealed.
Secure and Finish the Pond Edge Using Artificial Materials
Securing and finishing your pond edge with artificial materials provides a durable, seamless transition from water to land. To protect your liner, use edge reinforcement techniques such as manufactured edge pieces or synthetic finishing materials. These options create a clean, reliable barrier where traditional stones or soil might not be suitable. Plastic molded edge pieces can be glued directly onto the liner using pond-safe sealant, ensuring a smooth and secure edge. Textured sheets and pond foam can fill gaps, offering extra support and concealment. Artificial materials help prevent liner slipping or stretching, which enhances the overall durability of your pond. Proper edge reinforcement with synthetic options not only preserves your liner but also simplifies ongoing maintenance. Additionally, selecting the right materials is important for longevity, similar to considering quality in aquarium with stand choices. Using durable pond lining, such as reinforced materials, can further extend the lifespan of your pond edge and prevent potential damage over time.

UPGRADED REINFORCED AND ENCRYPTED EDGES WITH ROPES: Quick installation with tangle-free setup, securely fastening to the ground or posts for enhanced protection. The 5/8” square mesh effectively restricts animal movement, providing safety for your garden, poultry, and pets
UPGRADED REINFORCED AND ENCRYPTED EDGES WITH ROPES: Quick installation with tangle-free setup, securely fastening to the ground or posts for enhanced protection. The 5/8” square mesh effectively restricts animal movement, providing safety for your garden, poultry, and pets
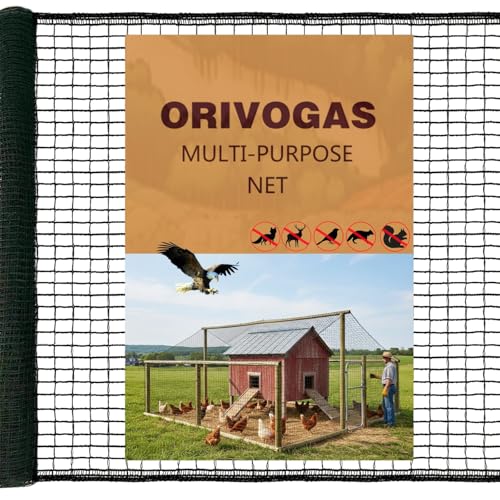
REINFORCED EDGES & TANGLE-FREE DESIGN | EASY INSTALLATION : Our heavy-duty bird netting features a premium woven square mesh structure that effectively resists tangling with fallen leaves, weeds, or twigs. The upgraded reinforced edges come with integrated ropes, ensuring a neat appearance and a frustration-free setup and storage process.
Trim and Cut the Liner for a Clean, Natural Border
Filling the pond before trimming the liner ensures it settles into its natural shape, which makes the cutting process more accurate and easier. Wait until the liner is fully conforming to the pond’s contours before making your cut to prevent tearing or creating jagged edges. Use sharp tools like scissors or a utility knife to achieve clean, precise edges that enhance liner durability. Measure carefully, adding about 12 inches per side for a safe trim allowance, and leave at least 10 to 15 centimeters beyond the pond edge for secure finishing. Maintain an even overlap around the perimeter and keep excess liner for anchoring. Only trim once the liner’s shape stabilizes, ensuring the finished border remains seamless and hidden, with no visible liner once completed. Proper planning is essential to ensure your liner edges are neatly concealed and built to last. Additionally, considering the proper tools for cutting can greatly improve the accuracy and quality of your trim.
Finish With Rock Caps and Edge Details for a Polished Look
Finish with rock caps and edge details to create a polished look. Start by placing flat stone caps along the pond’s edge, making sure they cover the liner lip and top of the wall comfortably. Choose liner materials like closely fitted stones and natural rock to minimize gaps and prevent slipping or stretching at the perimeter. Support the caps with a stable base or hidden ledge to enhance edge stability and prevent shifting over time. Allow a slight overhang of 2–3 centimeters to create a smooth waterline transition without exposing liner. Tuck the liner beneath a narrow shelf and backfill with soil, gravel, or mulch to conceal it and improve support. Combining well-chosen liner materials, secure positioning, and natural or formal caps results in a durable, visually appealing pond edge. Additionally, ensuring the long-term stability of the edge helps maintain a seamless appearance as the pond ages. Incorporating edge reinforcement techniques can further enhance durability and prevent future shifting or damage. Understanding the importance of a stable pond perimeter is crucial for maintaining a neat and secure pond edge over time.
Install Drainage and Weep Holes to Ensure Water Flow and Longevity
Installing drainage and weep holes is crucial for ensuring proper water flow and extending your pond’s lifespan. Begin by locating the lowest point in your pond, as this is the ideal spot for installing the drain. Mark this point with a silver Sharpie for accuracy. Dig a small access hole at this spot, then create a drain hole to release any residual water. Enlarge this hole until it fits the drain stem snugly. Seal the connection tightly using a rubber washer, fender washer, Teflon tape, and silicone caulk to prevent leaks and ensure a secure fit. Regularly inspect these drainage points to keep water flowing freely; proper drainage helps regulate the water table and prevents excess water from accumulating, which could weaken the pond’s structure over time. Maintaining these outlets is key to avoiding problems like liner rot and ensuring your pond remains healthy and durable for years to come.

Pulls debris from the bottom of your pond while the weir door in the Skimmer skims debris from the surface

PondH2o Water Garden Koi Fish Pond Liner Leak Repair Kit Includes Two Products:

Conduct Final Inspection to Ensure Secure, Hidden Edges
Conduct a final inspection of the liner edges to ensure they are fully concealed and secure. Begin by examining the entire perimeter for any exposed liner, folds, wrinkles, or seams that may remain visible after placing stones or pavers. Make sure the liner is properly tucked under edging, coping, or backfill, with no open gaps. The liner lip should be hidden behind the first layer of rocks or pavers to prevent visibility. Check that the overlap is buried in an anchor trench or locked in place, and confirm that stones or coping sit firmly without shifting. Pay special attention to corners and curves, ensuring they are well-sealed and smooth. Confirm that backfill is tightly packed behind all materials to prevent movement. Proper substrate placement also helps prevent liner shifting and protects the edges over time. Lastly, verify the final grade diverts runoff away from the liner, and ensure UV protection and stability are maintained for long-term durability. Maintaining a stable and level grade is essential for long-term durability, especially in areas prone to heavy rainfall or erosion.