Thinking about making your own reptile hide but not sure where to start? A well-crafted hide provides your reptile with comfort and security. It doesn’t have to be complicated or expensive.
With the right materials and some simple steps, you can create a cozy shelter that fits your pet’s needs perfectly. Keep reading to learn how to build a safe, durable, and inviting hide for your reptile.
Why a Secure Reptile Hide Matters for Your Reptile’s Well-being
A secure reptile hide is vital for your pet’s well-being because it offers a safe space where your reptile can retreat and relax without feeling exposed or threatened. It helps support natural behaviors by mimicking how reptiles seek shelter from predators, which reduces stress caused by open enclosures. To promote a sense of safety, choose opaque, stable hides that resemble natural refuges and provide a psychological anchor point in the enclosure. Multiple hides placed in different thermal zones encourage thermoregulation, allowing your reptile to manage its body heat while remaining hidden. Additionally, having microenvironments inside the hide can help control humidity levels, supporting proper shedding and hydration. Using a variety of natural aquarium plants can also enhance the hiding spots, creating a more enriching environment. Incorporating well-selected hides made from durable and safe materials ensures longevity and prevents harm to your reptile. Investing in well-designed, durable hides enhances your reptile’s safety and comfort, ultimately contributing to a healthier, less stressed, and more active pet. Using appropriate hides can also help replicate natural shelter, promoting healthier behaviors and well-being.
How to Choose the Right Size and Shape for Your Reptile’s Hide
The ideal size for your reptile’s hide should allow the entire body to fit comfortably inside without parts remaining exposed. For snakes, choose a snug fit that lets the animal coil naturally, filling most of the space but avoiding unnatural stretching. The interior dimensions should support species-specific behaviors—such as a width that accommodates your snake’s full girth or a height that allows terrestrial reptiles to rest without feeling cramped. The entry should be large enough for easy access but not so big that the animal remains visibly outside or feels insecure. Additionally, consider the maximum shoulder width, girth, and resting height to ensure your reptile can turn, rest, and reposition comfortably without obstruction. The shape should complement these measurements; vertical-sided hides work well for many snakes, while low, wide designs suit burrowing or terrestrial species, fostering a sense of security and natural behavior. Proper sizing and shaping can also influence the stress reduction of your reptile, encouraging more natural activity. Ensuring proper suitable size and shape helps replicate their natural environment, reducing stress and encouraging healthy activity. Remember that choosing the right appropriate dimensions is crucial for your reptile’s overall well-being.

Spacious Space: This reptile hide box large shelter measures 9.5x6.7x2.3in and has ample space, suitable for medium-sized climbing pets such as leopard geckos, corn snakes, lizards, and small amphibians. It allows them to comfortably hide and rest in the feeding box, providing a sense of security.

Dimension: 5.7 x 4.3 x 2.0 inch

PRODUCT SIZE: 5.25" X 3.75" X 2"
Planning Your Materials and Construction Approach
To successfully build a DIY reptile hide, you must first carefully choose your materials and determine the best construction method for your design. Prioritize using non-toxic, reptile-safe options such as water-based glues, natural surface materials like wood, cork, or untreated stone, and non-toxic paints if coloring is needed. These materials should not emit fumes or chemicals that could harm your pet. Consider your skill level and the look you want to achieve when selecting a construction approach. Options include carving foam for lightweight shapes, repurposing container-based structures, layering textures with natural or synthetic materials, or employing a mold-and-coat technique for detailed designs. Ensuring the materials are safe and appropriate for reptiles is crucial for your pet’s health. Proper tool maintenance is essential for achieving clean, precise results. Keep blades sharp and clean to prevent ragged or uneven cuts, which can compromise the integrity of your hide. Prepare your workspace with protective surfaces like greaseproof paper or scrap cardboard to prevent adhesives from sticking to unintended areas and to facilitate cleanup. Planning your materials and construction method beforehand allows you to avoid costly mistakes, saves time during assembly, and ensures that the final product is durable, safe, and suitable for your reptile’s needs. Additionally, considering the durability of materials helps ensure your hide withstands your reptile’s activity and environmental conditions over time. Selecting reptile-safe building materials is fundamental to your project’s success. Incorporating suitable construction techniques can greatly enhance the overall quality and longevity of your project.

Super strong, permanently flexible bonding agent, non toxic, cleans up with water. DO NOT FREEZE. Do not have shipped below 40 Degrees Fahrenheit. No refunds for product that has been frozen.

Super strong, permanently flexible bonding agent, non toxic, cleans up with water. DO NOT FREEZE. Do not have shipped below 40 Degrees Fahrenheit. No refunds for product that has been frozen.

🛠 Precise Glue Control: Apply glue exactly where you need it, with the easy-to-use precision microtip that ensures clean, accurate application even in tight spaces. Minimize waste and messy, making it perfect for intricate crafting, small repairs, and detailed DIY projects.
How to Build the Core Structure of Your Reptile Hide
Begin constructing the core structure by referencing your initial sketch or template to outline the hide’s footprint and entry shape. Choose materials such as foam, plastic containers, tinfoil, or existing molds to shape the main volume. Use assembly methods suited to your materials: hot glue for foam, or screws and strong adhesive for plastic and rigid shells. Secure the parts firmly, starting with the sides and corners to ensure stability during assembly. First, cut individual pieces to size, then test fit and label them before making any permanent connections. Carefully create a clean doorway or entrance using a utility knife, drill, or hole saw, making sure the opening allows your reptile to enter, turn around, and exit comfortably. Reinforce joints and seams early in the process to maintain stability and prevent structural weaknesses as you assemble. Additionally, utilizing materials like foam allows for easy shaping and modification, which is especially helpful when customizing the hide for specific species’ needs. Ensuring the materials used are safe and non-toxic is crucial for your reptile’s health during the building process.

True to Nature Reptile Rock Hide Cave - reptile hides and caves makes a great reptile house and hideout, resting place for reptiles and amphibians. It’s a terrarium décor featuring realistic shape and colors of natural looks. True to natrue to be a snake hide, ball python tank accessories, leopard gecko hide, bearded dragon hide and aquarium cave, etc.

Compact Dimensions: Measures 9 inches by 6.75 inches by 3 inches, providing an appropriately sized humid hide for various reptile species

Size L Snake Hide:10.2 x7.48 x 2.75inch Entrance Size :2.75 x 2.36inch
Adding Texture and Waterproof Coatings for Durability
Applying texture and waterproof coatings significantly boosts both the realism and longevity of your reptile hide, especially in humid conditions. To create authentic surface details, use materials like grout, clay, or foam to form rock-like pores and cracks. Applying multiple thin layers of texture instead of a single thick coat helps minimize bubbles and ensures more even curing. Work while the surface remains workable so you can carve, press, or stamp intricate details before the coating hardens.
When selecting a sealant, choose water-resistant products such as acrylic, silicone, or polyurethane. Applying several thin coats of the sealant provides better protection than a single thick application, enhancing durability. Proper priming and sealing are essential to prevent moisture absorption, allowing your reptile hide to withstand humidity and wear over time. Using waterproof sealants is crucial for maintaining the structural integrity of your build in humid environments.

EFFECTIVE WATERPROOFING FOR SMALL REPAIRS - YKF transparent waterproof sealant 12 oz is a water-based clear coating that cures into a dense protective membrane to help block water, air and moisture. Ideal for small leak repair, surface sealing and waterproof protection around roofs, walls, bathrooms, kitchens, sheds and outdoor areas.

Highly Effective Waterproofing and Anti-Leakage: Clear waterproof sealant is a water-based coating, waterproof coating cures to form a dense waterproof membrane that effectively insulates against air, water and moisture. The waterproof coating becomes more stable over time
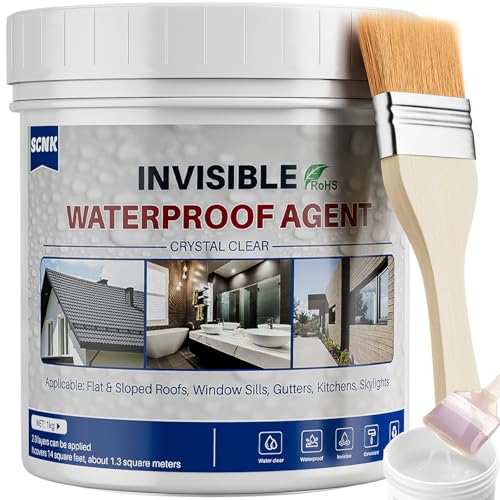
Strong Waterproof & Anti Leakage: SCNK Transparent waterproof coating is a water-based coating, waterproof sealant cures to form a dense waterproof membrane, which effectively insulates against air, water and moisture and prevents leakage.
Finishing and Curing Your Reptile Hide for Safe Use
Before placing your reptile hide in the enclosure, ensure it is fully finished and cured for safety and durability. Begin by thoroughly cleaning the surface to remove dust, loose foam, grout crumbs, and debris. This step helps achieve better adhesion when applying sealants and minimizes the risk of contamination. Allow sculpted or coated surfaces to dry completely—typically at least 24 to 36 hours—to prevent cracks and damage. Proper curing of all materials is essential to avoid the release of harmful chemicals that could affect your reptile’s health. Smooth out any sharp edges or pointed entrance areas to make entry and exit safe and comfortable for your reptile. Carefully inspect the hide for weak spots, gaps, or loose fragments that could potentially harm your pet. Confirm that all coatings have fully cured and are odorless, and test the overall structure for stability. Also, ensure the materials used are suitable for reptile environments to maintain safety and health. Understanding material safety is critical for choosing appropriate supplies and coatings for your project. Taking the time to verify these factors is crucial for reptile safety and well-being. Only once these conditions are met can you confidently introduce the hide into your reptile’s environment.

QUICK AND EASY HABITAT CLEANER: Our natural enzyme formula is incredibly fast-acting and won’t leave behind greasy, sticky, or filmy residue like other terrarium cleaners or soaps. After removing all items, spray the habitat thoroughly and let sit for 3-5 minutes. Use a brush or wet cloth to remove excess messes and rinse completely with hot water until sudsing stops. Then wipe clean and let dry before returning your pet to it’s home.

HEALING AID & SKIN REPAIR: Use a few times daily to flush reptile's wounds and skin problems to aid in the healing process.

✅ 【All-in-One Skin Support】 Helps support healthy skin in reptiles dealing with tail concerns, shell dryness, shedding discomfort, and minor surface irritations.