Struggling to keep your pond clean and debris-free? A DIY pond skimmer is a simple, cost-effective solution that you can build yourself.
By the end, you’ll know how to craft one from water-resistant materials and place it where debris naturally gathers.
Keep reading to discover all the easy steps for creating a long-lasting, effective pond skimmer.
How to Build a DIY Pond Skimmer: Step-by-Step Instructions
To build a DIY pond skimmer, start by planning its layout and placement carefully. Position the skimmer at the pond edge where surface debris naturally collects and water flow guides debris toward the opening. Dig a small excavation so the skimmer body sits flush with the ground, ensuring the weir lip aligns with the pond’s normal water level. Keep the opening just below the surface to effectively trap floating leaves and surface film. Make sure the skimmer opening makes full contact with the pond liner to prevent water from bypassing the intake. Mark and cut the intake opening on the container’s face or side, centering it for even water flow. Seal the opening well to avoid leaks, then attach the faceplate securely. Proper placement and sealing maximize water flow efficiency and debris removal. Additionally, understanding how selecting the right reptile thermostat can help ensure a stable environment for pond wildlife. Moreover, familiarity with water conditioning salts can aid in maintaining optimal pond water quality. Knowing how to filter and condition pond water effectively can also enhance the overall health of your pond ecosystem.
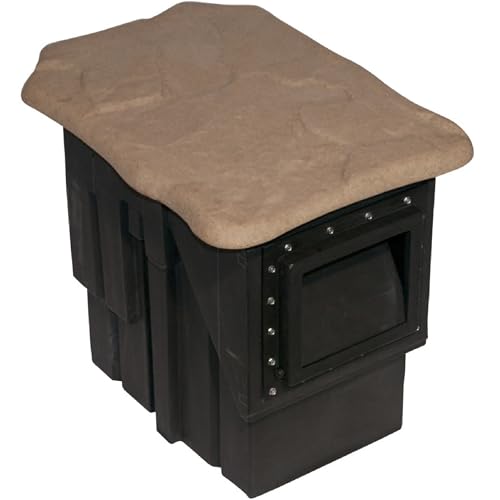
Specifically Designed for Water Gardens and Koi Ponds: Helps maintain clean, clear water in outdoor ponds up to 250 square feet or 3,000 gallons by skimming and removing floating debris before it sinks.

[Keep your pool clean with ease] This kit includes a semi-deep skimmer net,a 12" round pool brush head and a 70.5" pole

Effective Pond Surface Coverage: Covers up to 270 square feet of pond surface area for efficient debris removal
Choosing Materials and Tools for Your Pond Skimmer Project
Choosing appropriate materials and tools is essential for building a durable DIY pond skimmer. Prioritize materials with high water resistance to ensure they withstand outdoor conditions, debris load, and constant exposure to moisture. For containers, options like 5-gallon buckets, sturdy storage bins, or PVC pipes work well because they can support internal plumbing and debris without warping or breaking down over time.
When selecting tools, focus on safety and precision. A power drill, saw, and a hole saw are necessary for making accurate cuts and fitting holes. Always wear safety gear such as goggles, gloves, and hearing protection during operation. Use reliable measuring tools, such as a tape measure or ruler, to plan the skimmer opening accurately near the waterline, preventing leaks or improper fit.
Sealants are crucial for preventing leaks at fittings. Use pond-safe waterproof silicone around connections and fittings to ensure watertight seals. Fasten components securely with stainless steel screws, clamps, and washers, which resist rust and corrosion. Choosing high-quality, durable materials and safe, well-maintained tools simplifies assembly, saves time, and extends the lifespan of your pond skimmer.

Aquascape Black Silicone is a high-quality, waterproof sealant that is safe for fish, plants, and wildlife.

100% Silicone Caulk Protection: This silicone caulk clear provides ultimate waterproof protection, ensuring a reliable seal against water damage. Ideal for areas with consistent exposure, keeping your surfaces safeguarded and pristine under any weather condition.

Safe for pets, plants, fish, and other marine life
How to Properly Install Your DIY Pond Skimmer and Connect Plumbing
Proper installation of your DIY pond skimmer starts with precise placement and excavation. Position the skimmer along the pond edge where surface flow naturally directs debris toward the opening, ideally across from a waterfall or return to promote effective cross-flow circulation. Excavate a stable, compacted base to prevent settlement and ensure durability. Set the skimmer throat to match your waterline so that it skims efficiently without pulling air. Before fixing the skimmer in place, keep the area clear for plumbing connections. Proper positioning ensures optimal debris removal and system efficiency. Lower the skimmer body into the hole, ensuring it is level with the waterline for proper weir operation. Verify alignment, then smooth the liner surface around the skimmer to prevent leaks. Gradually tighten the bolts to secure the skimmer, checking for level and proper fit throughout. For plumbing connections, use PVC pipe, flexible hoses, or threaded fittings, sealing threaded joints with silicone or plumber’s tape to prevent leaks. Using appropriate materials and fittings will help maintain a leak-free system. Once connected, test the system by running water and observing whether debris is effectively drawn into the skimmer, making adjustments as needed for optimal performance, considering how proper aquarium plant placement can influence water quality.

This kit maximizes performance, options, and affordability. 20' x 25' Pond Kit can build an 16' x 21' (3,800 gallon) fishpond or water garden at a 1.5' depth. Finished pond length, width, and depth can be tailored to your specific requirements.

This kit maximizes quality and affordability. 8' x 10' Pond Kit can build an 4' x 6' (270 gallon) fishpond or water garden at a 1.5' depth. Finished pond length, width, and depth can be tailored to your specific requirements.
This kit maximizes performance, options, and affordability. 15' x 15' Pond Kit can build an 11' x 11' (1,300 gallon) fishpond or water garden at a 1.5' depth. Finished pond length, width, and depth can be tailored to your specific requirements.
Tips for Camouflaging Your Pond Skimmer for a Natural Look
Camouflaging your pond skimmer involves creating a natural-looking cover that conceals the equipment while allowing water flow. Use natural stone with a hole slightly smaller than the skimmer opening to hide it effectively. Position the skimmer just outside the pond line and angle it away from direct view to make it less noticeable. Secure the rocks in place with foam to prevent shifting over time. Incorporate stone and bridge covers by placing rocks on either side or across the top of the skimmer opening to mask the intake area. Enhance concealment with aquatic plants and native edge vegetation at the water’s edge, which softens the equipment’s appearance and integrates it into the landscape. Mixing uneven arrangements of rocks and plants creates a natural, effortless look that disguises the skimmer while supporting good circulation, especially near waterfalls or other features. Using natural materials and arrangements, such as overlapping rocks and trailing plants, further helps the skimmer blend seamlessly into the pond’s environment. Incorporating a variety of native plants can also help improve the overall aesthetic and support local wildlife. Understanding aquarium plant compatibility can aid in selecting plants that thrive in pond conditions, ensuring they complement your camouflage efforts.
How to Maintain and Troubleshoot Your Pond Skimmer Effectively
To keep your pond skimmer functioning effectively, regular maintenance and quick troubleshooting are essential. Always turn off the pump before opening the skimmer to prevent injury and avoid disrupting water circulation. Remove the debris basket and clean it weekly to improve flow and water quality, which helps prevent algae buildup. Rinse the filter mat or pad with pond water instead of tap water to preserve beneficial bacteria. Check the pump intake regularly for blockages or debris and clear any obstructions. Maintaining a consistent water level is crucial to ensure proper surface water intake; low water levels can impair skimmer performance. If you notice restricted flow, inspect the skimmer for clogs or debris buildup, and repair or replace worn or damaged parts promptly to protect your fish. During periods of heavy debris, increase cleaning frequency and perform an annual thorough cleaning of all components. Proper pump maintenance can significantly extend the lifespan of your equipment and prevent costly repairs. Consistently monitoring system components allows for early detection of issues, saving time and reducing potential damage. Understanding the exact tank dimensions and capacity helps in planning maintenance schedules and avoiding overloading your system. Quick troubleshooting, such as flushing clogged pipes or inspecting for cracks or leaks, helps keep your skimmer running smoothly and maintains a healthy pond environment.

【Model Description】Pond skimmer debris net compatible with 09015 classic standard skimmer, part number: 29146.

1-1/4" Return assembly
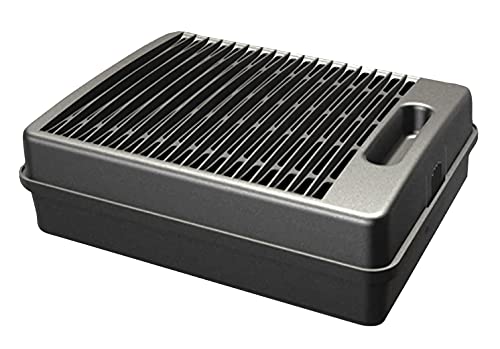
SUBMERSIBLE FILTER: Flat box filter prevents pump from clogging and keeps pond water clear and clean.
What Size Pond Skimmer Do You Need for Your Pond?
The ideal size pond skimmer for your pond depends mainly on the surface area. For ponds up to 1,000 square feet, standard skimmers with smaller openings and baskets typically suffice. If your pond exceeds this size, opt for larger units that offer bigger openings and increased basket capacity to handle greater debris loads. Ensure the skimmer’s dimensions and features are compatible with your pond liner for a proper fit and easier installation. Ponds with heavy leaf fall or surface debris require larger skimmers to prevent clogging during seasonal peaks. Matching your skimmer’s flow rate capacity with your pump’s output is essential for maintaining efficient water circulation and debris removal. Using the Skimmer Calculator Tool, you can accurately determine the right skimmer size based on your pond’s surface area and debris load. Considering your pond’s surface area, debris accumulation, and liner compatibility helps you select the right size skimmer. Proper skimmer placement can also improve its efficiency and ease of maintenance. Understanding pond filtration factors can help you make more informed decisions for a healthier pond ecosystem. Additionally, knowing how to manage water parameters such as pH and ammonia levels is crucial for ensuring aquarium stability and maintaining a balanced environment.
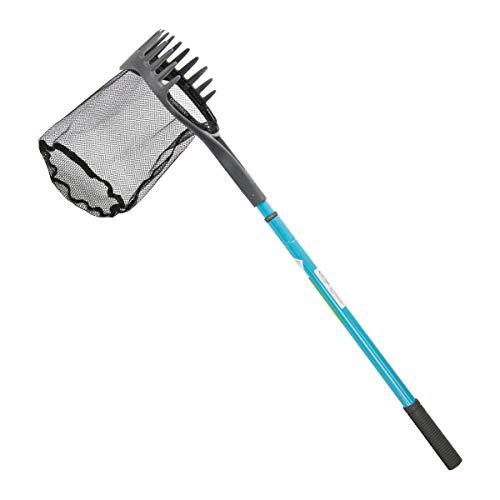
Versatile pond net that combines three helpful tools into one

Effective Pond Surface: up to 270 sq. ft.
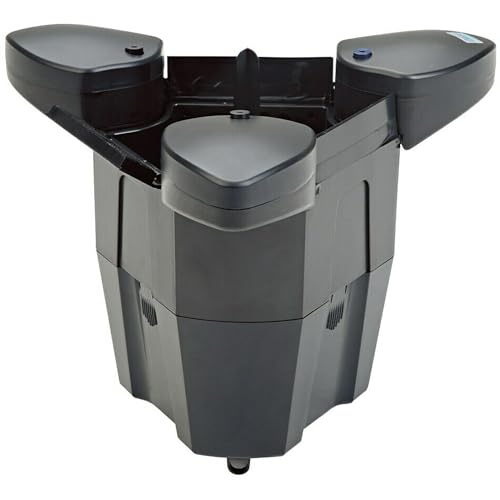
Oase Skimmers
Common Mistakes to Avoid When Building and Installing Your DIY Pond Skimmer
Ensure your skimmer opening sits just below the waterline, ideally about 1/2 inch. This positioning is crucial for efficient surface debris capture without allowing debris to escape or the opening to be over-submerged. Incorrect height—either too high or too low—reduces skimming effectiveness and can cause debris to accumulate outside the intake system. When attaching the faceplate, avoid setting it too high or too low; proper placement directly impacts overall skimming performance.
Apply pond-safe silicone sealant around the liner-to-skimmer joint and faceplate connection. Let the sealant cure fully before filling your pond to prevent leaks. Using washers and nuts at fastener points improves sealing and adds security against leaks over time. Proper placement of the skimmer, matching the pump’s flow rate, and designing easy access to debris baskets will extend your skimmer’s lifespan and ensure consistent pond maintenance. Small details matter—neglecting these can hinder your skimmer’s performance and make pond upkeep more difficult. Additionally, understanding the importance of dechlorination ensures that this crucial step in water preparation is not overlooked, protecting your pond’s ecosystem. Being mindful of proper sealing techniques can also prevent costly repairs down the line. Paying attention to initial installation steps can significantly impact the longevity and efficiency of your DIY skimmer, making your pond maintenance easier and more effective.