
Thinking about building a pond and worried about lining it properly? Choosing the right liner and knowing how to install it can make all the difference in creating a lasting, leak-proof pond.
With simple steps like selecting durable materials and preparing the site, you can tackle this project confidently. Keep reading for a straightforward walkthrough to help you bring your pond idea to life.
A Beginner’s Guide To Installing A Pond Liner DIY
Unfolding the pond liner outside the hole is essential to prevent punctures and minimize dragging during installation. Gently lower the liner into the excavation, allowing it to conform naturally to the pond’s contours. Overlap the edges by at least 30 to 40 centimeters to ensure adequate coverage and to accommodate future adjustments. As you position the liner, press it into curves, corners, and shelves with your hands or soft shoes, avoiding overstretching that could cause tears. Work from the center outward, smoothing out wrinkles as you go. If major folds appear, pause and readjust before proceeding. Install an underlayment beneath the liner to protect it from sharp debris and add stability. You can also protect the liner by ensuring the excavation is free of rocks or debris before installation. Properly preparing the excavation improves the durability of your pond liner and reduces the risk of future punctures. Additionally, selecting the right materials for your pond liner increases its lifespan and resistance to environmental factors. Temporarily hold the liner in place with weights, especially in areas prone to shifting. When filling the pond with water, continuously check for movement or wrinkles, trimming away excess liner once the shape is fully formed and the liner is secure. This careful process ensures a long-lasting base for aquatic plants and pond life.
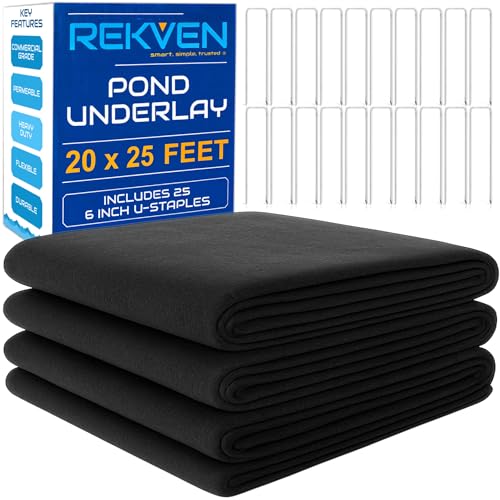
Pond-Tex Puncture Protection: Engineered 4.5 oz non woven geotextile underlayment cushions your pond liner or preformed pond tub against punctures from rocks, roots, stones...
Planning Your Pond Shape And Preparing The Site
Planning your pond shape and preparing the site sets the foundation for a successful construction. Choose a location with gentle slopes and natural contours, ideally above the floodplain, to reduce flood risk. Mark the pond’s perimeter with canes, string, or spray markers before starting to dig. Create a scaled sketch of your design and refine the shape to fit site limitations. Favor gentle, sloping profiles that provide stability and make liner installation easier. Select an area that offers partial shade to help control heat stress and algae growth. Clear away trees, bushes, and dense grass in the chosen spot, and ensure the ground has about 10 to 20 percent clay content to minimize leakage. Fix level references with stakes and maintain even edges throughout the process. During excavation, verify slopes and levels regularly to ensure the pond remains stable and looks natural. Adding a perimeter trench around the edge can further improve stability and support plant growth along the pond border. Proper planning of pond shape and site conditions is crucial for ensuring a durable and balanced ecosystem. Additionally, understanding the importance of aquarium plants can inspire ideas for natural filtration and habitat enhancement in your pond. Recognizing soil composition is also essential to achieving the right ground stability and preventing leaks during construction.
Choosing The Right Pond Liner And Underlayments
Choosing the right pond liner and underlayment is crucial for ensuring your pond is durable and functions effectively. For liner materials, EPDM rubber is a top choice because it offers flexibility, toughness, and straightforward installation, making it suitable for most pond sizes and shapes. Reinforced polyethylene (RPE) is highly durable, with excellent chemical and UV resistance, which is ideal for larger or more exposed ponds. PVC liners are budget-friendly but tend to become brittle over time, reducing their lifespan. High-density polyethylene (HDPE) is durable but less flexible and more sensitive to sunlight, limiting its use mainly to specific applications. Rigid liners provide strong structural support but restrict your shape options due to their stiffness. When selecting a liner, focus on puncture-resistance, safety for fish and plants, UV stability, and flexibility to accommodate pond movement or settling. Additionally, checking for manufacturer certifications can help ensure the liner meets quality and safety standards. Underlayments, typically nonwoven geotextile fabrics, serve as protective layers beneath the liner. They shield the liner from sharp objects, help prevent leaks, and stabilize the soil underneath. For larger or high-maintenance ponds, consider reinforced liners for additional tear resistance. The underlayment acts as a safeguard, prolonging the lifespan of your pond liner, and ensuring a secure, leak-resistant pond environment. Proper choice of both liner and underlayment will play a critical role in your pond’s long-term stability and success.

Having This Barrier Makes You Less Worried About Punctures Over Time: As a dedicated cushioning layer for pond liners, it effectively isolates sharp stones, tree roots, glass...
Excavating And Smoothing The Pond Base
To excavate and smooth the pond base effectively, start by clearly marking the pond’s outline using stakes, string, a garden hose, or spray paint. This ensures you stay within your planned shape and size throughout excavation. Before digging, assess the property for existing structures and utilities to avoid conflicts or damage. Use a level or laser level to identify high and low spots, helping you create a consistently even basin.
Begin excavating from the outer edge inward if using machinery, or from the center outward for hand or small pond projects. Shape the basin to your desired depth, including shallow shelves if needed for plants or features. Remove all debris like roots, rocks, and organic matter, and smooth any sharp edges to prevent damage to the liner. Filling low areas gradually and compacting each layer stabilizes the soil and produces a uniform, solid base underneath the pond.
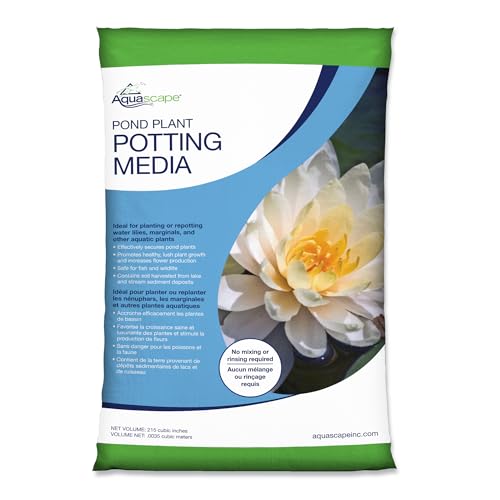
Specialized Aquatic Plant Soil – Formulated to promote healthy root establishment and robust growth for pond plants.
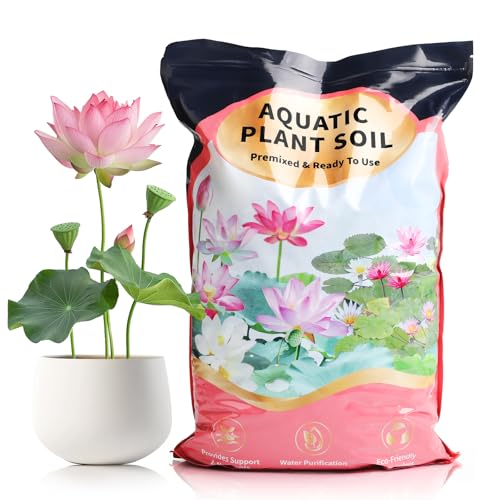
【Professional Aquatic Soil】: Crafted with a scientifically - formulated 100% all - natural soil mixture, this aquatic soil is specifically designed for aquatic plants, providing scientific care for various aquatic species

【Optimal Nutrient Balance】Our aquatic plant soil is enriched with a precise blend of nutrients essential for vibrant growth, ensuring your water plants thrive and flourish.
Laying And Securing The Pond Liner For A Leak-Free Pond
To ensure your pond remains leak-free, focus on carefully laying and securing the liner and underlayment during installation. The underlayment should fit snugly over all contours, covering the entire surface, with edges overlapping by at least 10 centimeters. This overlap prevents gaps and provides added protection against punctures. When unrolling the liner, center it so it overlaps the edges of the excavation by about 30 centimeters. Gently smooth the liner to remove slack and achieve proper tension without overstretching, which could tear the material.
Pay special attention to corner sealing. Fold the liner neatly into the corners, ensuring no excess bulk or folds that could trap air or water. Tucking folds carefully into corners helps maintain a smooth surface and prevents leaks. Temporarily secure the liner using weights, such as bricks or rocks, to prevent shifting during the next steps. Then, dig an anchor trench approximately 8 to 12 inches deep around the pond perimeter. Fill this trench with soil or gravel, and place flat stones over the filled trench. This setup holds the liner taut and secure, creating a reliable barrier against leaks and movement. Additionally, considering the underlayment can improve protection against punctures and extend the lifespan of your pond liner.

【THICKER 7.5OZ POND LINER UNDERLAYMENT】 Convivium geotextile fabric is 250GSM / 7.5 oz/yd², thicker than common 4.5–6 oz pond liner padding. Built to create a tougher protective base under pond liners for koi ponds, fish ponds, water gardens, and landscaping

Pond-Tex Puncture Protection: Engineered 4.5 oz non woven geotextile underlayment cushions your pond liner or preformed pond tub against punctures from rocks, roots, stones and rough terrain. Works with EPDM rubber, HDPE, LLDPE, RPE, LDPE and PVC liners. Lays underneath your liner as a protective layer, not a water barrier.

Product Includes: Measures 7 feet wide by 10 feet long. Includes 15 garden staple U-pins to stake fix the non-woven fabric pond underlayment.
Filling Your Pond Slowly And Shaping It Naturally
Filling your pond gradually is crucial for ensuring the liner settles evenly into the ground’s contours. Start by slowly adding water to prevent sudden shifts or folds that can cause stress on the liner. It’s best to use rainwater collected in a water butt whenever possible, as it avoids chemicals and chlorine found in tap water. If you need to use tap water, fill the pond in stages over several days to allow chlorine and trapped gases to escape naturally. Pour the water gently over a plastic sheet or trickle it in, which helps avoid stretching or floating the liner. As the water level rises, regularly check for folds or creases and adjust the liner gently to remove any stress points. Letting the pond rest overnight after partial filling allows the liner to conform naturally to the soil. This careful approach results in a secure, leak-free pond with minimal liner stress.
Trimming And Finishing The Pond Edges For A Clean Look
Once your pond’s liner is in place, carefully trimming and finishing the edges will create a clean, natural look. Leave an overlap of about four inches to a foot before making your final cut. This extra margin helps protect the liner and allows for adjustments later. Use a sharp razor blade to make a clean, precise cut. Keep the cut line outside the waterline to help conceal the edge with surrounding landscaping. Shape the edges with rounded or irregular forms instead of straight lines. Incorporate natural elements like stones, gravel, moss, or plants to soften the transition from pond to landscape. Position stones so they slightly overhang the liner, helping to hide it from view. Tuck the excess liner into a shallow trench at the rim, then backfill firmly to secure it. Level the perimeter for a seamless, polished appearance that blends effortlessly with your garden surroundings. Proper edging techniques also help prevent UV damage and improve the pond’s overall stability and aesthetic appeal.
Inspecting For Leaks And Troubleshooting Installation Issues
To identify and fix leaks in your pond, start with a systematic approach to isolate the problem area. First, perform a bucket test to distinguish evaporation from a true leak. Fill a bucket with pond water and place it in the pond at the same water level, marking the waterline on both the bucket and pond. Over 24 to 48 hours, compare water loss between the two; if the pond loses significantly more than the bucket, you likely have a leak. Mark the water levels daily to track changes accurately.
Next, eliminate all water movement by turning off pumps, filters, and waterfalls. Observe whether the water level stabilizes after the equipment is off. If it remains steady, the leak is likely in the static pond structure; if it continues to drop, ongoing water movement may be causing the loss. Understanding suitable materials for pond liners can help prevent future leaks during repairs.
Inspect common leak points thoroughly. Check seams, skimmer openings, pipe penetrations, and where rocks or ledges contact the pond liner. Use dye testing to pinpoint leaks precisely: turn off the pump, then add pond-safe dye near suspected areas. If a leak exists, the dye will drift toward the source. Carefully look for tears, punctures, or loose fittings, especially around high-risk zones like edges or joints, to identify and repair the source of the leak effectively.

Pond Repair Kit: This kit includes 5 pieces of pond liner repair patches, designed to repair damage, leaks, or cracks in pond liners, artificial water features, aquariums, rainwater collection systems, and more. This self-adhesive EPDM liner repair patch creates a permanent bond that instantly seals out air, water, and moisture.

Premium Material: Pond liner patch kit is made of premium butyl adhesive, which is resistant to aging, high-temperature melting. More waterproof and has stronger adhesion. Pond liner patch kit can be used without special tools. It has long-lasting performance, making it a practical choice for maintaining pond linings and outdoor projects
Pond Repair Kit: This kit includes 5 pieces of pond liner repair patches, designed to repair damage, leaks, or cracks in pond liners, artificial water features, aquariums, rainwater collection systems, and more. This self-adhesive EPDM liner repair patch creates a permanent bond that instantly seals out air, water, and moisture.
Maintaining Your Pond Liner For Long-Term Success
Regular maintenance is essential to keep your pond liner in good condition over time. Start by removing debris such as leaves, algae, and organic matter using a soft brush or broom and low-pressure water. This prevents buildup that can exert pressure on the liner and cause damage. Periodically drain a portion of the pond to create a dry surface, allowing you to thoroughly inspect and clean the liner without risking tears or punctures. Avoid harsh chemicals, solvents, or abrasive cleaners, as these can weaken the liner’s material and reduce its lifespan.
Clearing away debris like branches and rocks not only promotes smooth water flow but also helps prevent punctures. Check the water level regularly to ensure it stays within the optimal range and adjust as needed. Managing your filtration system effectively reduces algae growth and maintains clear water, which in turn lessens the risk of organic buildup pressing against the liner. Consistent, careful upkeep is key to extending the lifespan of your pond liner, ensuring your pond remains healthy and attractive for many years.