
Struggling to keep your pond water clear and healthy? A simple DIY pond filter box can make a big difference without breaking the bank.
By building your own, you control the size, materials, and ease of maintenance. Stay tuned for a step-by-step guide that makes creating your pond filter straightforward and effective.
How to Choose the Best Container and Housing for Your DIY Pond Filter
Choosing the right container and housing for your DIY pond filter is essential to ensure reliable performance and durability. Start by selecting a container made from UV-stabilized plastic, which resists sunlight deterioration and is suitable for outdoor environments. Food-grade plastics are preferable because they do not leach harmful chemicals into your pond. The container should have a volume of at least 15 percent of your pond’s total water capacity; for example, a 1,000-liter pond requires a minimum of 150 liters of container space. Larger containers allow you to include more filter media such as gravel or bio-balls, which improve biological filtration. Common shapes include round barrels and tall, box-style containers—choose based on your space and setup needs. Ensure the container has sturdy sidewalls that can support the weight of heavy media loads over time. Additionally, opt for containers that are easy to drill or modify with bulkheads or uniseals to facilitate maintenance and prevent leaks. Using a heavy-duty container material is crucial for long-term pond health and efficient filtration performance. To ensure longevity, consider selecting containers with UV-resistant properties, especially if they will be exposed to direct sunlight.

18W High-Efficiency UV Clarifier – Effectively eliminates green water algae in as little as 3-7 days, keeping your pond crystal clear while being 100% safe for fish and plants.

The Universal Pump Filter Box cleans water, promotes the growth of beneficial bacteria, and protects pumps from debris in small ponds up to 500 gallons.
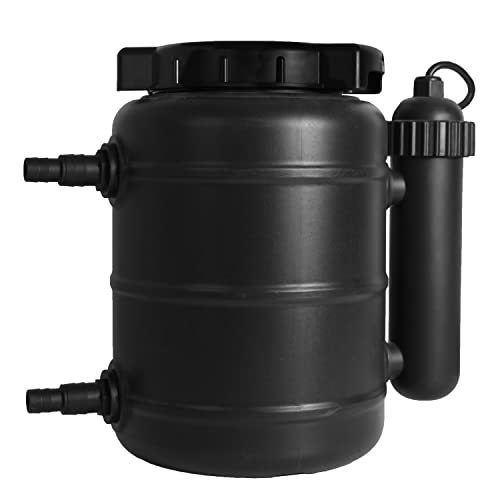
The Complete Pressurized Pond Filter with UV Clarifier is ideal for removing debris and improving water quality in or out of ponds up to 1200 gallons.
How to Plan Your Pond Filter Layout for Easy Maintenance
Choosing the right location for your pond filter is essential for easy maintenance. Position the filter in a shaded or partially shaded spot to prevent overheating and reduce algae growth. Keep it close to the pond to minimize plumbing length, which helps decrease head loss and makes access simpler. Ensure the ground is flat and stable so the filter container sits level, facilitating lid removal and media changes. Designing a clear flow path from inlet to outlet encourages water to pass through the media without bypassing it, which maintains filtration efficiency. Place clean-out points at strategic locations for quick flushing, and make sure all maintenance access points are easily reachable without reaching into the pond. Organize the media layers with coarse media in the first chamber to trap larger debris, followed by finer media to handle smaller particles, simplifying cleaning and preventing clogging over time. Additionally, understanding the different types of saltwater fish suitable for aquariums can influence your overall pond setup, ensuring your system supports healthy aquatic life. Incorporating proper filtration techniques ensures your pond remains clean and healthy, making maintenance more straightforward over time. Proper planning and layout will also help ease of access for routine maintenance and media replacement.
How to Drill and Seal Plumbing Openings Safely
To drill and seal plumbing openings safely, follow these steps precisely. Begin by measuring the pipe diameter carefully and selecting a hole saw that’s slightly larger to accommodate expansion and ensure proper clearance. Mark the center points with accuracy, using a pencil and a ruler or template to prevent misalignment. Verify that your drill is perpendicular to the surface with a level to avoid crooked holes. Always double-check measurements and markings before starting.
Before drilling, inspect the area thoroughly for hidden pipes, wires, or lines to prevent accidental damage. If working near existing plumbing lines, turn off the water supply to avoid leaks or flooding, especially when working around aquariums or sensitive setups. Choose the correct drill bit suited for your substrate material—metal, concrete, or plastic—to minimize the risk of cracks or fractures. Use a low-speed setting on your drill and apply steady, even pressure while holding the drill perpendicular to the surface. Avoid forcing the drill, which can cause damage or uneven holes.
After completing the drilling, clear away all debris and dust from the opening and surrounding area to prepare for sealing. Ensure the surfaces are dry, free of dust, and compatible with your chosen sealant. Apply the sealant evenly around the opening, following the manufacturer’s instructions for curing times. Proper sealing is crucial for creating a leak-proof seal, so allow the sealant to cure completely before restoring water or pressure.
Selecting and Layering Filter Media for Water Clarification
To effectively clarify water in a pond filter, start with coarse mechanical media such as anthracite. This layer captures large debris like leaves and algae, preventing clogging of finer media layers downstream. Follow with finer mechanical media, like quartz sand, which traps smaller particles and enhances water clarity. Next, add biological media such as bio-media to support nitrifying bacteria; this stage promotes biological filtration by breaking down organic waste without becoming clogged from suspended solids. Incorporating the right filter media layers can also help optimize water quality and maintain clarity. Arranging the media from coarse to fine, mechanical to biological, then chemical, ensures each stage is protected, extends media lifespan, and provides thorough removal of debris and dissolved substances. Additionally, understanding the different types of water clarification media can help in selecting the most effective materials for specific pond conditions.

EXCLUSIVELY MADE FOR KOI PONDS: Crafted with care, our 1-inch thick filter pads provide exceptional mechanical filtration for crystal-clear water. Plus, they infuse vital oxygen into your ornamental garden pond. Perfect for ponds!

Size & Package: These rectangular filter pads come in a two-piece set. Our rectangular filter pads measure approximately 10.43*5.5*0.98 inches with 2 coarse and 2 fine filter pad included, you'll be able to collect both large and small debris for a more thorough filtration process.

EXCLUSIVELY MADE FOR KOI PONDS: Crafted with care, our 1-inch thick filter pads provide exceptional mechanical filtration for crystal-clear water. Plus, they infuse vital oxygen into your ornamental garden pond. Perfect for ponds!
Designing Inlet and Outlet Connections for Even Water Flow
Use matched inlet and outlet sizes corresponding to your desired flow rate to ensure even water distribution. Keep the fittings the same size for both inlet and outlet to simplify plumbing and reduce flow restrictions, especially around biological filtration and UV sterilizers. For higher flow requirements, consider oversizing the outlet or adding multiple outlets to prevent bottlenecks or debris blockages. Place the inlet horizontally or with diffusing holes at the bottom to promote uniform distribution and prevent short-circuiting, which improves contact with media. Position the outlet near the water’s surface, just above the water level, to avoid flow swirl and bypass. Ensure the outlet pipes slope at least 1 percent to allow complete drainage and install screens on all entries to prevent clogging and maintain steady, even water flow through your system. Additionally, selecting appropriate inlet and outlet sizes is essential for maintaining balanced flow and efficient filtration to prevent uneven flow patterns.
How to Assemble Your Pond Filter Step-by-Step
Place your chosen sturdy, watertight container on a level, stable surface in a shaded area if possible. This helps ensure the filter remains steady during setup and reduces heat buildup that can promote algae growth, which impacts both aesthetic appeal and environmental health. Assemble the container and lid, making sure the inlet and outlet openings align with your planned plumbing layout to facilitate proper water flow. Add supports like bricks or rocks at the bottom of the container to keep it open, allowing water to circulate and solids to settle. Load the filter media in layers, beginning with coarse materials for structural support, followed by finer media to enhance biological filtration. Connect the plumbing, checking that pipes and fittings are level and properly aligned to promote even water distribution. Seal the connections with PVC cement, but leave the lid removable for easy access during cleaning or maintenance. Incorporate a sediment collection zone near the outflow to make future maintenance easier and prevent clogging (facilitating easier upkeep). Additionally, paying attention to filter media layering can significantly improve filtration efficiency and water clarity. Ensuring proper flow rates will optimize the entire filtration process. Proper overflow prevention measures, such as using appropriate fittings and outlet height, will further protect your pond from accidental overflows. Finally, secure any floating parts and double-check the stability of the entire setup to ensure smooth operation.

Provides ideal filtration when adding goldfish to a container water garden

Tips: Please refer to the video folding mesh cover.
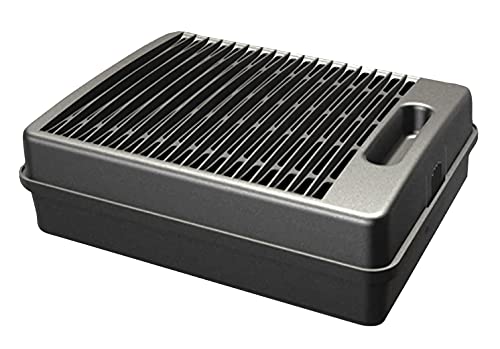
SUBMERSIBLE FILTER: Flat box filter prevents pump from clogging and keeps pond water clear and clean.
How to Test Your Pond Filter for Leaks and Proper Flow
To test your pond filter for leaks and proper flow, follow a systematic approach. First, turn off the pond pump, waterfalls, and streams, but leave aeration running if needed to keep fish safe. After shutting everything down, observe the water levels over a 12 to 24-hour period. If the level remains steady, it indicates there are no leaks or issues with the pond walls.
Next, perform a bucket test by filling a bucket with pond water and marking the initial water level inside it. Place the bucket in the pond at the same water level. Over time, check both the pond and the bucket; if both levels drop equally, evaporation is likely the cause. Significant water loss from the pond compared to the bucket signals potential leaks in the plumbing or pond liner.
Inspect all plumbing and filter components while the system is under flow. Look for loose connections, cracks, or wet spots indicating leaks. Pay special attention during a water pump upgrade, as new fittings can introduce leaks. To pinpoint the exact leak location, carefully trace the water flow visually and examine liner seams and edges. Regularly testing your pond system helps prevent water loss, ensures optimal filtration, and keeps your pond environment healthy. Additionally, routine inspection of pond structures can help catch issues early before they become costly repairs. Conducting water flow tests periodically provides valuable information about the system’s condition and performance.
Maintaining and Cleaning Your DIY Pond Filter for Longevity
Regularly maintaining and cleaning your DIY pond filter is essential for its longevity and optimal performance. Aim to clean mechanical media such as foam pads every 1 to 4 weeks, especially if your pond accumulates a lot of debris. Biological media like ceramic rings require less frequent cleaning—about every 2 to 3 months or once a year—since they host beneficial bacteria critical for biological filtration. Always turn off the pump before cleaning to prevent damage. Rinse media with pond water, not tap water, to protect the beneficial bacteria. For intake screens, check them two to three times a week and clear any debris to prevent clogging and ensure steady water flow. When cleaning biological media, be gentle to avoid disturbing bacterial colonies, and inspect for signs of wear or damage. Regular maintenance will keep your pond clear, balanced, and well oxygenated.
Common Issues in Pond Filter Builds and How to Fix Them
Poor placement of biofilters can cause significant issues in pond filter performance. Positioning the biofilter too close to inflows leads to debris buildup and restricts flow, while placing it poorly hampers bacteria efficiency. To ensure optimal biological filtration, place the biofilter at a distance that allows for good water contact without accumulating debris or debris buildup. Proper placement promotes efficient bacterial colonization** and maintains a healthy ecosystem. Regularly monitor the biofilter to prevent clogging and ensure it functions effectively, avoiding bacterial collapse and maintaining water clarity. Inadequate biological filtration can also result from poor placement, which hampers beneficial bacteria colonization essential for breaking down nutrients. Additionally, understanding the top algae scrapers for aquarium cleaning can help prevent algae buildup, keeping the pond environment clearer and aiding overall filter performance. Ensuring proper filter maintenance** can significantly improve biological filtration and the pond’s overall health.
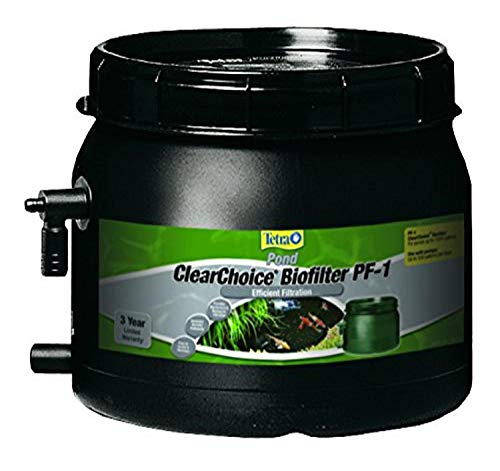
Easy out-of-pond accessibility and simple maintenance

Compatibility: 7137710 pond waterfall prefilters filter replacement for Beckett FR pond pumps FR400 FR500 FR600 FR680 FR800 FR900; DP waterfall pumps DP90 DP160 DP290 DP430

Note: Please tighten the screw in the bottom groove of the filter to ensure sealing; Also, unscrew the groove first before disassembly
Final Tips for Building an Effective and Aesthetic Pond Filter
To build an effective and attractive pond filter, start with proper sizing and placement. Ensure your filter can handle your pond’s turnover rate, which typically means circulating the entire volume every 2 to 4 hours. Use about 10% of your pond’s total volume as the container size for the filter. Position the filter near the pond’s edge for easy access during maintenance and to keep it discreet from view. Incorporate layered media inside the filter: place coarse gravel at the bottom for mechanical filtration, followed by finer gravel mixed with biochar or activated charcoal for chemical filtration, and finish with a sand and fine gravel mix at the top to maximize cleaning efficiency. Keep inflow pipes evenly spaced across the surface to prevent channeling and secure all connections with fish-safe sealants to avoid leaks. Place the filter in a shaded area to prevent overheating and algae growth, add natural elements like rocks to blend it into the pond environment, and consider a planted top to enhance both aesthetics and biological filtration. Understanding the importance of the biological filtration process helps ensure your pond remains healthy and balanced. Always ensure your setup aligns with aquarium standards to maintain a balanced, healthy pond ecosystem.

Efficient Filtration: Each kit includes 8 pcs of white fiber pads, 1 pcs of black wave pad, and 1 pcs of green filter pad, 10 pieces in total. The white pads can be stacked to increase filtration layers, effectively trapping algae, silt, and small debris in the pond

Size & Package: These rectangular filter pads come in a two-piece set. Our rectangular filter pads measure approximately 10.43*5.5*0.98 inches with 4 coarse and 4 fine filter pad included, you'll be able to collect both large and small debris for a more thorough filtration process.

Complete 22-Piece Pond Filtration Kit:This all-in-one waterfall filter media set includes 10 high-density filter pads, 10 support brackets, 500g bio-media, and 1 cleaning brush. Designed to provide a convenient replacement and maintenance solution for pond waterfall filter systems. (Spillway Box Not Included)