Struggling to keep your pond crystal clear without breaking the bank? Building a simple DIY bucket pond filter can make a big difference, and it’s easier than you might think. By choosing the right container and layering effective filter media, you can create a functional system that keeps your pond healthy and clean.
With just a few supplies and some basic steps, you’ll be able to set up a pond filter that works efficiently and is easy to maintain. Keep reading to learn how to build your own custom filter that suits your pond’s needs.
How to Choose the Right Container for Your DIY Pond Filter
Choosing the right container is essential because it directly influences your pond filter’s performance and how easy it is to maintain. Look for fish-safe materials such as food-grade plastics or UV-stabilized plastics that resist sun damage. If you decide on barrels or drums, ensure they are watertight or properly lined to prevent leaks. Avoid containers with unknown residues or contents for safety reasons. Proper container material selection helps prevent contamination and ensures the longevity of your filter setup. Selecting containers made from safe materials is crucial for maintaining a healthy pond environment.
The container’s weight distribution and wall strength matter significantly. It should be sturdy enough to support the weight of plumbing, filter media, and water. Flat surfaces that are easily drillable facilitate installation; wide openings make adding or cleaning media more manageable. Consider whether the container can be buried or installed partially underground, and choose a size that matches your pond’s load to provide enough media space and ensure proper water flow.

Food-Grade Material for Safe & Reliable Storage: Made from high-quality food-grade PP plastic, these containers are BPA-free, odorless, and built for long-lasting durability. Perfect for storing dry foods such as rice, flour, cereal, nuts, and snacks, they help keep your ingredients safe, fresh, and well-protected for everyday kitchen use.

Hydrogen Peroxide Cleaner - 3% Hydrogen Peroxide can cleans surfaces in your kitchen or bathroom. It's great for appliances like microwaves and refrigerators. Safer than using 35% hydrogen peroxide.

ULTRA DURABLE - The plastic feed bucket is made of tough DuraFlex plastic that is impact resistant, protects against warpage, and helps prevent stress cracks.
Planning Your Filter: Hole Placement, Plumbing, and Setup Tips
To ensure your DIY pond filter functions effectively, proper hole placement, plumbing, and setup are crucial. Start by drilling inlet holes just large enough to accommodate the rubber hose, which typically means using a drill bit slightly smaller than the hose’s outer diameter. For the outlet holes, position them 1 to 2 inches from the bottom of the barrel to facilitate proper drainage and prevent debris buildup. Mark the pipe work holes 5 centimeters from the center of the barrel cover for water inlets, using a 1-inch hole saw for outlets and a 3-inch saw for overflow openings. Use bulkhead fittings to securely seal hose connections, preventing leaks and safeguarding your fish. Install overflow bulkheads approximately 15 centimeters from the bottom of the barrel to handle excess water and aid in algae control. When setting up valves and pipes, position them carefully to maintain consistent water flow and avoid pressure issues that could disrupt algae regulation or harm your aquatic life. Ensuring proper alignment and sealing of all components enhances the durability and safety of your filtration system, especially when considering drainage and filtration efficiency. Additionally, paying close attention to the correct installation techniques ensures long-term performance and minimal maintenance needs. Proper sealant application can further improve the longevity and reliability of your setup.
Picking and Layering the Best Filter Media
Layer your filter media with the coarsest at the top and the densest at the bottom. Start with mechanical media such as coarse foam, brushes, or pre-formed pads that trap large debris like leaves, twigs, and detritus. Mechanical media should be easy to access and clean every 1 to 2 weeks to prevent clogging. Beneath this, add progressively denser foam with a pore rating of 30 to 60 PPI for finer particle removal, creating a staged filter that prevents flow restrictions. This arrangement ensures even water flow and reduces the risk of clogging. Proper layering supports biological filtration, which is critical for maintaining healthy pond water. Including porous media like ceramic rings or bio-balls below the mechanical layers provides a high surface area for beneficial bacteria to colonize, which helps convert harmful ammonia into less toxic substances. Proper layering supports biological filtration, which is critical for maintaining healthy pond water. Using the right filter media layering can significantly improve your pond’s water quality and reduce maintenance. Regularly inspecting and adjusting your media layerings based on water quality testing will ensure your pond remains healthy and clear. Additionally, consistent media maintenance is essential to sustain optimal filtration performance over time.

Efficient filtration: Pond filter pads can effectively filter impurities and sediment in the water, improve water transparency, and has excellent filtration effect

Nice Variety of Filter Media: You will receive a package of 12 kinds of aquarium filter media including ceramic ring, biological beads, activated carbon, maifan rock, infrared breathing ring, infrared bacterial ring, volcanic rock, green zeolite, nanosphere, biosphere, gray mineral ring and infrared bacterial ball. You will be impressed by the assortment of color and shape as well as their powerful filtration effectiveness. They are made of porous materials that can help keep our aquarium clean.

Size & Package: These rectangular filter pads come in a two-piece set. Our rectangular filter pads measure approximately 10.43*5.5*0.98 inches with 2 coarse and 2 fine filter pad included, you'll be able to collect both large and small debris for a more thorough filtration process.
Installing Your Pump for Optimal Water Flow
Proper pump installation is crucial for optimal water circulation in your pond. Place the pump at the deepest point or near the pond bottom to ensure even flow throughout the pond. Position the intake opposite the return line or waterfall to promote cross-pond circulation and avoid short-circuiting, which can cause stagnant areas. Keep the intake a few inches above the bottom to reduce debris intake and prevent clogging. Use a stable platform such as a stand or bricks to keep the pump steady and at the proper height, preventing unnecessary movement or vibration. Electrical safety is essential; always plug the pump into a GFCI-protected outdoor outlet and ensure all connections are weatherproof to protect against water damage. Route hoses carefully to prevent kinks that restrict water flow, and match the internal diameters of hoses and fittings to minimize restrictions. Proper pump performance can further extend the life of your equipment and maintain optimal pond health. Once installed, test the system and adjust the flow as needed to achieve the best water circulation. Correct pump placement also improves energy efficiency and helps prevent unnecessary wear on the pump. Paying attention to water parameters ensures your pond remains healthy and well-balanced.

SUBMERSIBLE PUMP: Create a water garden using this pump kit and a waterproof container (not included). This container pump kit with fountain nozzles, converts a container into an instant water garden, a birdbath, decorative fountain or mini pond. Install in your garden, deck, patio, balcony, porch, or indoor areas to promote relaxation. Perfect for small spaces, meditation areas, indoors and outdoors. Simply assemble the fountain, connect it to the pump base and place it inside a waterproof container that is at least 1 ft. deep. Add water to completely submerse the pump and plug the cord into an outlet. You can change or adjust the nozzles for different water effects.

Keep Pond Clean & Healthy - This versatile and efficient performance pond filter combines filtration, pump, and fountain functions in a single, compact unit. Ideal for maintaining clear and healthy water in small and medium ponds, ensuring a healthy environment for fish and other aquatic life.

1️⃣Variety of models: 3pcs optional nozzles
Connecting Hoses and Fittings to Prevent Leaks
To prevent leaks in your pond filter system, your hoses and fittings must be securely connected. Match the hose diameter to your pump’s flow rate: for example, use a 20 mm hose if your pump flows between 700 and 1500 liters per hour. The wider the hose within the appropriate size, the better your water flow and system efficiency. When attaching flexible hoses, secure them with hose clamps—two per connection are usually enough, but opt for four clamps if you’re using a UV clarifier to ensure a tight seal.
For bulkhead fittings, ensure a secure fit by placing rubber gaskets between the fitting and the tank wall. Tighten the fittings snugly, but avoid overtightening, which can crack the fitting or damage the tank. Before installation, drill holes carefully and smooth rough edges to prevent leaks and make assembly easier. Always double-check hose and fitting connections before applying any solvent cement or final tightening. Properly fitted hoses and bulkhead fittings are essential to keep seepage out and maintain steady water flow, ensuring your pond filter operates reliably. Using fittings designed specifically for pond systems can also help improve the overall durability and leak resistance of your setup. Regularly inspecting your connections can help prevent leaks before they develop and maintain optimal water flow. Additionally, using appropriate fitting types designed specifically for pond systems can significantly reduce the risk of leaks and enhance durability.

🛠️【PRECISION SIZING GUARANTEED】 ✓ Exact Work Range: 20-22mm (0.79"-0.87") with 18mm Band Width ✓ Ultra-Durable 0.6mm Thickness & M5*40mm Screw → Pro Tip: Measure your hose OD before purchase! Avoid leaks with perfect fit.

Heavy Duty: The buckle of our hose clamps is welded to increase breaking torque by 60%. The non-perforated band prevents deforming and stripping if over-torque. Our worm drive hose clamps provide superior clamping force and safe sealing. Failure torque: 65 lb-in, recommended installation torque: 40-45 lb-in.
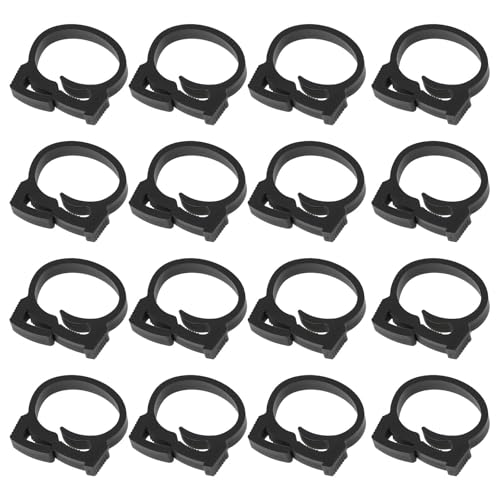
Size: This plastic hose clamp fits pipes with a diameter of 18mm-20mm. Its tight design securely holds the pipe in place, preventing loosening or leaks.
Tips for Easy Maintenance and Better Filter Performance
Regular maintenance is essential to keep your pond filter working efficiently, and it’s simpler than you might think. Clean mechanical media weekly or biweekly to remove debris that can cause algae buildup and reduce water clarity. Always rinse media with pond water, not tap water, to protect the beneficial bacteria that help maintain a healthy ecosystem. Perform staged cleaning—first removing debris from mechanical media, then cleaning biological media—to preserve the nitrifying bacteria that are vital for biological filtration. Avoid scrubbing aggressively, as this can damage biofilms and diminish bacterial colonies. Check pump and filter parts regularly for tears or wear, and replace media every 1 to 2 years to maintain optimal flow rates. Organize filter media by pore size, with larger pores trapping bigger debris and smaller pores targeting finer particles, to improve debris removal efficiency. During warmer months, add beneficial bacteria supplements to promote healthy colony growth and help keep your water clear. Consistent, proper maintenance ensures your pond remains both healthy and visually appealing, and understanding water parameter monitoring can help you maintain stable water quality for your pond ecosystem. Additionally, inspecting filter media organization can significantly optimize debris removal and biological filtration efficiency.
Common Mistakes to Avoid When Building Your Bucket Pond Filter
Building your bucket pond filter with proper planning helps avoid common mistakes that can reduce its effectiveness. One of the most frequent errors is choosing an undersized pump, which leads to insufficient water turnover and poor filtration. To ensure effective filtration, your pump should match your pond’s volume, ideally turning over every one to two hours. This promotes better water aeration and supports healthy aquatic plants. Placement matters too—position the pump opposite the filter to encourage consistent water flow and avoid dead zones where stagnation can occur. When installing fittings, drill holes carefully and secure them tightly to prevent leaks and enhance stability. Avoid packing the media too tightly, as this restricts water flow and limits the filter’s performance. Also, plan for drain points early in the design to simplify cleaning. Remember, maintaining a balance between aquatic plants and water movement is essential for creating a healthy, thriving pond ecosystem. Additionally, designing the filter with ease of maintenance in mind helps prevent buildup of debris and makes routine cleaning much simpler in the long run.
Troubleshooting and Fine-Tuning Your Pond Filter
To troubleshoot and fine-tune your pond filter effectively, start by checking for leaks. Use paper towels to seal edges, pipe interfaces, and joints; any wet marks indicate leaks that require shutting down the system and resealing. The right plant choice can also influence filter efficiency by helping to absorb excess nutrients and reduce algae growth. Before resuming normal operation, perform a water test to verify proper flow. Ensure the water level is about 2 centimeters below the overflow port, and confirm the overflow feeds evenly into the next chamber. If the flow stalls or decreases, inspect for blockages, such as debris or algae buildup, and gently clean impellers or media using pond water. Adjust the pump output if necessary—consider using an oversized pump or dual outlets—to maintain consistent circulation. Regularly inspecting the filter components and steady water movement prevent stagnation and help avoid algae growth or unwanted visitors like predators. Additionally, understanding aquascaping principles can help optimize your filter placement and improve overall pond health. Keeping the system’s flow rate in check ensures effective filtration and minimizes maintenance needs over time.

REPLACEMENT PRE-FILTER FOAM: Fits inside your Tetra Water Garden Pump Pre-Filter to help reduce pump clogging.
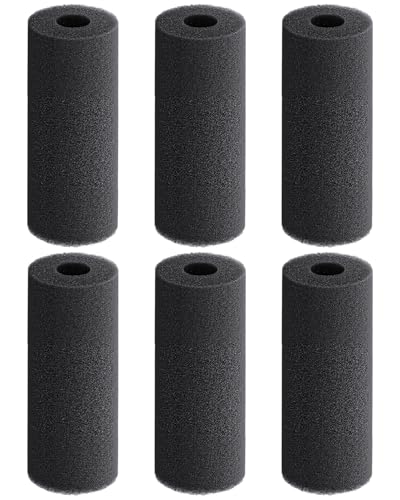
Pre-Filter Sponge: Size: 0.78" ID x 2.6" OD x 5.9" L Part numbers: 7209410, 7137710. The pre-filter sponges are compatible with Beckett Pond G FR DP Pump. Essential accessories for enhancing pond maintenance
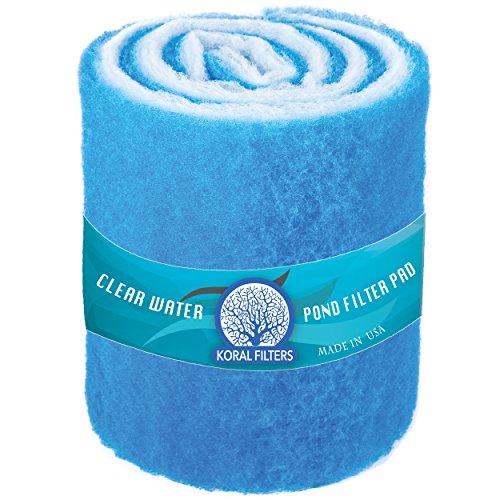
Suitable for Koi Ponds and Aquariums: Our blue bonded and dye-free bonded filters are specially designed for both fresh and saltwater environments in koi ponds and aquariums. These filter pads offer excellent mechanical filtration while delivering essential benefits for your ornamental garden pond and aquarium.
Understanding the Role of Filter Layers for Water Quality
Mechanical filtration is the first layer of filtration in your pond, capturing debris like leaves, waste, and dirt early on. Using foam pads or brushes, it prevents clogging in other filters and keeps the biological media functioning efficiently. Regular cleaning every one to two weeks is essential to maintain steady water flow and prevent buildup. Biological filtration comes next, with media like ceramic rings or lava rock that provide extensive surface areas for beneficial bacteria such as Nitrosomonas and Nitrobacter to thrive. These bacteria convert harmful ammonia into nitrates, which are less toxic and help maintain water quality. Proper layer sequencing—coarse to fine—maximizes overall filtration efficiency, supporting clear, healthy pond water and a balanced ecosystem. Adding a filter layer can improve water clarity and reduce maintenance time for your pond. Incorporating adequate biological media ensures optimal biological filtration and promotes a healthier pond environment, with the correct filter layering playing a crucial role in sustaining water quality.
Enhancing Your Pond Ecosystem With Your DIY Bucket Filter
Enhancing your pond ecosystem with a DIY bucket filter benefits from incorporating bio-media and aquatic plants, creating a natural and efficient treatment system. Using surfaces with a large area—such as lava rock, bio-balls, or plastic pot scrubbers—provides ample space for beneficial microbes like nitrifying bacteria to colonize. These microbes break down fish waste and organic debris, helping keep the water clean. Recycled materials can serve as cost-effective bio-media options when properly prepared. Adding aquatic plants such as cattails, iris, and rushes further supports water quality. Their roots absorb excess nutrients, reducing algae growth and improving clarity. They also create habitats for microorganisms, turning your filter into a living treatment bed that continuously cleans the water naturally. Proper circulation and oxygenation are crucial. An aerator or water pump keeps water moving and adds oxygen, which boosts bacterial activity and prevents stagnation zones. This combination of bio-media, aquatic plants, and good water movement creates a balanced environment that supports fish, invertebrates, and overall pond health.