
Wondering how to build an affordable, effective filter for your aquarium? Creating your own setup allows you to customize water flow and filter media to fit your tank perfectly.
With simple materials like plastic bottles, sponges, and activated carbon, you can craft a reliable filter that works well and saves money.
Stay with me to learn step-by-step how to make it happen.
Why Build Your Own Aquarium Filter? Benefits and Key Considerations
Building your own aquarium filter is an excellent way to customize your tank’s filtration system to suit your specific needs. This approach allows you to control the flow rate, media capacity, and filtration stages, ensuring optimal water quality for your aquatic life. Prioritize safe, non-toxic materials like aquarium-specific silicone, food-grade containers, and media designed for aquatic environments. These materials help prevent harmful chemicals or toxins from leaching into the water and posing health risks to your fish. By selecting appropriate media such as sponge filters, bio-balls, or activated carbon, you can create a multi-stage filtration process that effectively removes debris, toxins, and excess nutrients. Proper design not only enhances water clarity and stability but also makes routine maintenance simpler and more efficient. Understanding the filtration stages involved can help you tailor your build for maximum efficiency. Using cost-effective materials ensures the DIY filter remains budget-friendly without compromising quality. Implementing a well-designed filter can also promote healthier biological filtration, which is crucial for maintaining a balanced ecosystem in your tank. This tailored, cost-effective solution ensures your tank remains healthy, peaceful, and customized exactly to your aquatic inhabitants’ needs.
Choose the Right DIY Aquarium Filter Type for Your Tank
For tanks under 10 gallons, sponge or compact internal filters are the best choice. These filters provide gentle water flow, which is crucial for small tanks, and are designed to fit tight spaces without disrupting the environment. They also tend to be simple to install and maintain, making them ideal for nano tanks where space is limited. Selecting the right filter ensures your tiny aquatic ecosystem remains healthy without overwhelming your miniature aquatic landscape. Additionally, choosing aquarium plants that thrive in low-flow environments can further promote a balanced and healthy tank.
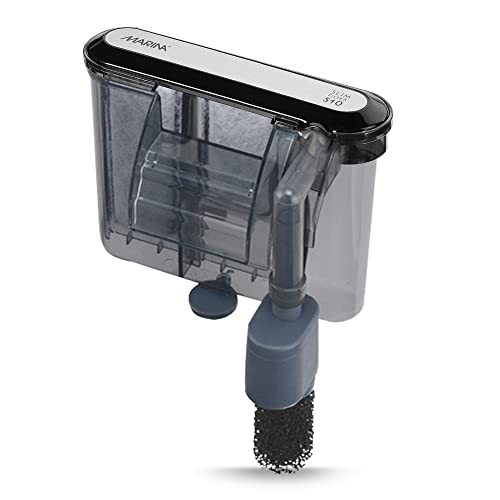
Power filter for aquariums up to 10 gallons

Provides effective and thorough biological and chemical filtration, creating superior aquarium water environment

Water filter for nano tanks and aquariums up to 10 gallons
Gather Materials and Tools for DIY Aquarium Filters
Gathering the right materials and tools is essential for building an effective DIY aquarium filter. Start with container options like plastic bottles, milk cartons, or wider-mouth bottles. Choose based on visual appeal—color and transparency matter—and material durability for longevity in aquatic environments. For larger filters, consider using PVC pipes or acrylic housings, which provide sturdy and long-lasting options. Ensure that your chosen container is thoroughly cleaned, food-safe, and free of residues to prevent contamination in your aquarium. It’s also important to select materials that are non-toxic to avoid harming your aquatic life and to ensure safe, healthy water conditions. Filtration media choices include sponges, ceramic rings, and activated carbon. Layer these materials inside your container to optimize filtration functions—sponges for mechanical cleaning, ceramic rings for biological filtration, and activated carbon for chemical removal. Incorporate proper assembly techniques to maintain effective water flow and prevent leaks. Additional layers or alternative filtration media can be added depending on your specific needs and aquarium size. Properly arranging the media ensures optimal filtration efficiency and flow rate in your DIY setup. Essential tools include scissors or utility knives to cut and shape components, small drills for creating holes, and pliers for securing parts. Use zip ties or cable ties to hold filtration media in place securely. Apply Teflon tape on fittings to ensure a tight, leak-free seal. Carefully selecting and preparing your materials and tools will set a strong foundation for a reliable and long-lasting DIY aquarium filter.

Slim and compact design, hardly noticeable on the tank, great choice for nano and pico tanks up to 5 gallons.

SIMPLE AND EFFICIENT: The filter is simple and efficient for all small aquariums and fish bowls, a simple design and efficient filtering, utilizing the ½” lift tube
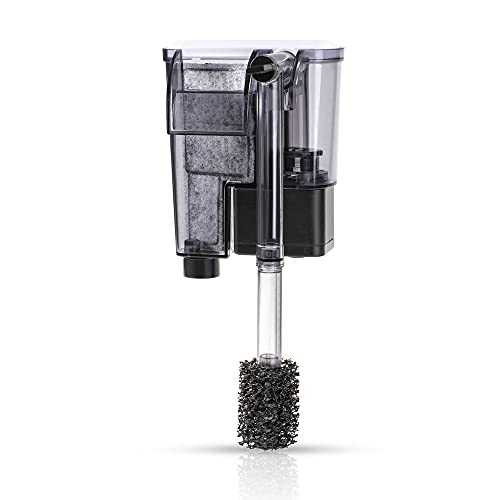
DaToo Aquarium Hang-On Filter: Owning a successful aquarium is the dream of every aquarium hobbyist. But what is the key to the success of the aquarium? The answer must be the perfect filter. DaToo Aquarium hang on filter has a powerful & whisper-quiet filter system, safe and durable, adjustable water flow rate, can easily create a clean, clear and stress-free water environment for your beloved fish. Select DaToo hang-on filter, let us immediately have a successful aquarium.
Step-by-Step: Build a Simple Bottle Filter
To build a simple bottle filter, start with a clean, wide-mouth 1- or 2-liter plastic bottle. Remove labels and any debris, then rinse the bottle thoroughly. Ensure the opening is clear so you can easily load the filter media. Choose a bottle with a broad opening, which makes access easier and improves the overall look. Drill small holes in the cap for airflow and in the neck for airline tubing, making sure the tubing fits snugly to prevent leaks. You may also want to add side holes near the bottom and top to improve water circulation. Attach the airline tubing to an air pump and insert it through the cap or neck, positioning the outlet to promote good flow. Fill the bottle with suitable filter media such as sponge, activated carbon, and biological media, starting with debris-trapping materials first. Incorporating proper filtration materials helps enhance water quality and supports aquatic health. Ensuring the right water flow rate is essential for effective filtration because it affects how well the water is processed through the media. This setup helps maintain water quality and keeps your filter process straightforward and unobtrusive. The ease of DIY makes this project accessible and affordable for most aquarium enthusiasts.
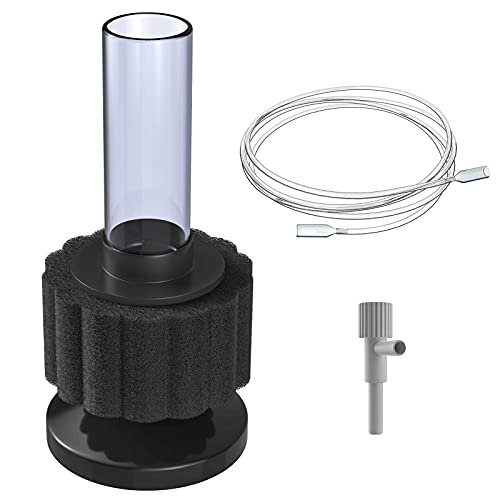
Fine Sponge Filtration: The bio sponge filter provides mechanical and biological filtration and traps debris or waste without sucking up your fish, keeping a crystal clear water tank.

FLEXIBLE MULTIFUNCTIONAL BRUSH:The 61 inch long double ended brush made of high quality soft nylon bristles and stainless steel, flexible two-end long brush, sky blue plastic and it can reuse for many times, easy to push and pull.The multifunctional aquarium brushes set of 10 different sizes brush,perfect for your fish tank cleaning,filter systerm,hose/glass tube,water pump accessories cleaning

GREAT FOR SMALLER SETUPS: The Small World Filter is specifically designed for aquariums and tanks up to 5 gallons. In addition to our Small World, New World, and Betta World habitats, this filter is compatible with other tanks in the market. It fits all shapes and sizes, and also mounts securely to glass, acrylic, and plastic surfaces.
Assemble a DIY Canister Filter: Tips for Success
To assemble a DIY canister filter successfully, start with a canister size that matches your aquarium’s volume. Aim for a flow rate of three to four times your tank’s volume per hour to ensure proper water turnover. Make sure the filter body has enough space for baskets or compartments to hold your filter media efficiently and support good water flow. Use PVC pipes, caps, and fittings for constructing the canister, sealing all joints with aquarium-safe silicone and PVC glue. Allow these sealants to cure fully before proceeding. Properly sealing all joints is essential to prevent leaks and ensure the system functions efficiently. Secure the inlet and outlet hoses using hose clamps to prevent leaks, and check that there are no kinks or sharp bends in the hoses, as these can restrict water flow. Before starting, fill the canister about three-quarters full with water. Prime the system by running water through it and verifying all connections are tight and leak-free. This step is crucial for smooth operation and maintaining effective filtration. Additionally, inspecting your filter media compartments beforehand can help improve overall system performance. Regularly checking the water flow rate can ensure your system is operating at optimal efficiency.

【Efficient Filtration Capabilities】 The PondForse canister filter utilizes multiple layers of filtration media to remove particles and impurities from the aquarium water. This comprehensive approach to water filtration helps maintain crystal-clear water and a healthy ecosystem for your aquatic pets.
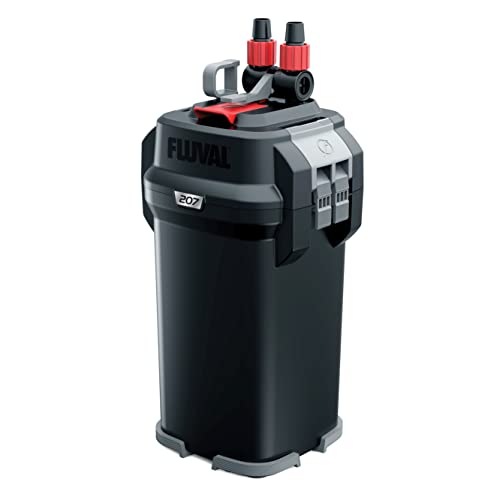
Efficient Aquarium Canister Filter: Fluval eTEC technology delivers powerful pump performance and ultra-quiet operation; uses same energy as LED light bulb

FILTRATION PRINCIPLE: The built-in pump draws dirty water through the inlet tube, while surface water enters through the oil skimmer to help remove surface film. Water then passes through 4 stages of filter media before clean, filtered water flows back into the aquarium through the outlet
Arrange and Organize Media for Effective Filtration
Proper media layering involves arranging filter media from coarse to fine in the direction of water flow. Start with coarse mechanical media like sponge or floss, which captures large debris as water enters. Next, add fine mechanical media such as finer floss or pads to trap smaller particles and prevent clogging of subsequent layers. Follow with biological media, including ceramic rings or bio balls, placed in steady-flow areas to support beneficial bacteria growth. Incorporating appropriate media placement can further improve water flow and prevent dead zones. Lastly, position chemical media like activated carbon or Purigen at the outlet side to polish the water. This ordered setup ensures optimal flow through each layer, enhances filtration efficiency, and simplifies maintenance. Tailor your media arrangement to match your filter’s internal flow path for the best results. Incorporating proper media placement improves the overall efficiency of your filtration system and promotes a healthy aquatic environment.

Efficient Filtration: The high-density and unique structure of the sponge provide exceptional mechanical filtration. It effectively captures and removes impurities, suspended particles, and waste from the water, maintaining a clear and stable aquatic environment for the well-being of your aquatic organisms.
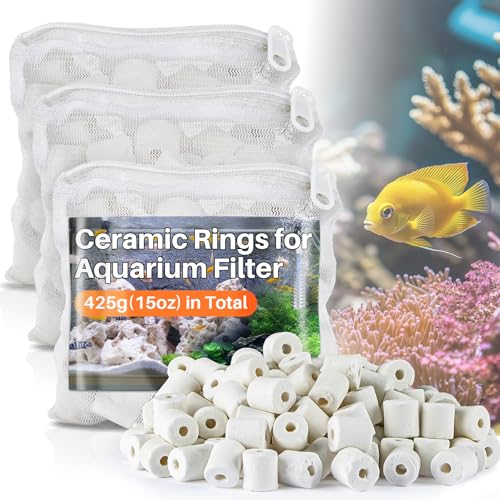
Efficient Purification: Designed for both freshwater and saltwater aquariums; Helps capture floating particles and impurities; Promotes clearer and cleaner water; Improves overall water quality over time; Works continuously to maintain a balanced aquatic environment
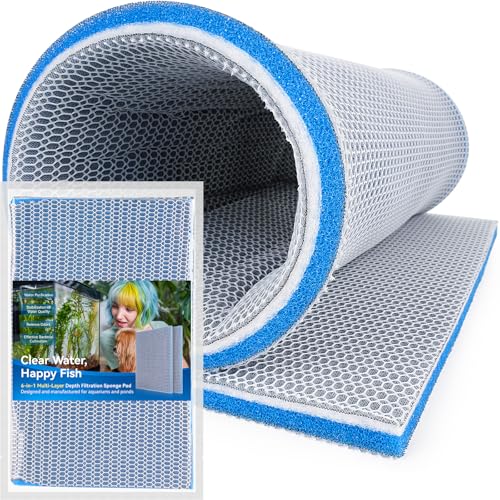
✅Deep Filtration: Designed with multiple filters such as three-dimensional honeycomb mesh cloth, fiber biochemical cotton, and non-adhesive nano-filter mesh stacked on top of each other to give it a finer filtration effect, it effectively captures impurities such as fish feces, uneaten food, and other small particles in the water so as to maintain clear and healthy water for the fishes and aquatic organisms.
Test Your DIY Filter: Check Flow, Leaks, and Performance
Testing your DIY aquarium filter is essential to ensure it functions properly and avoids future problems. Start with flow testing by measuring the output into a container of known volume. Record the time it takes to fill the container, then convert this measurement into gallons or liters per hour. Repeat this process several times to obtain an accurate reading.
Next, check for leaks by inspecting all joints, hoses, and seals while the system is running. Look carefully for drips, damp spots, or water trails around connections. Make sure tubing is fully seated, not kinked, and that all attachments are secure. Ensuring proper aquascaping and placement can also help optimize your filter’s performance.
Finally, evaluate the filter’s performance by observing circulation patterns in the aquarium. Watch for dead spots where water isn’t moving properly, signs of stagnation, or overly strong flow that could stress aquatic life. Adjust or fix any issues you find to keep your filter operating efficiently, leak-free, and supportive of a healthy environment for your tank.
Maintain and Improve Your DIY Aquarium Filter Over Time
Regular maintenance of your DIY aquarium filter is essential to keep it functioning efficiently and support a healthy environment for your aquatic life. Check water circulation weekly to spot signs of clogging or weak current early. Clean impellers, housings, and tubing monthly to prevent buildup that could hinder biological processes. Rinsing biological media in old tank water preserves beneficial bacteria, maintaining biological filtration. Mechanical media like sponges benefit from rinses during water changes, which remove trapped debris without stripping away helpful bacteria. Inspect all parts for cracks or damage and reassemble carefully to ensure proper seals. Using reusable media can improve long-term stability and reduce ongoing costs. Additionally, adding extra prefilters and routinely vacuuming gravel helps reduce debris and lightens the filter’s workload. Proper filter maintenance practices also ensure consistent water quality, which is crucial for healthy fish and plants. Regularly inspecting and replacing worn parts prevents equipment failure and further preventative maintenance issues. Adopting proper cleaning techniques can further enhance the longevity and efficiency of your filter. Proper attention to these steps extends your filter’s lifespan and keeps water circulating properly, supporting a thriving aquatic ecosystem.