Thinking about building your own acrylic aquarium but unsure where to start? The key is understanding the right materials, precise measurements, and proper techniques to ensure your tank is both durable and beautiful.
With a bit of careful planning and the right guidance, you’ll be able to craft a custom tank that fits your space and needs perfectly.
Keep reading for all the steps and tips to make your DIY project successful.
Why Build Your Own Acrylic Aquarium? Benefits and Key Considerations
Building your own acrylic aquarium offers several key benefits that make it a worthwhile project. Acrylic provides exceptional clarity, with over 90% light transmission, meaning you’ll see your aquatic life in vibrant detail and richer colors. Its high impact resistance significantly reduces the risk of breakage compared to glass, making it safer and more durable, especially for larger tanks. Acrylic also has better insulation properties, helping to maintain stable water temperatures that promote fish health and allow for more flexible lighting options. Additionally, crafting your own tank allows for complete customization in shape and size, tailoring the aquarium precisely to your available space and aesthetic preferences. The durability of acrylic materials is a crucial factor to consider when planning your DIY build, as it impacts the longevity and safety of your finished aquarium. Using the right acrylic sheets can greatly influence the overall quality and appearance of your tank. Overall, a homemade acrylic tank combines enhanced visual appeal with safety and adaptability, making it a smart choice for serious aquarium enthusiasts.
How to Plan Your Aquarium Size and Shape for Your Space
To ensure your aquarium fits perfectly in its designated space, start by measuring the exact footprint where it will sit, including clearance for the stand, walls, doors, and nearby furniture. Use a tape measure to check both width and depth, and add at least a few inches to allow for easy access and maintenance. Consider the shape that best suits your room and flow; rectangular tanks are versatile, but square or specialty shapes can add visual interest without obstructing circulation or viewing angles.
Think about the fish species you want to keep—some need more swimming room or vertical space—which influences your size and shape choices. Make sure the stand or surface can support the full weight and dimensions of the tank, including water, substrate, and decorations. Remember that acrylic tanks have thicker sides that add to their outer dimensions, so factor this into your measurements. Lastly, leave enough space for routine maintenance, such as filters, tubing, cords, and cleaning equipment, to make upkeep easier and prevent clutter.
Choosing the Right Acrylic Material Thickness and Tools
Choosing the right acrylic thickness is essential for ensuring your aquarium’s durability and safety. For tanks up to 12 inches high, 3/4 inch thick acrylic is standard; taller tanks over 24 inches require at least 3/4 inch thickness. Use a scaling formula based on the height to determine the exact thickness needed. Cell-Cast acrylic is preferred for its clarity and strength, making it ideal for aquarium construction. Extruded acrylic, on the other hand, is unsuitable for tanks taller than 12 inches because it is less durable under water pressure. When selecting acrylic, consider color options such as clear or tinted, and think about how decorative frame designs can enhance your setup. Essential tools for assembly include acrylic adhesive, painter’s tape, support blocks to hold pieces in place, and a spirit level to ensure precise alignment. Applying a transparent sealant at the corners can help guarantee watertight durability and prevent leaks. Additionally, understanding acrylic material strength and how it varies with thickness can help you choose the most suitable option for your specific needs. Recognizing material properties can also guide you in handling and cutting the acrylic safely to avoid cracks or weak points, and it’s beneficial to familiarize yourself with the safety precautions necessary when working with acrylic to prevent accidents during construction.

Please allow +(-) 1/8" for size. Actual size is around 11-7/8"x11-7/8"

SUPERIOR MATERIAL -- High quality acrylic material coupled with superior thermoforming process make our acrylic sheets durable, light and non-toxic. This 3mm acrylic sheet has an ultra-clear surface without impurity or scratches. In addition, a protective paper on the surface of the acrylic board protects the surface from scratches, stains and fingerprints.The installation of plexi glass Installation is quick and easy, simply peel off the protective paper before use.

USA-MADE PREMIUM CAST ACRYLIC SHEETS - Duco’s 1/8 inch 12x12" plexiglass sheets are proudly made in the USA and offer protective film on both sides, glass-like clarity, and long-term durability. NOTE: Our 3mm acrylic sheets have a ±1/8 inch cut tolerance
Measuring and Designing Your Aquarium Blueprint Accurately
Measuring and designing your aquarium blueprint accurately is crucial for a proper fit and structural stability. Begin by sketching the internal dimensions—length, width, and height—based on your available space and viewing preferences. When considering color coordination, choose a hue that complements your decor to create a cohesive look. Use these measurements as the basis for calculating all panel sizes, ensuring that the bottom and top panels are slightly larger to facilitate seamless joins and prevent gaps. Mark each panel and hole location precisely with high-accuracy tools like a caliper or ruler. Double-check all measurements before transferring them to your acrylic sheets to avoid costly mistakes. Fit checks through dry runs help verify that everything aligns correctly before bonding. When planning your lighting setup, leave enough space for fixtures and ensure wiring paths are accessible without obstructing views or maintenance. Accurate measurement techniques are essential for achieving precise cuts and a perfect fit. Additionally, understanding acrylic bonding methods can help you create durable, professional-looking joints. Proper blueprint planning can significantly reduce assembly errors and ensure your aquarium fits perfectly within your designated space. An accurate, detailed blueprint reduces errors and guarantees your aquarium will fit perfectly and function reliably within your space.
Cutting and Shaping Acrylic Panels for a Precise Fit
To cut and shape acrylic sheets with a precise fit, start by accounting for the saw blade kerf, leaving about 1/16 inch extra on each edge for final polishing. Use a fine-toothed circular saw or a guided router for straight, clean cuts. Support the sheet on a flat surface and keep your saw or router perpendicular to prevent uneven edges. Support the acrylic close to the cut line to reduce vibration and ensure accuracy. Additionally, ensuring proper handling and accurate measurements during cutting can greatly improve the overall quality of the final assembly. After cutting, smooth the edges with progressively finer sandpaper to remove any roughness and prepare for polishing. Dry fit each piece to check for proper fit before final assembly, making adjustments if necessary to achieve a leak-proof, professional result.

PRECISE SCORING: Quickly create a clean scoring line and snap acrylic sheets along the groove for straight, accurate cuts. This scoring tool is built for controlled scoring, and the plexiglass cutter knife design helps achieve precise plexiglass cut to size results with smooth, clean edges.

This acrylic hook knife tool is specially used to cut acrylic sheets or other plastic sheets. Acrylic sheets or other plastic sheets are hard and brittle, so it is difficult to divide. This hook knife can help you carve a thin groove on the acrylic sheet, and then you can break the acrylic sheet along the groove.
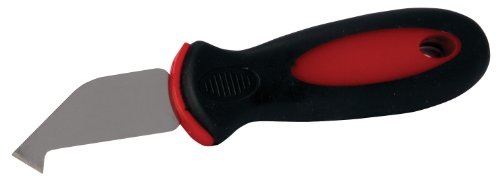
This scoring tool for plexiglass creates a shallow, precise groove on the surface of the material, which weakens it and allows for a clean break along that line.
How to Assemble and Bond Acrylic Panels Safely and Effectively
To assemble and bond acrylic panels safely and effectively, proper surface preparation and precise alignment are crucial. Begin by thoroughly cleaning the edges with isopropyl alcohol to remove dust, oils, and debris that can weaken the bond. Conduct a dry fit to verify the panels are flat and aligned correctly, ensuring smooth edges that enhance bond strength and reduce stress points. Use pins or spacers to maintain consistent joint gaps, which allows solvent to flow evenly and create a strong, uniform bond. Acrylic bonding relies on molecular adhesion rather than just surface adhesion, so ensuring the surfaces are impeccably clean and properly fitted is essential for a durable bond. Apply solvent cement such as Weld-On #3 or #4 directly into the seam with a fine needle applicator. The cement wicks into the joint through capillary action, so applying it evenly is key. Once the cement is in place, press the panels firmly together using clamps or jigs, but avoid over-tightening, as this can cause warping or distortions. Properly aligning the panels and ensuring surface cleanliness are critical steps to achieve a strong bond. Additionally, understanding the properties of different acrylic types and grades can influence the durability and clarity of your assembled tank. Allow the assembly to cure undisturbed for at least 24 hours before handling or leak testing. Properly bonded acrylic panels, selected with consideration for color and transparency, combined with careful storage and transportation, will result in a durable, leakproof tank.

Precision Bonding – Water-thin formula flows into tight joints for clean, strong bonds on acrylic and plastic surfaces.
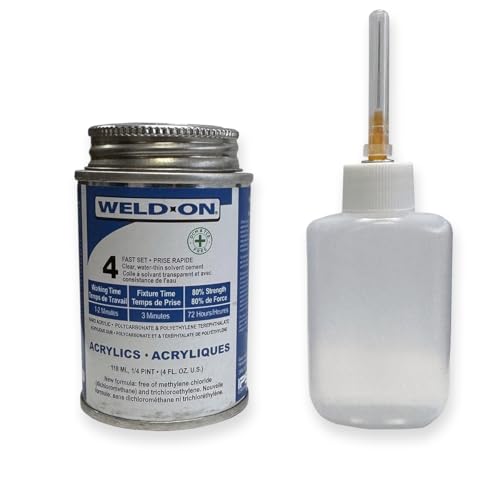
Solvent Cement for Bonding Acrylics

STRONG AND SECURE BONDING — Add as a bonding grout or admixture to cement, concrete, or mortar for increased adhesion and impressive tensile strength
Sealing and Reinforcing Seams for a Leakproof Tank
To effectively seal and reinforce acrylic seams, start by diagnosing the damage to choose the right repair method. Check if the seam is fully separated with a visible gap or just has tiny pinholes and microgaps. For fully separated seams, gently open the joint and apply a thicker solvent cement like Weld-On 16 to fill the gap. If the seam still pinches together, a wicking solvent cement can penetrate microcracks and small gaps. Using the appropriate sealing method ensures a secure bond tailored to your specific repair needs.
Before sealing, clean the surface thoroughly by removing old sealant and residue with acetone or isopropyl alcohol. Lightly sand rough edges to promote better adhesion. Ensuring the acrylic surface is dry is critical for enhanced durability; reinforce the seam by bonding acrylic patches over weak spots, ensuring they overlap the leak zone. Proper surface preparation and controlled application are key to creating a leakproof, reinforced seam. Additionally, understanding the different sealing methods available will help you select the best approach for your specific repair situation. Considering material compatibility is also essential to prevent future leaks or bond failures.

SAFE FOR THE FISH: Selsil Aquarium Silicone is a silicone sealant used in glass bonding work. It does not contain chemicals or solvents that are not friendly to your fish or other organisms in the aquarium. This product is made from 100% silicone polymer, is used in aquarium manufacturing, and conforms with the ISO 11600 –F&G–25 LM standards.
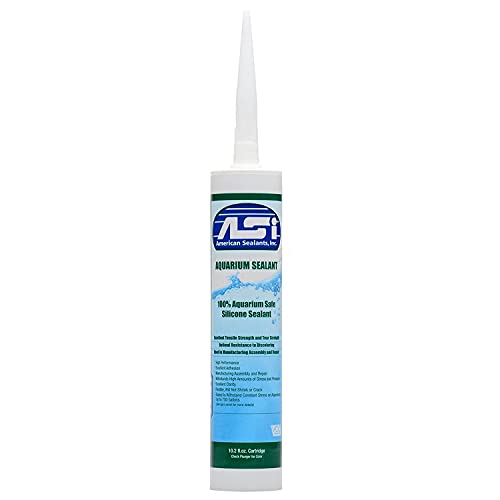
This high modulus component RTV Silicone Sealant forms strong cohesive bonds to glass without the need of primers

Fish Safety:Aquarium sealant clear is a non-toxic, solvent-free acid cured silicone sealant, 100% Silicone, which is friendly to underwater organisms, protects fish safety, and is your best repair choice.
How to Test Your Aquarium for Leaks Before Filling
To test your acrylic aquarium for leaks before filling it completely, start by placing it on a stable, level stand on a flat surface. Wipe the exterior dry and remove any dust or debris to ensure accurate detection. Fill the tank with about 2 to 3 inches of water—this partial fill allows you to check for leaks without wasting too much water. Pause for 5 to 10 minutes, then use dry paper towels along the seams, corners, and bottom edges to detect any moisture or droplets. Look for signs of water beading or a thin film on the outside of the tank. Visual Inspection & Silicone Check — examine the entire glass surface for cracks, inspect for shell chips near silicone and corners, and feel the silicone for lifting or gaps. Repeating the partial fill and inspection process, gradually adding more water until the tank is full, helps ensure thorough testing. Regularly performing leak detection checks during this process can prevent potential water damage. Also, consider checking the acrylic panels for any signs of stress or deformation that could compromise the tank’s integrity. Additionally, verifying that tank dimensions match your space requirements ensures the tank will fit comfortably, preventing the need for repositioning later. Once filled to your desired level, monitor the aquarium for at least 24 to 48 hours. Mark the water level with a waterproof marker and regularly inspect for any signs of seepage or dampness to confirm the tank is leak-free.
Installing Equipment and Finalizing Your Aquarium Setup
Once you’ve confirmed your acrylic tank is leak-free, you can proceed to install the equipment carefully. Start by positioning your lighting to avoid direct contact with the acrylic surface. Arrange the lights to provide even illumination across your aquascaping features and plants, which promotes healthy growth and showcases your setup.
Next, install your filtration system. Place the inlet and outlet on the same short side of the tank for optimal circulation. Position the outlets about 1 to 2 centimeters below the water surface at a slight upward angle to enhance surface agitation and oxygen exchange. Use elbows and bulkheads to connect tubing securely, sealing any drilled holes with uniseals to prevent leaks. Proper placement of the filtration outlets ensures full circulation and prevents dead zones, supporting healthy water movement.
Then, install your heater and thermometer to maintain stable water temperature and monitor conditions effectively. Follow this by adding aeration devices such as an air stone to increase dissolved oxygen levels, especially important for healthy fish and plants.
Secure all equipment firmly, making sure nothing interferes with water flow or your ability to perform maintenance later. Before filling the tank, double-check that everything is mounted securely and positioned correctly to ensure seamless operation once filled. Proper equipment placement is essential for efficient water circulation and a healthy aquatic environment.
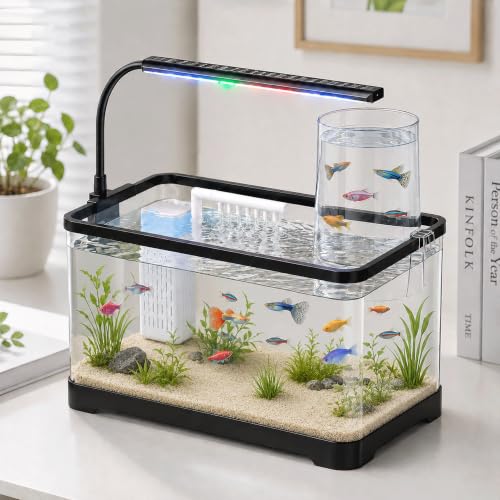
INNOVATIVE NEGATIVE PRESSURE DESIGN: Featuring a unique inverted negative pressure bowl attached to an ultra-clear rectangular acrylic body, this 3-gallon desktop aquarium provides extra swimming space and visual depth. The 360-degree panoramic view creates a stunning, distortion-free display for any desk, counter, or shelf
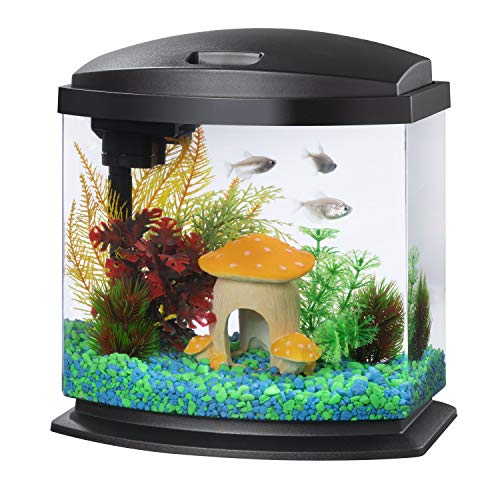
COMPLETE STARTER KIT comes with MiniBow aquarium, low profile LED hood, elevated base, filter, water conditioner and food samples to get you started

What is it used for: It is use for hanging and adjusting the height of the aquarium lamp. We have make 5 point location on the bracket for your reference,to make sure the same height of the left and right side holder (Please make the two side on the same height to keep the balance of the aquarium light). Confirm the height and fix it with screws
Tips for Maintaining Your DIY Aquarium and Troubleshooting Issues
To keep your DIY acrylic aquarium in optimal condition, regular maintenance is essential. Gently wipe the acrylic walls with a soft sponge or microfiber cloth to prevent scratches, avoiding abrasive materials or rough scrubbing. Always use acrylic-safe cleaners—skip alcohol-based or glass-specific products—to avoid damage to the surface. Water should be replaced every few weeks to maintain quality, and your filter needs regular cleaning to ensure proper filtration. Carefully vacuum the substrate to remove debris without scratching the acrylic. Handle decorations cautiously to prevent scratches and repair minor damage promptly to prevent further deterioration. Controlling algae growth involves limiting overfeeding and cleaning the walls often with a soft sponge. Frequently test water parameters such as pH and ammonia levels to maintain a healthy environment. Additionally, regularly inspect seams for cracks and perform immediate repairs to prevent leaks, which could compromise the safety of your aquatic life. Recognize that scratches can be minimized with proper handling and protective measures, which is crucial for maintaining the clarity and longevity of acrylic surfaces over time. Proper acrylic surface care techniques can significantly extend the lifespan and appearance of your DIY aquarium. Incorporating proper cleaning techniques can also help prevent the buildup of algae and other deposits, ensuring a clear view of your aquatic inhabitants.