
Thinking about building your own canister filter to save money and improve your aquarium’s flow? With the right materials like BPA-free plastics and PVC fittings, you can create a custom solution that fits your tank perfectly.
When you follow a clear plan, assembling and sealing your DIY filter becomes straightforward.
Keep reading to see how you can make a reliable, efficient filter on your own.
Is a DIY Canister Filter Right for Your Aquarium?
A DIY canister filter can be a good option if you need higher filtration capacity and customization for your aquarium. These filters are often larger and more robust than store-bought options, making them suitable for bigger tanks or those with a heavy fish load. Because they are external, they keep equipment outside the tank, which adds to the overall aesthetic and free up space inside the aquarium. However, building a DIY filter requires more time and effort upfront, as you need to gather materials, assemble the components, and ensure proper sealing to prevent leaks. Proper assembly techniques can help prevent issues such as leaks or damage over time. Maintenance can also be more involved, since cleaning or replacing media depends on your custom setup. Leak risks exist if the assembly isn’t secure, so attention to detail during installation is vital. Risks and safety concerns of DIY canister filters should be carefully considered, as they can be extremely dangerous due to potential failure or leaks. A DIY canister filter is especially beneficial if you prioritize customized media arrangements and higher flow capacity. It gives you flexibility to include mechanical, biological, and chemical media tailored to your specific needs. Understanding DIY filtration systems can enhance your ability to troubleshoot and optimize your setup effectively. Additionally, familiarity with water flow dynamics can significantly improve your understanding of how your filter operates and prevent problems. However, if you value simplicity, quick setup, and minimal maintenance, a ready-made filter might be a better choice. Consider your tank size, willingness to perform ongoing upkeep, and filtration demands when deciding if a DIY canister filter is right for your setup.
Gather Materials and Tools for Building Your Filter
To build your DIY canister filter effectively, you need to gather all the necessary materials and tools beforehand. Ensure that your container materials are suitable for aquarium use—food-grade or BPA-free plastics and PVC are ideal choices because they are safe for aquatic life and durable over time. Select a container that matches your tank’s volume and desired flow rate; a larger container may hold more media but should still fit comfortably within your setup. Using high-quality materials can improve the overall lifespan and performance of your filter. You will also require plumbing components such as PVC fittings, hoses, and clamps to connect the filter to your tank properly. For precise openings, a drill equipped with a hole saw is essential. Sealants like aquarium-safe silicone and PVC cement will prevent leaks and ensure joints stay secure, creating a neat appearance. Before assembly, rinse all media and parts thoroughly to remove dust or residues that could cloud your water. Additionally, checking for compatibility with aquarium-safe sealants ensures a leak-free and secure fit. Paying attention to material compatibility helps avoid chemical leaching that could harm aquatic life. Selecting the right filter media is also crucial for optimal biological, mechanical, and chemical filtration. Being meticulous in choosing quality, aquarium-compatible materials and tools guarantees your DIY filter will function reliably and look professional in your aquascape.

Heavy wall bulkhead is molded of highest impact resistant PVC eliminating possibility of finding hidden cracks when filling aquarium

Size: Large one: 85*30mm, inner hole diameter: 16mm.
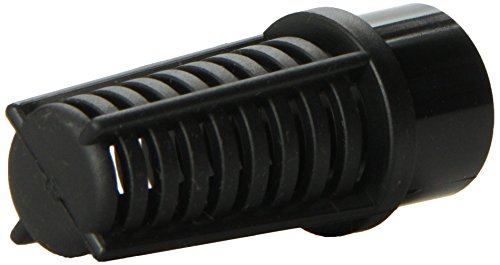
Heavy wall bulkhead is molded of highest impact resistant PVC eliminating possibility of finding hidden cracks when filling aquarium
Plan Your Build: Design and Layout Considerations
Planning your canister filter’s design and layout before assembly helps you avoid future problems and streamlines maintenance. Start by sketching the placement of the inlet, outlet, and internal media chambers. Arrange the media chambers so that water flows logically: mechanical filtration first to remove debris, followed by chemical media for toxins, and finally biological media for beneficial bacteria. This setup enhances filtration efficiency and keeps servicing straightforward. When designing the plumbing, position the canister below the water level to use gravity for drainage and water flow. Keep hoses as short as possible to minimize flow resistance and maintain proper flow rates. Ensuring proper filtration stages align correctly in your design improves overall water quality and system longevity. Place the intake where debris naturally accumulates, typically opposite the return outlet, to maximize debris capture without creating excessive surface currents that disturb the tank’s stability. Secure all fittings and connections with aquarium-safe silicone or tight seals to prevent leaks. Proper planning of these aspects results in reliable operation, easier priming, and consistent flow. By dedicating time upfront to your layout, you ensure your DIY canister filter functions smoothly and requires less troubleshooting later.
Assemble Your DIY Canister Filter Step-by-Step
Start by placing the media baskets inside the canister in the correct order. Ensure each basket sits flat to facilitate water flow from coarse to fine filtration. Typically, mechanical media like sponges or filter pads go first, followed by biological media such as bio-balls or ceramic rings, and then chemical media if needed. Proper alignment and secure seating of each basket are crucial to prevent water from bypassing the media. Before sealing the lid, check all gasket seals around the lid, fittings, and openings. This step is vital to prevent leaks during operation. It’s also helpful to understand the types of equipment involved to ensure compatibility and optimal performance. Additionally, understanding filter media helps in selecting the right materials for effective filtration. Once everything is correctly assembled, close the canister, making sure all caps, plugs, and gaskets are fully seated. Only then should you proceed with priming and testing the system to ensure proper function. Properly arranged media layers maximize filtration efficiency and maintain a healthy aquarium environment by ensuring optimal water flow through all media.
Test and Tune Your Filter Before Installing in the Aquarium
To ensure your filter works properly before installation, you should thoroughly test and tune it. Start by inspecting all hose joints, valve bodies, and lid seals for leaks. Tighten fittings just enough to prevent drips—overtightening can damage the seals. Place the canister on a stable, level surface and run it with dechlorinated water to check for proper sealing. Watch for any drips or puddles during the first 24 hours to catch leaks early. Confirm all hoses are correctly attached, and position the output so it points away from the intake, promoting better water flow. Then, observe the flow rate; it should be steady and appropriate for your tank size. If you see air bubbles or irregular circulation, adjust or restart the filter to achieve smooth, reliable water movement. Regular testing helps ensure optimal filtration, and understanding the flow dynamics can help fine-tune your system further. Proper setup from the start reduces the need for troubleshooting later and contributes to a healthier aquatic environment.
Select the Best Filter Media Layers for Clear Water
The best filter media layers follow a coarse-to-fine sequence to ensure effective filtration and longer-lasting media. Start with coarse sponge or foam as the first layer to trap large debris and prevent clogging downstream. Next, add a fine sponge or filter floss to catch smaller particles that pass through the initial stage. This layered approach reduces clogging on the biological and chemical media and keeps the entire system cleaner longer. Proper media layering aligned with the flow direction—usually bottom-up—ensures each stage performs optimally, resulting in clearer, healthier water in your aquarium. Incorporating filter media options that suit your specific needs can further enhance your filtration system’s efficiency. Using the right kinds of UV filtration methods can also help keep water crystal clear and free of pathogens. Additionally, selecting proper flow rates ensures that each layer functions correctly without causing undue stress on your aquatic life.
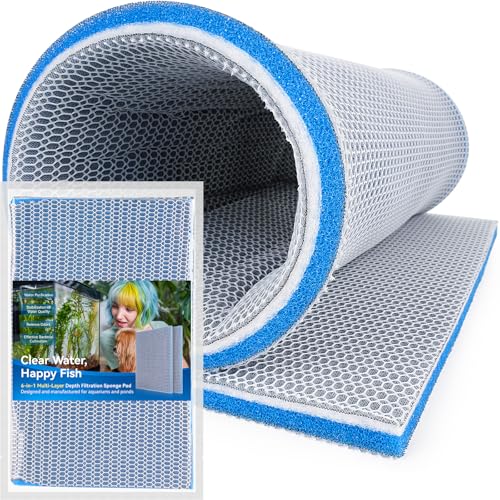
✅Deep Filtration: Designed with multiple filters such as three-dimensional honeycomb mesh cloth, fiber biochemical cotton, and non-adhesive nano-filter mesh stacked on top of each other to give it a finer filtration effect, it effectively captures impurities such as fish feces, uneaten food, and other small particles in the water so as to maintain clear and healthy water for the fishes and aquatic organisms.

8-layer filter pad: 2×3D honeycomb mesh, 2×Hydrophobic fiber cotton, 2×Carbon fiber, 1×Nano-bio sponge, 1×Biochemical sponge; The 3D honeycomb mesh captures large debris, hydrophobic fiber cotton filters fine particles, while carbon and bio layers remove microscopic impurities and odors, all works to provide high efficiency filtration

NEW 3rd AMERICAN TECHNOLOGY- It is the first choice for sponge filter pad. Equipped with 8-layer filtration, the Sunjojo aquarium sponge foam are smarter than normal: 2 layer's honeycomb woven mesh;2 layer's three-dimensional fiber; 2 layer's fine mesh fiber; 1 layer Nano bio sponge filter and 1 layer Fiber bio sponge filter. They working together to help keep your aquarium crystal clear. Size: 15.7x11.8x0.6in, 1 Pack.
Connect Plumbing Securely to Prevent Leaks
To guarantee your canister filter operates leak-free, you must connect plumbing components securely using appropriate fittings and techniques. Begin by using bulkhead fittings with the gasket on the water side, tightening them evenly to prevent distortions that could cause leaks. Keep mating surfaces clean and flat before assembly, ensuring fittings sit flush without forcing them together. Seal threaded joints by wrapping male threads with PTFE or Teflon tape and applying silicone sealant where necessary—which should not be applied on gasket faces or O-rings. To mechanically secure hoses, fully push tubing onto fittings and tighten clamps, preferably stainless steel ones, for corrosion resistance. Route the plumbing carefully by keeping hoses straight, supported, and positioned to minimize stress and avoid back-siphoning. Properly installed fittings prevent pressure loss and help maintain the flow rate needed for effective filtration. Regularly inspecting and maintaining your connections can extend system lifespan and ensure consistent performance. Before powering on your system, test all joints with water and address any leaks immediately to ensure leak prevention and safe operation.

Hose Clamps Stainless Steel: The buckle, band and screw of these metal clamps are all made of heavy duty 304 SS. Hose clamp kit has the features of corrosion-resistant, anti-rust, salt resistant, waterproof and oil proof. No longer worry about them rusting and breaking when used in indoor and outdoor places

Premium Hose Clamps Stainless Steel Construction: Crafted from durable stainless steel, these hose clamps are designed to endure rugged use in various applications. Ideal for high-pressure settings, they deliver superior corrosion resistance and longevity.

Excellent Material:maierke hose clamp is made of 304 stainless steel, with a thickness of 0.023 inches, smooth edges, good-looking and durable. Stainless steel hose clamp is corrosion-resistant and rust-proof, and can be used in harsh environment
Adjust Pump Flow and Performance for Optimal Filtration
To ensure your filter operates efficiently, you should fine-tune your pump’s flow after securing your plumbing. Opt for a pump with a GPH (gallons per hour) rate roughly double your canister’s rated capacity—that is, around 200% higher—to maximize flow without creating turbulence. Use built-in controls or external valves to reduce the flow by 20 to 30 percent, which helps minimize strong currents and sediment accumulation. Installing flow diffusers or baffles at the output ensures water is evenly distributed, reducing flow energy and turbulence. Directing the outflow toward the back wall or surface of the tank can break currents and protect sensitive fish. Regularly adjusting your pump’s flow ensures optimal filtration and promotes a healthier, more stable aquarium environment. Testing and adjusting systematically helps in identifying the optimal flow that balances filtration and tank stability. Monitoring flow rates with a flow meter can provide precise measurements for fine-tuning, especially when you consider the overall aquarium setup, including reactor placement and other equipment. Remember, proper understanding of flow dynamics can greatly enhance your DIY canister filter’s performance and longevity.

【Sufficient Quantity】Each pack contains 10 T-shaped control valves, the color is black, sufficient quantity to meet your daily use and replacement needs, 1.5" long x 0.8" high, suitable for standard 3/16" ID aviation tube

Manually control the flow of vital O2 or switch an air pump "on or off"

Single Way Valves: T-shaped structure with a straight single way for air to get through. Great to be used in fish tanks, aquariums, aquaculture, gardening or drip irrigation system.
Troubleshoot Common DIY Canister Filter Issues
Leaks in a canister filter often originate from hoses, O-rings, lids, or fittings. Damaged or mis-seated O-rings are the most common cause of seepage. To detect leaks, perform a water test by filling the canister and tubing separately before turning on the filter, and watch for drips or streaks. Proper priming is crucial; make sure the canister, inlet, and outlet lines are fully filled to prevent startup problems or air bubbles. Trapped air can be cleared by lowering the outlet or creating siphon action. During troubleshooting, carefully examine hoses, connectors, and O-rings for damage, cracks, or improper seating. Address leaks systematically by replacing faulty O-rings, tightening fittings, and reseating lids to restore proper flow and prevent leaks from disrupting your filter’s operation. Additionally, regularly inspecting all connections can help catch potential issues before they cause significant leakage or performance problems.

O-Ring Part Number: AXW542

Replacement Lid/Cover/Head Seal O-Ring for SunSun HW304A (HW-304A) and HW304B (HW-304B) canister filters, as well as the full list of compatible filters below.
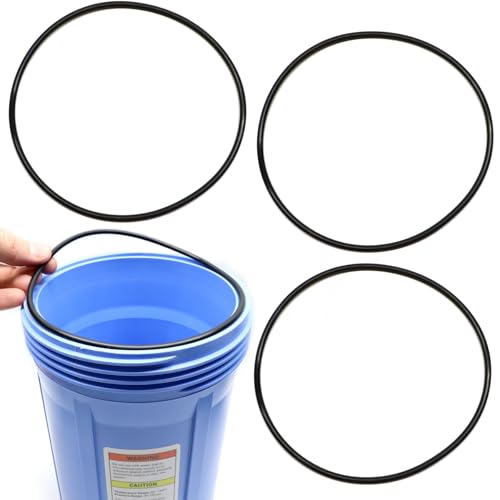
Replacement 151122 o-rings compatible with Pentair/Pentek style Big Blue Water Filter Housings (3 Pack)
Maintain and Service Your DIY Filter for Long-Term Performance
Regular maintenance of your DIY canister filter ensures it functions efficiently over time. Prioritize biological media by rinsing it in tank water or dechlorinated water to preserve beneficial bacteria; avoid hot tap water, which can destroy colonies. Clean the impeller, chamber, and interior surfaces regularly to prevent debris buildup that reduces water flow. Check the O-ring for signs of wear or looseness to prevent leaks; applying a small amount of aquarium-safe silicone lubricant can help maintain a good seal. Inspect hoses and fittings for leaks, drips, or water marks on the exterior, and ensure all connections are tight. During reassembly, always fill the canister with water first to avoid air pockets, and verify that all components are correctly aligned. Performing routine checks and careful cleaning will extend your filter’s lifespan, keeping biological filtration optimal and leaks at bay. Additionally, monitoring water flow and oxygen levels helps maintain beneficial bacteria health and overall filter performance.