Keeping your aquarium filter clean is crucial for a healthy tank and happy aquatic life. But knowing the right steps can seem tricky or overwhelming at first.
By the end of this guide, you’ll be able to safely and effectively clean your filter, ensuring it runs smoothly and keeps your tank water pristine.
Keep reading to uncover simple, straightforward tips for a thorough clean.
Turn Off and Unplug Your Aquarium Filter and Electrical Equipment
Turning off and unplugging your aquarium filter and electrical equipment is essential before performing maintenance. First, ensure the filter is completely off by checking that no water is flowing from the outflow tube. Disconnect the power supply from the motor housing, impeller, or internal parts to prevent electrical shocks and accidental startup. Keep the power cord dry during removal to avoid electrical hazards. Proper disconnection helps prevent damage to the equipment and ensures safety during cleaning. This step is especially important for avoiding electrical hazards that can occur if moisture contacts the electrical components. To prevent equipment malfunctions, always verify that the power source is completely disconnected before proceeding. Next, close the filter’s shut-off valves to halt water flow through hoses, which helps prevent spills and siphoning. Carefully disconnect the hoses, keeping the canister level to avoid leaks. Handle all equipment gently to minimize disturbance to your fish and avoid damaging beneficial bacteria that live inside the filter. Being aware of maintenance best practices can also help in preserving the health of your aquarium. Before restarting, double-check that everything is properly reassembled and secure all seals to prevent leaks. Properly turning off and unplugging your equipment ensures safety and protects your aquarium’s delicate ecosystem.
Gather the Right Tools and Supplies for Filter Cleaning
Gathering the right tools and supplies is essential for efficient filter cleaning. You should have a dedicated bucket filled with dechlorinated or old tank water for rinsing media and soaking parts. Soft brushes, like a toothbrush, and pipe cleaners are necessary for removing stubborn debris from impellers, tubing, and narrow spaces. Use soft cloths or sponges to wipe down the filter housing and remove residue; avoid abrasive materials that can scratch plastic or seals. White vinegar or mild cleaning solutions are effective for dissolving mineral buildup; soak parts for 30 minutes to an hour and then rinse thoroughly. Additional tools like scissors, towels, and garden hoses can help with debris removal and organization. Proper preparation with these supplies ensures safe, thorough cleaning and supports media replacement and remote cleaning without harming beneficial bacteria. Regular maintenance helps keep the filter operating efficiently and prolongs its lifespan.
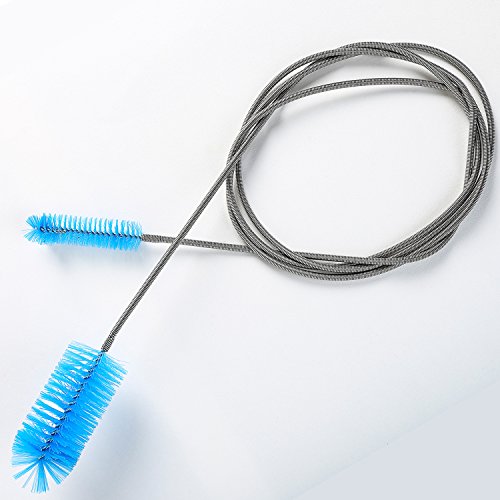
FLEXIBLE DOUBLE ENDED BRUSH:made of high quality soft nylon bristles and stainless steel, flexible two-end long brush, sky blue plastic and it can reuse for many times, easy to push and pull.

FLEXIBLE MULTIFUNCTIONAL BRUSH:The 61 inch long double ended brush made of high quality soft nylon bristles and stainless steel, flexible two-end long brush, sky blue plastic and it can reuse for many times, easy to push and pull.The multifunctional aquarium brushes set of 10 different sizes brush,perfect for your fish tank cleaning,filter systerm,hose/glass tube,water pump accessories cleaning
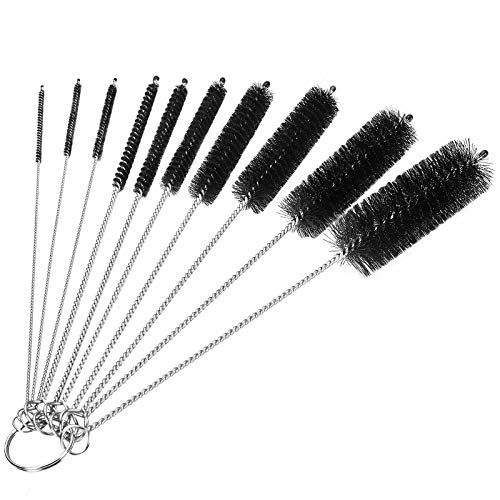
➽ Key ring keeps them together – All 10 brushes attach to a key ring for easy storage. Stainless steel body with nylon bristles and a rubber tip (no bristles on top) to protect tube bottoms.
Remove and Rinse Mechanical Media the Right Way
Rinsing mechanical media with tank water helps preserve the beneficial bacteria crucial for your aquarium’s stability. During media maintenance, always use dechlorinated tank water instead of tap water, as chlorine kills helpful bacteria on sponges. Gently squeeze and swish the media in a bucket of tank water to loosen debris, avoiding wringing since it can damage bacterial colonies. Keep the media wet during replacement by immediately placing it in a bucket of aquarium water to prevent bacterial desiccation. For dense sponge surfaces, use soft brushes to scrub away buildup, and dip filter floss in tank water for fine particles. Discard dirty rinse water away from the tank to prevent contamination. If you replace disposable media, opt for new sponges. It’s also important to monitor filter capacity regularly to ensure it’s adequately supporting biological filtration. Proper media maintenance helps maintain stable bacterial populations, ensuring your aquatic environment remains healthy. When reinstalling the cleaned media, ensure it sits securely to maintain ongoing bacterial populations and filter performance. Regular maintenance of aquarium filters supports aquarium health and ensures your betta fish thrive.

Efficient Filtration: The high-density and unique structure of the sponge provide exceptional mechanical filtration. It effectively captures and removes impurities, suspended particles, and waste from the water, maintaining a clear and stable aquatic environment for the well-being of your aquatic organisms.

Dimension: 9" Lx 9"W x 0.5"H, PPI:40. Includes 2 pieces of open cell sponges

Dimension: 8x4.5cm/3.2” x1.8”, the inside hole diameter is 2cm/0.8”; for a snug fit, check the size you need carefully before placing an order. The sponge's inner diameter accommodates filter intake within 0.8-1 inches (20–25.4 mm) due to its elastic properties.
Clean Biological Media Without Harming Beneficial Bacteria
To clean biological media without harming beneficial bacteria, it’s important to handle the media gently. Use old tank water or dechlorinated water during maintenance to maintain the same chemical conditions that support beneficial bacteria, reducing stress to the biofilm. Gently agitate or lightly squeeze the media in this water to loosen debris while preserving the beneficial bacterial colonies. Avoid vigorous scrubbing or using tap water, soap, or harsh chemicals, as these can kill the bacteria and disrupt the biological filtration. Never clean all media at once; instead, clean a portion at a time to keep a stable bacterial population and ensure continuous nitrification. Keep the media moist during cleaning, reinstall it promptly, and restart the filter quickly. Monitoring water parameters after cleaning helps confirm that the bacterial colonies are recovering and that your nitrogen cycle remains stable. Additionally, understanding the importance of beneficial bacteria can help guide proper maintenance and support a healthy aquarium environment. Regularly inspecting your filter components and maintaining optimal conditions will also promote a thriving biological ecosystem within your tank.
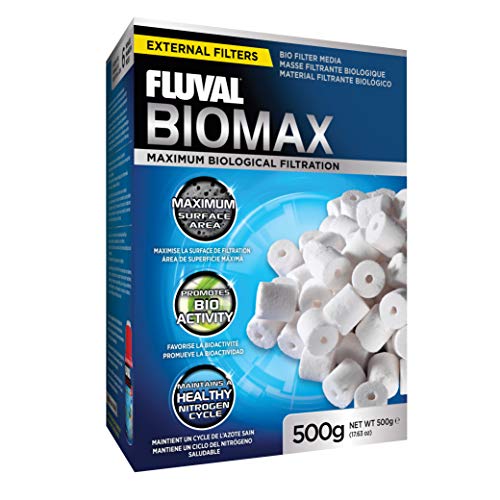
Filter Compatibility: Compatible with Fluval Filter Series 106, 206, 306, 406, FX5, FX6, 105, 205, 305, 405, 104, 204, 304, and 404.

Biological filter media made from safe, inert ceramic material that does not alter water chemistry

Filtration Enhancement: Natural quartz balls help improve water clarity by supporting mechanical filtration; optimizing filtration efficiency
Thoroughly Clean the Filter Housing, Impeller, and Tubing
To thoroughly clean the filter housing, impeller, and tubing, start by turning off and unplugging your filter to ensure safety. Remove the filter from the aquarium and disassemble it to access these parts. Inspect the impeller for cracks, wear, or damage, replacing it if any issues are found. Disassemble the housing and clean the interior thoroughly using a small brush, sponge, or filter floss to remove algae and debris buildup. Disconnect the tubing and scrub its interior with a flexible brush or cleaning device to eliminate biofilm and gunk. Rinse the tubing well afterward. Before reassembling, make sure the housing, impeller, and tubing are free of debris, completely dry, and properly aligned. Additionally, be sure to consider the best aquarium filter for small tanks to maintain optimal filtration. Regular maintenance of your filter components helps prevent biofilm buildup, which can impact water quality, and supports a balanced water parameter essential for a healthy aquarium. Then, reassemble the filter, prime it if necessary, and restart the system.

Flexible Double Ended Brush:made of high quality soft nylon bristles and stainless steel, flexible two-end long brush, sky blue plastic and it can reuse for many times, easy to push and pull.

This hose brush is perfectly used to clean small diameter pipes

[FIVE SIZE SET] This 5 piece aquarium cleaning brush set includes multiple brush sizes and lengths to narrow filter tubes impeller wells and small corners helping fish tank owners clean with better precision.
Reassemble Your Filter, Prime If Needed, and Restart Safely
After thoroughly cleaning and drying all parts, you can begin reassembling your filter in the correct order. Follow the original assembly sequence, ensuring the impeller, media, housings, lids, and seals are aligned properly. Return the filter media to their trays or chambers as before unless the manufacturer specifies otherwise. Make sure all clips, caps, duckbills, lids, and outlet pieces are fully seated to restore the correct water pathway. Confirm that the impeller rotates freely, which is essential for proper water flow and startup. Reattach hoses, intake, and outlet fittings securely to prevent leaks. If your filter model requires priming, fill the chamber with tank water until it’s full. Additionally, check that the water flow pathway is clear and unobstructed to ensure efficient filtration. Ensuring the proper assembly of your filter helps prevent future malfunctions and prolongs its lifespan. Remember to consult your filter’s user manual for any specific instructions related to priming and startup procedures. Turn on the filter only after verifying that all steps are completed correctly for safe operation and consistent water flow.
Troubleshoot Common Issues After Cleaning
Issues like weak water flow, trapped air, or impeller jams often occur after cleaning if components aren’t reassembled correctly or blockages remain. Impeller jams happen when debris, slime buildup, or hair get lodged, preventing it from spinning freely. Ensuring media trays, gaskets, and seals are properly aligned is critical; misalignment can cause leaks or poor suction. Air trapped in the filter creates gurgling sounds and reduces circulation. Tilting or rocking the filter gently can help release these air pockets. Incorrect reassembly, such as misplacing the impeller or tightening parts unevenly, also hampers performance. Additionally, electrical connections might be loosened or water quality may be disturbed, leading to restart issues or cloudy water. To troubleshoot effectively, double-check your assembly, verify the filter is properly primed, and inspect all electrical connections. Proper reassembly is essential to prevent these common issues and maintain optimal filter operation.

This impeller may be white or blue in color, they are the same item just a different color

Ml Impeller Assay Penguin 350b (Aquaria), Parts-Power Filters category with model AMLPRIM350B
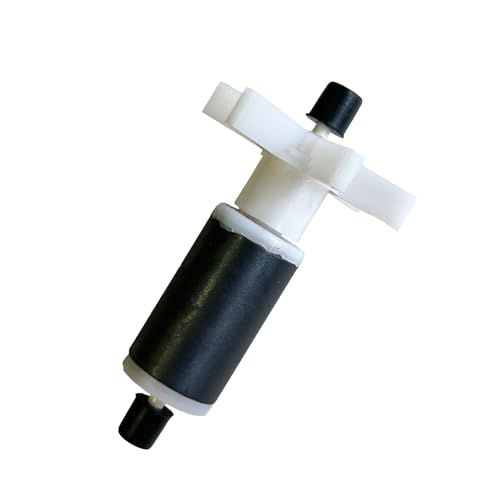
for Penn-Plax Replacement Impeller For Cascade 1000 Canister Filters, Pump Accessory for Cascade 1000 Replacement Impeller