
Wondering how to build a simple, secure lid for your aquarium? Getting the measurements right and choosing the right materials are key steps to creating a lid that fits well and keeps your tank safe.
With a few tools and some basic tips, you can make a sturdy, functional cover that provides ventilation and easy access.
Read on for a straightforward guide to DIY aquarium lids.
Start Here: Planning Your DIY Aquarium Lid
Careful planning is essential before building your DIY aquarium lid. You need to consider how much light will penetrate the lid to maintain your tank’s aesthetics and healthy environment. Decide whether you prefer a solid acrylic or glass cover, a screen or mesh for ventilation, or a wood or PVC canopy for a more decorative look. Each option affects both the appearance and functionality of your lid. Materials should be durable and suitable for aquatic environments to ensure longevity and safety. Your design must prevent fish from escaping while minimizing evaporation. It should also provide easy access for feeding and maintaining equipment like filters and aeration tubes. Take note of any protrusions, such as airline tubing or filter intakes, to ensure they pass smoothly through the lid. It’s crucial to plan a secure fit that sits snugly on the tank rim without wobbling or creating gaps. Incorporating secure fastening techniques is vital to keep the lid firmly in place during daily use. Good planning upfront helps prevent fitting issues and ensures your lid meets your goals for both style and function. Consider incorporating ventilation and access features to improve usability and maintain a healthy aquatic environment. Incorporate features like hinges, flip-up sections, or removable openings to enhance usability. A thorough understanding of aquarium lid materials can help you select the best options for durability and safety, further increasing the success of your build.
Measure Your Tank Accurately for a Perfect Fit
Accurate measurement is essential for creating a DIY aquarium lid that fits perfectly and operates smoothly. Start by measuring the inner lip of your tank, not the outer edges, to ensure your lid sits securely. Take measurements at multiple points—left, center, and right—to identify any irregularities caused by warping or variations in the glass. Use a tape measure or a ruler for this task, and note the smallest measurement to avoid gaps. Using precise measurements helps prevent leaks and ensures your lid remains stable over time, especially if the tank has slight warping or uneven edges, which is common in older tanks. Proper fit Remember to measure the glass thickness, as this impacts your cutout dimensions. For tanks longer than 36 inches, measure the center braces separately, as these can reduce available space and may require adjustments to your lid size. When marking where to cut for lighting or cords, add about 1/8 inch of clearance. This extra space prevents tight fits that could pinch cords or make removal difficult. Also, consider adding a ventilation gap to improve airflow within the enclosure. Proper measurement accuracy ensures you cut exactly where needed, minimizing waste and rework. Always double-check measurements before cutting, and prefer a slightly larger cutout that you can trim down if needed.
Choose the Best Materials for Your DIY Lid
Acrylic is the best choice for DIY aquarium lids if you want a lightweight, easy-to-cut material with a clean appearance. It can be scored and snapped easily, which makes shaping straightforward without specialized tools. Acrylic also offers UV protection that helps prevent yellowing over time, maintaining clarity. Its lightweight nature reduces strain on the tank frame, and its attractive transparency makes it suitable for showcasing aquatic life. Additionally, proper handling and soft cloth cleaning can help mitigate scratches, which are more likely with acrylic scratches compared to other plastics. Overall, acrylic balances ease of work, aesthetic appeal, and durability for most DIY aquarium lid projects. Additionally, acrylic is non-toxic once cured, which makes it safe for use in aquariums and ensures it won’t harm aquatic life.

NO SCREWS OR GLUE REQUIRED – Our 24 Inch PVC hinge for plexiglass and acrylic panels eliminates the need for screws or glue. It relies solely on friction to hold your aquarium lid or drum shield panels together, making it ideal for a variety of applications like glass sheets, plastic hinges for plexiglass, and more. The hinge can be easily cut to custom lengths and features a smooth surface that is simple to clean.

Quantity and Size: this package includes 10 acrylic panel connectors, each measuring 3 x 1 inches in size, fitting glass or acrylic sheets from 3/16 inch to 1/4 inch thick, providing enough quantity for aquarium lids, display cases, or partition builds of various scales
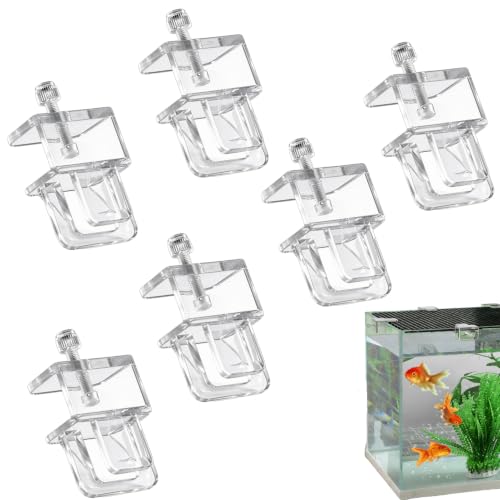
[Aquarium Lid Clip Set] This aquarium lid clips set includes 6 clear acrylic aquarium lid clips for securing aquarium glass walls less than 0.8 inches (approximately 2 cm) thick. The set also includes 6 nuts for better protection of the aquarium lid and to ensure it is firmly attached to the aquarium wall.
Cut and Shape Your Materials Safely and Precisely
Ensuring safe and precise cutting starts with careful measurement and marking. Use a straightedge and permanent marker to clearly outline your cut lines on transparent materials like acrylic or polycarbonate. Wearing eye protection and gloves is crucial for tool safety; keeping blades sharp helps prevent slips and accidents. Handle materials firmly and support them securely to ensure clean cuts and avoid mishaps. Selecting the right cutting tools and proper technique are essential for achieving accurate results and preventing damage to your materials. Score acrylic with a utility knife and snap along the line to achieve a clean edge. For polycarbonate, cut lengthwise with the grain for better results. Drill holes and internal cutouts before making full cuts to reduce the risk of cracking. Maintain control by pulling serrated blades in the correct direction, and keep saw blades tight and stable for smooth operation. Finish edges with fine-grit sandpaper to create smooth, safe surfaces that reduce injury risks.

This acrylic hook knife tool is specially used to cut acrylic sheets or other plastic sheets. Acrylic sheets or other plastic sheets are hard and brittle, so it is difficult to divide. This hook knife can help you carve a thin groove on the acrylic sheet, and then you can break the acrylic sheet along the groove.

❤Acrylic Nail Kit with Drill and U V Light: This acrylic nail kit for beginners with everything contains all the necessary for acrylic nail supplies. 3pcs Basic Acrylic Powder, nail Drill, nail lamp, nail rhinestones, glitter decoration powders, other nail art tools. Make the nail art fun with this nails kit acrylic set , create various nail art style with salon quality.

Product Details: 4 pieces clear acrylic rectangle sheets, 2 pieces transparent acrylic clay slab rollers (one solid and one hollow), 4 pieces pottery clay cutters, including 2 long tissue blades and 2 short knives, 1 wire texture tool and 1 needle detail tool.
Assemble and Secure Your Aquarium Lid Properly
To assemble and secure your aquarium lid properly, accurately measure the fit to ensure precise alignment. Begin by checking the hinge placement to confirm it lines up correctly with the aquarium rim, which allows for smooth opening and closing. Use a drill to fasten hinges securely with appropriate hardware, such as stainless steel screws, for durability. Inside the inner rim, position support components like acrylic rods or dowels to prevent the lid from slipping off. Place supports carefully so they do not cause binding and verify that the lid remains stable and easy to lift during use. Before permanently attaching any hardware, test the fit of the hinges and supports to ensure everything aligns correctly. Proper placement of hinges and supports guarantees the lid’s stability, keeping it secure and functional during normal aquarium operation. Additionally, ensuring the lid has proper ventilation is crucial to prevent condensation buildup and maintain adequate oxygen exchange. To enhance lid security, consider adding a latch or locking mechanism to prevent accidental removal or displacement. Proper hardware installation is essential for ensuring the lid remains durable over time and withstands regular handling. Regular inspection of all components can help identify any wear and tear early, further prolonging the lid’s lifespan.

PACKAGE CONTENT - Each packet purchase include 4 different designs of 10 "and 12" black tweezers. The rounded tips tweezer is blunt enough to be safe to touch or even press, and holds the food securely, minimizing the risk of food slipping and sliding. The pointed tips tweezer have a fine-tipped design to help chefs create delicate dishes.

Precision thickened axis, smooth and quiet when opening and closing. The offset short side hinge can be folded to a straight angle for easy adjustment and fitting.

Specifications: Length x Width: 2 inch x 2 inches (50 mm X 50 mm), Thickness: 5 mm (0.2 inches). Weight: 58g/each hinge. Screws: 4.8 x 19 mm.
Add Openings for Equipment and Ventilation
To ensure proper airflow and safety, you should add openings for equipment and ventilation with specific guidelines. Ventilation openers need to provide at least 20% open area to allow sufficient oxygen exchange and prevent the buildup of carbon dioxide, which can be toxic to your aquarium environment. When designing cutouts for equipment, include an extra 1/4 inch of clearance beyond cord sizes to avoid contact with water or air, with standard gaps of 1/8 inch for filters and 1/2 inch for heaters. To ensure accuracy, trace the cutouts on cardboard first before cutting into the tank. Mesh panels should be cut 1 inch smaller than the openings and secured using aquarium-safe silicone for a tight seal. Incorporate a 1/2 inch air gap around openings to facilitate warm air escape, which helps reduce condensation and evaporation. Properly placed ventilation openings and equipment cutouts promote optimal airflow, prevent hazards, and support a healthy aquatic environment. Additionally, adequate ventilation can help maintain stable water temperature and reduce energy costs by improving airflow within the tank’s environment.

1 clear plastic mesh sheet net - 1/4" x 1/4" opening - high light transmission for coral reef growth

【Accelerated Propagation】 The stainless steel mesh is self-sinking. Tie the moss to the stainless steel mesh and lay it flat on the bottom of the aquarium to achieve better lighting conditions. If you use a bottom substrate such as sand or aquatic soil, the environment near the bottom will provide more nutrients, allowing the moss to grow faster.
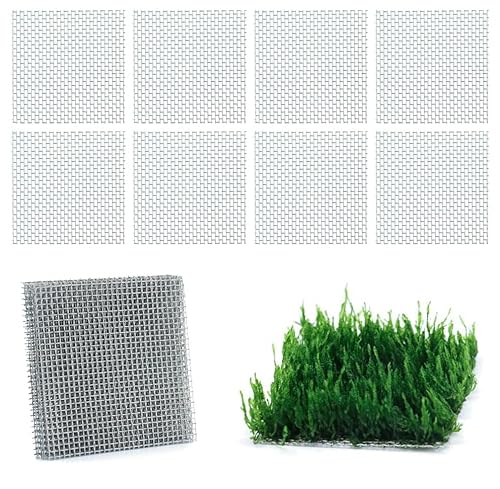
【Accelerated Propagation】 The stainless steel mesh is self-sinking. Tie the moss to the stainless steel mesh and lay it flat on the bottom of the aquarium to achieve better lighting conditions. If you use a bottom substrate such as sand or aquatic soil, the environment near the bottom will provide more nutrients, allowing the moss to grow faster.
Finish and Install Your Custom Aquarium Lid
Once you’ve finished all cutting, sanding, and assembly, the next step is to carefully fit and secure your custom aquarium lid. Measure the outside dimensions of your tank to ensure the lid fits precisely, which is crucial for preventing gaps that could allow fish or debris to escape or enter. Dry-fit the lid first by placing it on the tank to check corner squareness, rim coverage, and overall stability. Adjust the measurements if you notice any misalignment before attaching it permanently.
Next, smooth and trim all edges with medium-grit sandpaper to remove sharp points and create a polished look that reduces risk of injury. For added stability and a secure fit, incorporate structural supports such as acrylic rods or aluminum rails. Attach these support pieces with silicone sealant or screws, depending on your design, and ensure all adhesives or fasteners are fully cured before handling further. Proper support can significantly enhance the durability and stability of the lid, especially in larger tanks. Additionally, selecting the appropriate materials ensures the durability and longevity of your DIY project. Considering waterproofing techniques can also help extend the lifespan of your lid by protecting it from moisture damage.
Once all supports are firmly in place, remove any protective film from the lid only after confirming that it sits flush on the tank and all equipment openings align properly. It is also beneficial to consider tank setup considerations when designing your lid to ensure it complements your overall aquascape and functionality. Finally, consider aesthetic enhancements that match your tank setup, like painting or adding trim, to give your lid a finished appearance. Regular maintenance includes checking the lid’s fit, cleaning it to prevent buildup, and inspecting supports for stability to keep your tank protected and looking great.
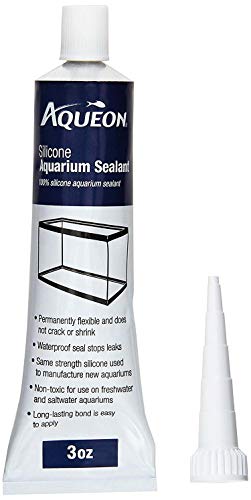
Waterproof seal stops leaks

SAFE FOR THE FISH: Selsil Aquarium Silicone is a silicone sealant used in glass bonding work. It does not contain chemicals or solvents that are not friendly to your fish or other organisms in the aquarium. This product is made from 100% silicone polymer, is used in aquarium manufacturing, and conforms with the ISO 11600 –F&G–25 LM standards.
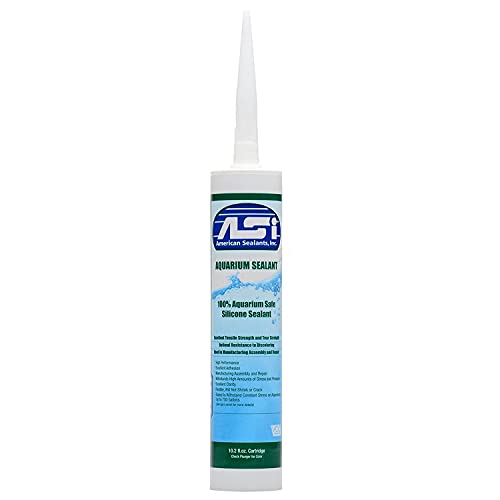
This high modulus component RTV Silicone Sealant forms strong cohesive bonds to glass without the need of primers