
If you’re wondering how to create your own pond vacuum without spending a fortune, you’re in the right place.
A simple DIY pond vacuum can be made with common materials like PVC pipes and hoses, saving you time and money on professional cleaning tools.
By the end, you’ll be able to build an effective system to keep your pond clean and clear.
What You Need to Know Before Building a DIY Pond Vacuum
Before building a DIY pond vacuum, understanding safety precautions and electrical considerations is essential. Since you’ll be working with electrical devices near water, always use a GFCI-protected outlet to reduce the risk of electrical shock. Ensure extension cords are rated for outdoor use and kept well away from the pond’s edge to prevent accidental water contact. Additionally, selecting the appropriate type of water softening salt can help maintain the health of your pond and equipment. Perform a dry test run before operating the vacuum to verify that all connections are secure and the pump functions properly. Check that the power supply matches the pump’s voltage requirements, and inspect all wiring for signs of damage or loose connections. Decide whether you will use a submersible pump placed inside the pond or an external pump connected via hoses. External pumps are preferable if your hose routing can support it, but submersible pumps are often easier to set up for certain pond layouts. Understanding electrical safety measures and proper wiring practices is critical to prevent accidents and ensure your DIY pond vacuum works reliably. Following these safety and electrical steps ensures your DIY pond vacuum is both safe to use and capable of working effectively.
How to Select the Right Components for Your Pond Vacuum
Choosing the right components for your pond vacuum involves selecting parts that provide sufficient power, durability, and safety. Aim for a pump with at least 300W and 0.5 to 1.0 HP, as this range offers strong suction suitable for medium to large ponds. Ensure the motor includes thermal protection to prevent overheating during prolonged use, which helps avoid damage and downtime. Using aquarium filter quality components can also enhance durability and water resistance in your pond vacuum. Use corrosion-resistant materials such as stainless steel or ABS plastic for critical components to withstand water exposure and reduce maintenance. Securing fittings are essential; employ bulkhead connectors, hose clamps, and quick-release valves to prevent leaks and facilitate easy assembly and disassembly. For hoses, choose diameters between 1.25 and 1.5 inches for the suction line and at least 1.5 inches for the discharge line; larger diameters reduce clogging and improve flow efficiency. Additionally, selecting components with corrosion resistance ensures your pond vacuum remains reliable over time, even in outdoor environments. Proper component selection ensures your pond vacuum performs reliably, lasts longer, and operates safely during cleaning sessions. Where possible, selecting waterproof electrical connections can further improve safety and longevity of your equipment.

AC Electric Pump - The air pump is perfect for indoor use with 110V AC socket. The cord length is about 1.6M/5.25ft, and the air pressure is 1.2psi/8800pa, you can inflate the Queen-size/King-size air mattress within few minutes, which saves much time than other old hand pumps

【Regenerative Blower】High pressure scroll annular blower side channel blower is made of aviation aluminium, precise and sturdy, fireproof, good heat dissipation, oil-free design, rustproof and long service life.
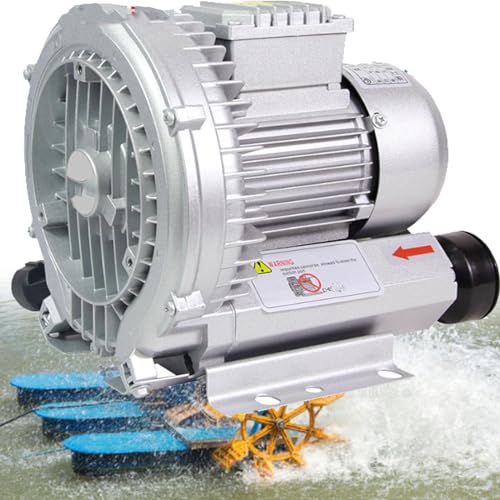
【The regeneration fan】 Adopts an integrated aviation aluminum shell, which has good heat dissipation performance, high temperature resistance, fire resistance, good heat dissipation, no rust, and long service life.
Step-by-Step Guide to Assembling Your Pond Vacuum
To assemble your pond vacuum, start by constructing the vacuum head. This is crucial for effective debris pickup and overall cleaning performance. Cut a length of PVC pipe to match your pond’s depth, typically between 3 and 5 feet, to ensure you can reach all areas comfortably without strain. Attach a mesh or leaf bag on the intake end to trap debris while protecting aquatic plants and fish from harm. For angled scraping, connect a 45-degree connector; for collecting fine debris, drill small holes into the head. Ensure the head remains rigid and stable during use. When choosing tank components for your pond vacuum, consider the exact tank dimensions and capacity to ensure it can accommodate your cleaning needs comfortably and fit into your storage space. Additionally, selecting a tank with proper ventilation and drainage options can help maintain safety and ease of maintenance.
Next, connect flexible tubing from the vacuum head to your pump, sealing all joints securely with hose clamps, duct tape, or PVC glue to prevent leaks. Attach a mesh filter at the inlet to further protect aquatic life from larger debris entering the pump. Finally, mount the head onto a pole that offers a balance of control and reach. Briefly test the assembled vacuum for leaks, stability, and ease of movement before starting your cleaning session.

WIDE CLEANING COVERAGE: 14.4" x 10.5" professional pool vacuum head covers more surface in each pass. Ideal as a pool vacuum head for inground pools and above ground setups to speed up routine maintenance.

【Ideal Size】- Pond Hose Outer Diameter: 1.23”, Pond Hose Inlet: 1”, Pond Hose Thick: 0.115'', Pond Hose Length: 20.7' . (Tolerance 0.12'' is allowed) The length can be freely cut according to your needs.

{DEEP CLEAN}: This vacuum head is perfect for deep cleaning of all pool types. Featuring an extra-large Triangle Shaped cleaning area designed for optimal suction, this vac head picks up dirt quicker & more efficiently than the average cleaner
How to Use Your Pond Vacuum Effectively
To use your pond vacuum effectively, start by preparing the area thoroughly. Remove all protective nets or covers and turn off pumps and filters to prevent interference during cleaning. Check that water levels remain above the vacuum’s intake to avoid dry running. Manually clear large debris like leaves and sticks to protect the vacuum from clogging or damage. Additionally, inspect the aquarium plants to ensure they are not disturbed during the cleaning process. Place the vacuum on level ground to prevent tipping or submersion, which could lead to equipment failure. For optimal results, inspect the tools and products to ensure they are suitable for your pond’s specific needs.
Before starting, verify that the pond’s filtration system is functioning properly to maintain water clarity during and after cleaning. Begin vacuuming in shallow zones first, then gradually move to deeper areas. Use slow, steady strokes to ensure thorough debris removal without disturbing the pond’s delicate bottom or edges. Apply gentle pressure to prevent damaging the pond floor or disturbing aquatic plants. Direct the discharge hose into a designated drainage site or garden area, making sure to keep pet access away from contaminated water. If chemicals or treatments are present, ensure they do not enter the pond during cleaning. Regularly monitor water levels and check the filter and debris collection system to maintain optimal performance.
Troubleshooting Common DIY Pond Vacuum Problems
A clogged intake or hose blockage is a common cause of reduced or no suction in your pond vacuum. Leaves, branches, or small toys can restrict water flow, so it’s important to remove these obstructions. To fix this, first remove the vacuum from the pond and manually clear out any debris. Flushing the hose with a garden hose can also help dislodge stubborn blockages. Next, inspect the hose and fittings for kinks, cracks, or loose connections, which can impede suction. Rinse dirty hoses thoroughly to ensure no residual debris remains. Air leaks around fittings or trapped air in the hose can further reduce vacuum efficiency. Check seals with soapy foam or fully submerge and shake the vacuum to detect leaks. Also, verify that water levels are high enough, hoses are properly submerged, and no obstructions are blocking debris intake. Regular cleaning of the vacuum head and hose helps maintain optimal performance, which prevents buildup that can cause blockages and reduces suction efficiency. Additionally, reviewing proper setup and maintenance practices can help prevent future issues. Ensuring the correct positioning of the vacuum can significantly improve efficiency and extend the lifespan of your equipment. Proper initial assembly and periodic checks are essential for consistent operation. Addressing these issues restores proper water circulation and makes your pond vacuum work effectively again.

This kit includes spa jet vacuum cleaner,a 13.5-inch pool brush,a semi-deep skimmer net and a 57.5-inch pole
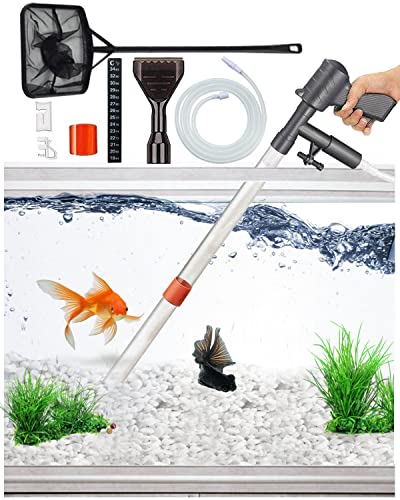
Mufti-functional cleaning kit: Aquarium gravel vacuum cleaner kit is a mufti-functional aquarium cleaner that uses (adopts)the siphon design principle, which includes the aquarium, aquarium sand washing, algae scraping, fish excrement cleaning, aquarium residual debris, and aquarium water changing. Quick water change gives fish (provides)a clean and comfortable aquarium living environment.

Complete Pool Vacuum Cleaning Kit: includes 1-1/2 inch x 18 ft pool vacuum hose, flexible weighted vacuum head and 13.7 ft adjustable pole, giving you the basic tools needed for manual suction cleaning of pool floors, corners and hard to reach areas
Maintaining and Enhancing Your Pond Vacuum for Long-Term Use
To keep your pond vacuum in good condition over the long term, regular maintenance is key. Clean filters by rinsing them thoroughly to prevent debris buildup that can impair suction. Flush hoses with clean water to remove dirt and algae, and empty debris from collection chambers often to avoid clogs. Inspect hoses, seals, and fittings for signs of leaks or wear, and tighten joints as needed to maintain optimal suction power. Store all components in a dry, organized space to minimize exposure to moisture that causes corrosion and mold growth. Before storing, dry each part completely to prevent damage. Upgrading to eco-friendly materials can reduce environmental impact and extend the lifespan of components. Additionally, implementing noise reduction measures, like adding insulation or shielding, helps keep operation quieter. Performing seasonal upkeep—such as cleaning filters and removing large debris beforehand—ensures your pond vacuum remains efficient. Regularly checking its performance and testing water quality help you identify issues early and prolong its usability for many seasons. Proper storage techniques are essential to prevent moisture buildup and maintain the vacuum’s longevity. Incorporating filter maintenance into your routine can significantly improve overall performance and durability. Considering component durability can also help you select parts that withstand the test of time. Lastly, keeping an eye on overall system health allows you to address potential problems before they escalate.
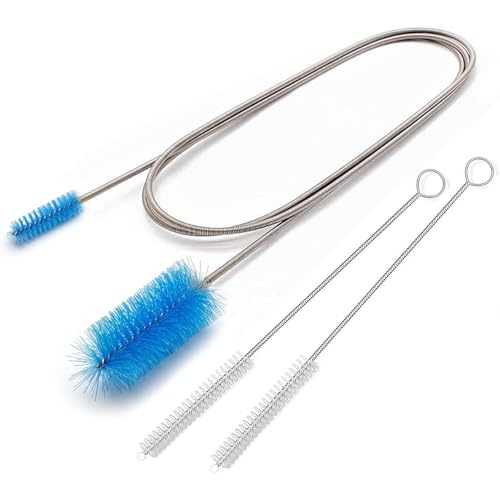
🚫UNCLOG NARROW TUBES INSTANTLY: Tired of water pooling in your fridge or grime clogging your aquarium filters? This 67-inch (170cm) extra-long flexible drain brush is the ultimate problem-solver. It easily snakes through deep, narrow, and curved tubing to effortlessly remove gunky buildup, dirt, and residue.

Multifuncation Aquarium Gravel Cleaner: The main function is automatic changer water; sand washer; debris cleaning; water filter; water shower; water cycle; With this product, make your fish tank cleaning activities are time-saving and efficient

The Universal Pump Filter Box cleans water, promotes the growth of beneficial bacteria, and protects pumps from debris in small ponds up to 500 gallons.