Noticing your pond isn’t holding water like it used to? Finding out where the leak is can seem tricky, but with some simple steps, you can identify the culprit.
From water tests to visual checks and even using dye, I’ll walk you through how to locate and repair that pesky leak.
Keep reading to get your pond healthy and full again.
How to Confirm If Your Pond Is Leaking, Not Evaporating
To confirm whether your pond is leaking or just evaporating, you can perform a simple water loss test. First, consider recent rainfall—if your area has had enough rain to refill your pond, evaporation is less likely to be the cause of water loss. Next, fill a 5-gallon bucket with pond water and place it on a shelf at the same height as your pond. Mark the water levels on the bucket and leave both the bucket and pond undisturbed for 24 to 48 hours. If the water levels in both the pond and bucket drop by a similar amount, evaporation is probably the main factor. However, if the pond’s water level drops significantly faster than the bucket’s, it suggests a leak. Keep in mind that wildlife activity around the pond can also influence water levels slightly. Monitoring water loss over several hours or days provides a more accurate assessment of whether you’re dealing with natural evaporation, wildlife interference, or a leak. Regular checks help ensure you catch potential leaks early before they become more serious, especially since detecting pond leaks can sometimes be tricky without systematic observation.
Perform a Visual Inspection to Spot Possible Leak Areas
Performing a visual inspection is an essential first step in spotting potential leak areas of your pond liner. Begin by examining the perimeter for signs of wet soil, muddy patches, or saturated berms, as moisture outside the pond indicates possible leaks. Look closely for wildlife activity or vegetation overgrowth near the edges; lush or unusual plant growth can signal persistent seepage in localized spots. Check the shoreline carefully for liner damage such as tears, punctures, or cracks, paying special attention to folds or seams where stress may concentrate. Inspect rocks and other rough objects along the edge for displacement that could puncture or damage the liner. Additionally, watch for wet spots beneath submerged rocks or decorations, which can help identify hidden leak zones before moving on to more detailed testing. To enhance your visual inspection, understanding aquarium starter kit characteristics can help familiarize you with common issues and signs of damage in pond liners. Recognizing leak indicators such as wet soil or damaged areas early can save time and prevent further water loss. Being aware of material vulnerabilities can help you identify potential weak spots that may not be immediately visible.
Use a Bucket Test to Detect Leak Presence
A bucket test can effectively detect whether your pond is leaking. Use a sturdy 5-gallon bucket filled with pond water and place it at the pond’s water level. Mark the water level in the bucket and in the pond before starting. Turn off pumps, filters, and water features to prevent plumbing or waterfall loss from affecting the results. Leave the bucket and pond undisturbed for 24 hours. After this period, check both water levels again. If the pond’s water level drops significantly more than the bucket’s, a leak is likely. Similar drops in both indicate water loss primarily through evaporation, which is normal and less concerning for fish health and water conservation. This simple test helps you determine if a leak exists before pursuing more invasive inspections. To ensure accurate results, consider the best pond aerator fountains that help keep water movement and reduce stagnation, which in turn minimizes false indications of leaks. Proper testing helps maintain a healthy aquarium water quality, promoting a stable environment for aquatic life.
Narrow Down the Leak Location: Basin or Plumbing?
To determine whether your pond’s leak is in the basin or the plumbing, pump-off testing is your most reliable method. Start by turning off the pump and observing the water level. If it stabilizes, the leak is likely in the plumbing, waterfalls, or skimmer components. If the water continues to drop, the basin or liner is probably the source. For greater accuracy, compare the rate of water loss with the pump on versus off. A larger drop during pump operation indicates a leak in the water features or fittings. Common plumbing issues include loose, dripping, or overtightened connections, especially around check valves or fittings. Additionally, frequent algae growth can signal ongoing leaks, as nutrients in the water encourage algae. Inspecting the waterline cutoff helps identify the leak’s approximate elevation. Preventing water loss is essential for maintaining healthy fish and avoiding stress caused by constant drops in water level.

2 Pack Pond Liner Repair Patch: Stop leaks fast with our pond liner repair patch. Two 10" x 10" patches made from premium butyl rubber for EPDM, PVC, and HDPE liners. Patch tears or seal seams with a flexible, watertight bond.

APPLICATION: RectorSeal pipe repair kit is a cost-effective pipe repair system; stops leaks on all rigid pipes in a variety of applications; knitted fiberglass cloth in polyurethane resin bonds to pvc, fiberglass, concrete, all metal pipes, and will seal harden in minutes

Premium Material: Pond liner patch kit is made of premium butyl adhesive, which is resistant to aging, high-temperature melting. More waterproof and has stronger adhesion. Pond liner patch kit can be used without special tools. It has long-lasting performance, making it a practical choice for maintaining pond linings and outdoor projects
Find the Leak’s Highest Point With Controlled Draining
To locate the highest point of a leak, start by draining your pond in a controlled way. Turn off your pump and waterfall to eliminate active water movement, so the pond drains only from leakage points. Fill the pond back to its normal full level, providing a clear reference point. Allow the water to drain naturally until it stabilizes, which indicates the lowest leak point. The highest point of the leak is where the water stops dropping; it typically occurs just above the stabilized waterline. This area often aligns with the most vulnerable spots, such as seams or folds in the liner. Remove nearby rocks, plants, and decorations at that water level, and carefully inspect these areas for signs of leakage. This process helps you accurately identify the leak’s highest point, enabling targeted repairs that protect your pond’s appearance and structural integrity. Leak detection techniques can further assist in confirming the leak’s exact location, especially through methods that detect water infiltration patterns in the liner.

Pinpoint Leaks with Precision - Symptoms of a pool leak may include rising water bills, chemical imbalance, algae blooms, or cracks in structure. Our DIY leak detection kit helps you quickly identify the exact source of the leak in your in-ground pool, above-ground pool, or hot tub for faster repairs.
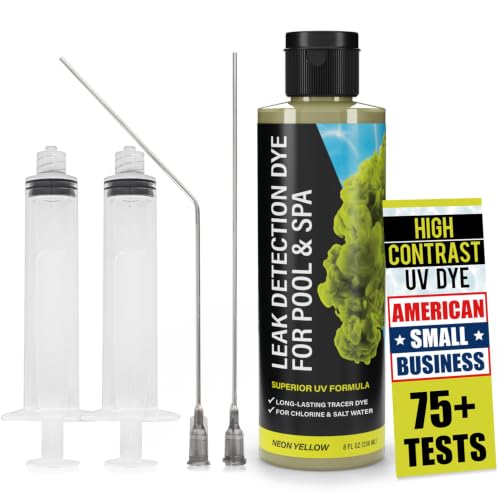
Easily Identify & Locate Leaks: 75+ tests per kit! This pool leak detection kit delivers a High-Contrast UV dye that glows brightly in sunlight and under UV light. It stands out against light and dark surfaces, making it just as effective as traditional blue dyes on light-colored backgrounds. This superior pool dye formula holds together underwater, ensuring easy & accurate leak detection

Easily Identify & Locate Leaks - 75+ tests per kit! This pool leak detection kit delivers a High-Contrast dye that easily traces flow paths. It stands out against light and dark surfaces, making it just as effective as traditional blue dyes on light-colored backgrounds. This superior pool dye formula holds together underwater, ensuring easy & accurate leak detection
Use Pond-Safe Dye or Milk to Pinpoint the Exact Leak Spot
To pinpoint the exact leak spot using pond-safe dye or milk, start by turning off the pump and choosing a calm, clear day with good lighting. This ensures minimal water movement, making it easier to observe the dye’s movement. Add small amounts of dye or milk near areas suspected of leaks, such as spots with algae growth or where wildlife activity is noticeable. Observe the water from a distance, watching how the dye or milk moves. If water is flowing smoothly, the dye will disperse evenly. If there’s a leak, the dye will pull toward a specific point, revealing the exact location. Applying dye or milk precisely where you suspect the leak increases accuracy and helps you identify whether the problem is near seams, cracks, or damaged spots. Using pond-chemical testing methods can further help verify the leak’s source, making the repair process easier. Conducting regular inspections can also prevent leaks from worsening over time. Additionally, understanding how water flow affects the movement of dye or milk can improve the accuracy of your leak detection. Use this method to mark the leak for a more straightforward repair process later.

WATER TRACING MADE EASY: Green Gobbler's highly concentrated fluorescent green water tracing dye is perfect for leak tracing, overflow analysis, discharge testing, dispersion and diffusion pattern analysis, sea marking and time-flow studies. Use it in pools, toilets, septic tanks, sewers and more.

CONCENTRATED WATER TRACING DYE. EcoClean Solutions’ Water Tracing Dye is perfect for leak tracing, dispersion/diffusion pattern analysis, overflow analysis, discharge testing, sea marking, and time-flow studies.

Highly concentrated fluorescent water tracing and leak detection dye
Inspect the Liner for Punctures, Tears, or Damage
To inspect your pond liner for punctures, tears, or damage, conduct a thorough visual examination. Begin by inspecting the entire surface, focusing on areas where rocks, sharp objects, or substrate could cause abrasion or damage. Look for discolored patches, algae buildup, or thinning spots which may indicate water seepage or underlying issues. Pay attention to aquatic plants, as they can obscure damage, and observe for signs of wildlife disturbance that could have caused tears. Examine folds, creases, and seams carefully, as these stress points are more susceptible to punctures. Use a soft brush to gently remove debris and reveal any hidden flaws. Additionally, gently probing with your hand can help detect soft spots, weak areas, or air bubbles, all signs of potential leaks. Regularly monitoring water levels and proper maintenance procedures can help prevent or quickly identify issues early on. Staying vigilant about aquatic plant placement can further protect the liner from damage, as improper placement might lead to abrasion. Consulting the top solar panels for pond pumps can also ensure your pond’s filtration system remains efficient while you inspect for leaks.
Check Common Leak Places: Skimmer, Waterfall, and Pipes
Inspecting common leak areas like the skimmer, waterfall, and pipes involves a methodical approach to pinpoint water loss. Start by turning off the pump and watching the water level. If it stabilizes, the leak is probably in the skimmer, plumbing, or waterfall system. Examine the skimmer box for gaps, cracks, or loose fittings around the opening, and consider dye testing near the skimmer throat to trace leaks. Check the waterfall liner, especially edges, behind rocks, and liner folds, for signs of seepage. For plumbing, scrutinize pipe joints, fittings, and connections for splits or loose fittings. Use dye or food coloring to track water movement and identify leaks more precisely. Remember that components like aquatic plants and pond lighting fixtures can sometimes obscure leak signs or complicate detection, so inspect thoroughly around these areas. Water loss during winter due to contraction can also cause leaks to develop or worsen in these spots, so pay special attention during colder months. Additionally, inspecting pond liners for tears or punctures, especially around areas with foot traffic or recent repairs, can help catch hidden leaks before they cause more damage.
A thorough examination of liner seams and any repairs or patches can reveal hidden vulnerabilities that may lead to leaks if not properly sealed or maintained.

Pond Repair Kit: This kit includes 5 pieces of pond liner repair patches, designed to repair damage, leaks, or cracks in pond liners, artificial water features, aquariums, rainwater collection systems, and more. This self-adhesive EPDM liner repair patch creates a permanent bond that instantly seals out air, water, and moisture.

country of origin : United States

Repair Kit for rust on the swimming pool wall at the skimmer opening
Repair Small Leaks With Pond Patch Kits and Sealants
To repair a small leak in your pond liner, start by draining the affected area completely and clearing away debris or mud. Next, use a scrubber pad with primer to prepare the surface; wait until it becomes tacky before applying the patch. Roll the patch evenly to prevent air bubbles and ensure good adhesion. Clean the surrounding area thoroughly, removing any algae and smoothing out wrinkles. Apply primer with gloves, scrubbing it in well, then seal the edges of the patch with a suitable sealant—use underwater sealant if the leak is underwater. Press firmly and allow the patch to dry for about 12 hours before refilling the pond slowly. A properly sealed patch helps prevent future leaks that could disturb aquatic plants or fish, keeping your pond healthy and balanced. Using the right sealant for pond repairs ensures a durable and waterproof fix, minimizing the chance of re-leaks.
Pond Repair Kit: This kit includes 5 pieces of pond liner repair patches, designed to repair damage, leaks, or cracks in pond liners, artificial water features, aquariums, rainwater collection systems, and more. This self-adhesive EPDM liner repair patch creates a permanent bond that instantly seals out air, water, and moisture.

Permanent seal: This Gorilla tape creates a permanent bond that instantly seals out air, water, and moisture
Pond Repair Kit: This kit includes 5 pieces of pond liner repair patches, designed to repair damage, leaks, or cracks in pond liners, artificial water features, aquariums, rainwater collection systems, and more. This self-adhesive EPDM liner repair patch creates a permanent bond that instantly seals out air, water, and moisture.
Tips to Prevent Future Leaks and Maintain Pond Integrity
Proactive monitoring and regular maintenance are crucial to prevent future leaks and preserve your pond’s structural integrity. Keep a close watch on water levels by marking the pond’s waterline with a permanent marker and checking it weekly to catch any drops early. Turning off auto-fill devices during inspections prevents masking leaks, allowing you to identify issues without interference. Managing water quality is also key—spot early signs such as algae blooms or damp soil near the pond edges, which may indicate seepage. Protect the liner by removing sharp debris and covering vulnerable areas with soil or mulch; avoid placing heavy rocks near edges to prevent punctures or abrasions. Regularly inspect seams, edges, and structural supports for signs of wear or damage, reinforcing weak spots before leaks develop further. Maintaining healthy plants around the pond reduces root intrusion that could puncture the liner and shields against UV damage. Establishing a routine inspection schedule—monthly or bi-monthly—ensures prompt detection of emerging problems, helping you address issues early and keep your pond safe, attractive, and leak-free over time.