
Having trouble setting up a sponge filter for your aquarium? It might seem tricky at first, but with the right parts and a clear process, you can get it running smoothly.
A sponge filter is a simple yet effective tool for keeping your tank clean and your fish healthy.
The steps below will guide you through the entire setup to ensure everything runs perfectly.
Why Use a Sponge Filter for Your Aquarium?
A sponge filter provides gentle filtration that benefits both your aquarium’s aesthetics and fish behavior. Unlike loud, powerful filters, sponge filters create calm, quiet water movement, which helps keep your tank clear and natural-looking. They produce low flow, making them ideal for small fish, shrimp, and fry that can be stressed by strong currents or turbulent water. The porous sponge traps debris effectively while allowing water to pass at a controlled rate, reducing the risk of fish being pulled into the intake. This mild operation encourages natural behaviors, minimizes stress, and promotes healthier, more active fish. Additionally, their simple design and low maintenance make them a smart choice for maintaining a peaceful and visually appealing aquarium environment. Their effectiveness relies on biological filtration, which supports the growth of beneficial bacteria essential for maintaining water quality. Proper water circulation is also crucial for ensuring all areas of the tank are effectively filtered and oxygenated. Efficient installation techniques can further enhance the efficiency of your sponge filter and ensure it functions optimally. Regularly monitoring and cleaning the sponge helps maintain its filtration capacity and overall effectiveness.
Gather All the Components You Need
Gathering all the components you need before starting is essential for a smooth sponge filter setup. First, ensure that the sponge filter body, lift tube, airline tubing, and fittings are compatible to prevent leaks or malfunctions. Check that the sponge size matches your tank’s dimensions; larger sponges offer more surface area for biological filtration, while smaller ones are better suited for compact tanks. Confirm your air pump’s power source and placement, ensuring it’s appropriate for your setup and easily accessible. Gather airline tubing long enough to reach your desired location—this also helps reduce noise during operation. Include connectors or collars for secure attachment, and select mounting hardware suited to your tank’s material and setup. Keep a bucket nearby for rinsing or maintenance, along with scissors or cutters to trim tubing to the desired length. Having all these components ready in advance minimizes disruptions and guarantees a straightforward, efficient setup process. Additionally, verifying the air pump’s airflow capacity ensures it provides sufficient aeration for your specific tank size. It’s also helpful to familiarize yourself with spare parts that might be needed for future repairs. To ensure long-term reliability, regularly inspecting filter components will help maintain optimal performance. Recognizing the importance of proper component compatibility can prevent issues that might arise during setup and operation.
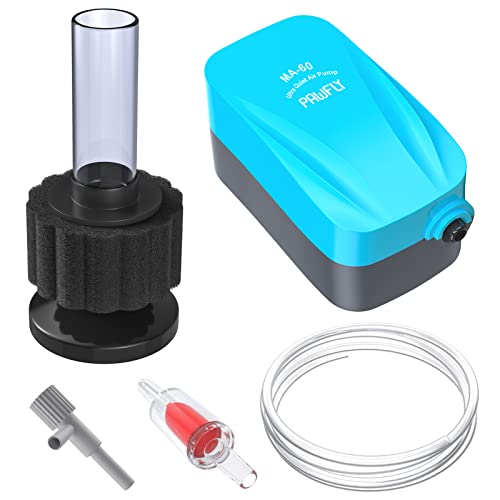
Fine Filtration Set: Driven by 40 GPH air pump, the sponge filter (1.5" D x 3" H) produces dense bubbles to increase oxygen content. Also trap and break down impurities to keep your tank crystal clear.

Easy Installation: Pass the lower column of the bracket through the pump hook, then clip the bracket on the wall of fish tank and rotate the knob to fasten the pump tightly.

Ultra-Quiet Operation: Driven by a thin piezoelectric ceramic plate, the fish tank air pump delivers gentle aeration at just 30 dB. Nearly as silent as a whisper! Perfect for bedrooms, offices, studies, and other spaces where peace matters
Prep and Inspect Your Parts Before Assembly
Before assembling your sponge filter, check each component carefully for damage or manufacturing defects. Ensure that the sponge, uplift tube or strainer, airline tubing, air stone or collar, and suction cups or clips are all present and compatible with your model. Look for cracks, warping, splits, or loose joints in plastic parts, as these issues can interfere with airflow and stability. Examine the sponge for tears, compressed sections, or debris that could reduce filtration efficiency. Make sure connectors seat firmly to prevent air leaks. Additionally, review the design for any model-specific parts like check valves or weighted bases. Rinse all components in dechlorinated or tank water to remove dust and residues, ensuring they are clean and safe before starting assembly. Performing a thorough initial inspection helps prevent airflow problems and ensures the filter operates effectively from the start, and understanding the filter’s components can assist in troubleshooting any issues that arise.
Assemble Your Sponge Filter Step by Step
To assemble your sponge filter, start by organizing all your parts—such as the sponge, uplift tube, base, and removable fittings—so everything is ready. Slide the foam sponge over the central stem or strainer column until it fits snugly. If your model has a weighted base, attach it to the bottom for added stability. Place the top cap or bullseye onto the uplift tube securely. Reinsert any removable connectors to ensure a secure pathway for tubing or air components. When installing the air path, insert the air stone if your setup supports it, then push the airline tubing onto the inlet nipple. Route the tubing through any supplied connectors to prevent kinks. Firmly connect all tubing to minimize leaks. Additionally, understanding the best aquarium setups can help optimize your filtration system’s effectiveness. Paying attention to proper filter maintenance ensures your sponge filter operates efficiently and prolongs its lifespan. To prevent common issues such as air leaks, double-check all connections and seals before operating the filter. Finally, make sure all removable parts are aligned correctly so the filter stays stable, operates quietly, and allows maximum water flow.
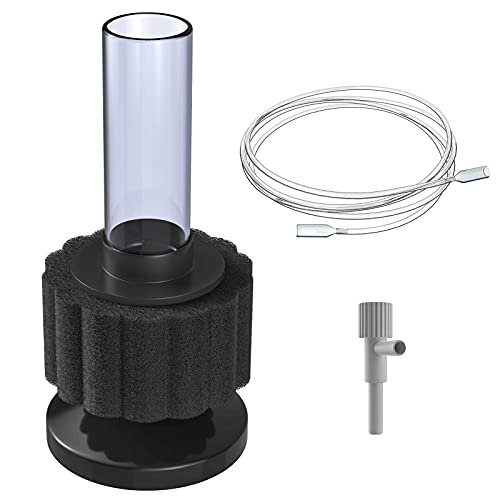
Fine Sponge Filtration: The bio sponge filter provides mechanical and biological filtration and traps debris or waste without sucking up your fish, keeping a crystal clear water tank.

Sponge filter provide both mechanical and biological filtration
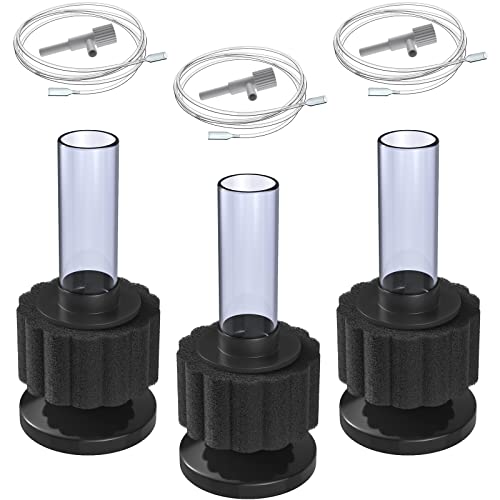
Fine Sponge Filtration: It provides mechanical and biological filtration and traps debris or waste without sucking up your fish, keeping a crystal clear water tank.
Position Your Sponge Filter in the Aquarium
To position your sponge filter correctly in your aquarium, place it at the bottom with the weighted base securely sitting on the substrate. Extend the uplift tube fully toward the tank’s full depth to promote efficient water circulation. It should be situated where the rising bubble column effectively circulates water, avoiding dead spots or stagnant areas. Keep the filter slightly away from decorations and glass to allow free water movement and prevent obstruction of the lift tube. Use suction cups or clips to keep the filter upright and stable, reducing movement caused by fish or maintenance. Proper placement ensures adequate flow, efficient filtration, and stability, all of which support a healthy aquarium environment. Additionally, consider proper husbandry practices, including maintaining appropriate water parameters and ensuring correct lighting and temperature, to promote the well-being of your aquatic life. Ensuring correct filter positioning can significantly enhance your aquarium’s overall health and clarity, especially when combined with effective water circulation techniques.
Connect the Air Pump and Adjust Bubble Flow
To connect your air pump to the sponge filter and adjust the bubble flow, start by attaching the airline tubing to the pump’s outlet nozzle. Ensure the tubing is cut slightly longer than necessary to accommodate movement and avoid tension on the connection. Thread the tubing through the filter’s top or lift-tube opening before securely attaching it to the air inlet. Confirm that the entire air pathway is airtight, with no loose sections or kinks, to prevent leaks. It’s important to verify that the selected filtration method suits your tank size and Fish Choices for Your 55-Gallon Aquarium to ensure optimal performance. Checking the tubing for proper airtight fitting helps prevent air leaks that could reduce filtration efficiency. To control the bubble flow, install an air control valve inline with the tubing. Gradually turn the valve to adjust the size and strength of the bubbles. Proper bubble regulation helps maintain steady filtration, prevents excessive water movement, and keeps debris and aquatic life undisturbed, leading to optimal sponge filter performance. Additionally, proper maintenance of the tubing and fittings ensures consistent operation over time.

Reliable Airflow Connection - This standard airline tubing connects aquarium pumps to air stones, under-gravel filters, and decorative ornaments. A dependable solution for maintaining steady airflow during new setups, system upgrades, or routine tank maintenance.

The Airline Tubing is made of fish-safe material, it is thickened and wear-resistant,and should not crack or become brittle
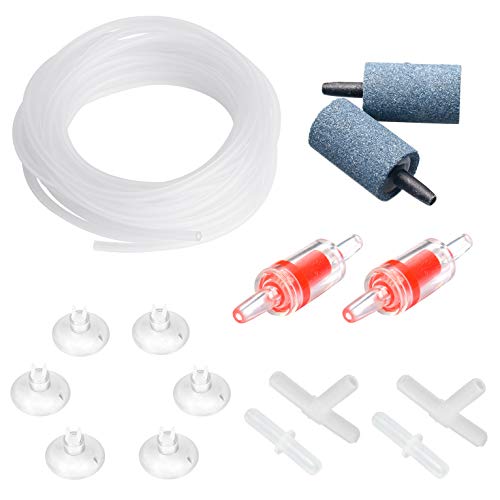
All In A Package: No Worry About Mismatching - Complete air pump accessories of airline tubing, air stones, connectors, suction cups and check valves for basic aquarium aeration setup.
Start Your Sponge Filter and Check for Proper Operation
Ensure all components—sponge, lift tube, and air-stone insert—are fully assembled and correctly positioned before powering on your sponge filter. Submerge the filter completely to force out trapped air, then squeeze the sponge several times underwater to improve water flow. Position the filter where you can easily observe initial bubbles and water movement. When you turn on the air pump, look for bubbles rising steadily through the lift tube; this indicates proper airflow. A consistent stream of small to medium bubbles signifies optimal operation, promoting effective water circulation without creating excess turbulence. Adjust the airflow control valve if bubbles become too strong or too weak. Regularly check that the filter remains stable and monitor water movement to ensure efficient and quiet operation. Proper assembly is crucial for optimal performance of your sponge filter. Additionally, maintaining the right water flow is vital for a healthy aquarium environment, supporting long-term animal health and well-being.
Maintain and Troubleshoot Your Sponge Filter
Maintaining your sponge filter requires regular inspection and careful cleaning to ensure it functions properly over time. Check flow rates and surface agitation weekly to detect early signs of flow loss, which can impact biological stability. During water changes, gently clean the sponge using old tank water to avoid removing beneficial bacteria that promote biological filtration. Squeeze the sponge until the water runs clear, taking care not to twist or wring it, as this can damage its structure and reduce filtering ability. Regularly inspect airlines, uplift tubes, and connectors for buildup or blockages, clearing them with brushes or swabs as needed. Monthly visual checks for slime, discoloration, or foul odors help catch potential issues early. When replacing worn sponges, do so gradually alongside existing media to maintain biological stability and extend your filter’s effectiveness. Proper cleaning techniques help preserve bacterial colonies, which are essential for maintaining a healthy aquarium environment. Additionally, understanding biological filtration can help you optimize your filter’s performance and longevity. Recognizing the importance of filter media maintenance ensures your aquarium remains a stable habitat for your turtles.

Dimension: 8x4.5cm/3.2” x1.8”, the inside hole diameter is 2cm/0.8”; for a snug fit, check the size you need carefully before placing an order. The sponge's inner diameter accommodates filter intake within 0.8-1 inches (20–25.4 mm) due to its elastic properties.

Efficient Filtration: The high-density and unique structure of the sponge provide exceptional mechanical filtration. It effectively captures and removes impurities, suspended particles, and waste from the water, maintaining a clear and stable aquatic environment for the well-being of your aquatic organisms.

✅Excellent Filtration Performance - The fine porous structure design gives it excellent filtration effect, it can effectively capture impurities in the water such as fish feces, fish food residues and suspended particles, thus maintaining clear and healthy water quality for fish and aquatic life.
Troubleshooting Common Sponge Filter Problems
If your sponge filter isn’t bubbling as it should, the most common cause is an airflow issue that you can troubleshoot. First, check if the air pump is running properly and providing enough pressure for the filtration. You can test this by disconnecting and then reconnecting the airline to see if the airflow resumes steadily. If the pump is weak or not functioning properly, consider replacing it.
Next, examine the airline tubing for kinks or blockages that could restrict airflow. Clear any obstructions or replace the tubing if needed. Ensure all airline connections are secure and properly attached to the filter’s inlet. A loose or improperly fitted connection can hinder airflow significantly. Verify that the check valve, if you have one installed, is correctly positioned and free of debris to maintain a consistent flow of air.
Lastly, inspect the sponge itself for buildup of detritus or dirt. If the sponge is clogged, water flow and bubbling will slow down. Clean it thoroughly or replace it if cleaning doesn’t restore proper flow. Regularly cleaning or replacing the sponge material prevents internal build-up and keeps the filter functioning efficiently. Addressing these airflow issues promptly helps your sponge filter perform efficiently, maintaining healthy water conditions in your aquarium.
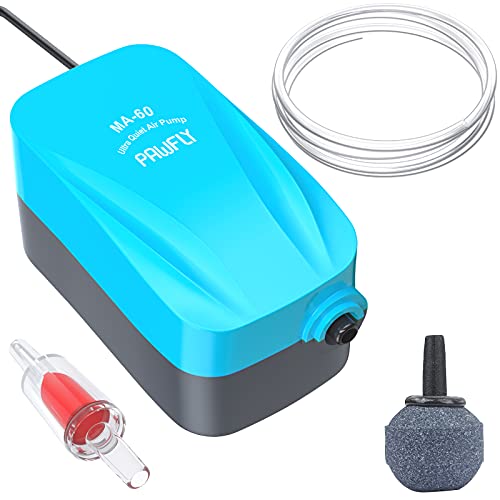
Compact & Light: Measures 3.3" L x 1.8" W x 1.6" H. Ideal for those who are tight on space. Suitable for 5 - 20 gallon fresh and marine fish tanks and aquariums.
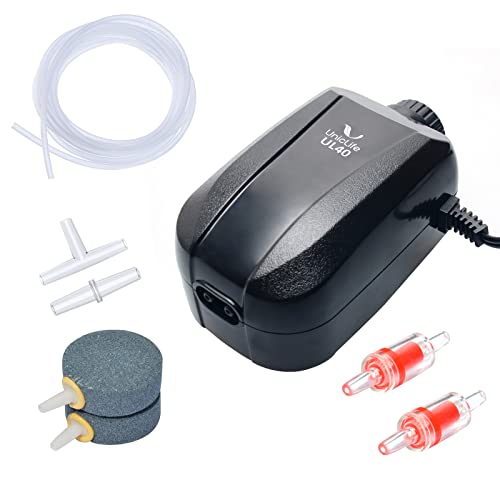
Steady Output: Max Air Flow Rate: 64 GPH; Pressure: 0.016 MPa; Power: 4 W. Perfect for aeration in 10 - 100 gallon fresh water and marine aquariums.(The data is measured with experimental equipment and may deviate slightly from the actual data. The air volume may be insufficient due to the blocked air intake cotton. Please replace the cotton yourself if the air volume is insufficient.)

For 0-5 Gallon Tanks: Compact size: 2.95" L x 2.95" W x 2.25" H. Fit perfectly in nano fish tanks up to 5 gallons. Fit for the breeding and feeding of fry, shrimp, or various ornamental fish