
Getting a reef tank started can feel overwhelming, especially when you’re unsure how to safely establish the right environment for your corals and fish.
The key is cycling—building up beneficial bacteria to keep water chemistry steady so your tank’s inhabitants thrive.
With a clear process and patience, you’ll be able to create a healthy, balanced reef setup.
Keep reading for the full step-by-step guide.
How to Understand the Nitrogen Cycle in Reef Tanks
The nitrogen cycle in reef tanks typically takes about four to six weeks to establish. During this process, beneficial bacteria grow and develop enough to efficiently convert waste products into less toxic compounds. When ammonia appears—often from fish waste or decaying matter—these bacteria begin converting it into nitrite within a few days. Next, other bacteria convert nitrite into nitrate, which is less harmful but can still promote algae growth if levels get too high. This process is essential for maintaining a stable environment, and its completion signals that your tank is ready for marine life. Monitoring water parameters regularly is essential. Ammonia levels should decrease as bacteria establish themselves, followed by a drop in nitrite levels as the same bacteria consume it. Nitrate levels will gradually rise but should be kept under control through water changes or live rock filtration. Proper temperature and oxygen levels also support bacterial development and prevent fluctuations that could hinder the cycling process. Ensuring adequate water circulation helps distribute oxygen evenly and promotes faster bacterial growth, which can speed up the cycling process. Additionally, maintaining consistent water parameters minimizes stress on beneficial bacteria, supporting a smooth transition through the cycle. Temperature, oxygen levels, and good circulation speed up this process, but if it’s too hot or poorly aerated, bacterial development can slow or become unstable. Recognizing these stages helps you know when your tank is cycling properly and ready for marine life without risking toxic buildup.
Preparing Your Reef Tank for Successful Cycling
Proper preparation of your reef tank is crucial for a successful cycle. Begin with an aquascape that accommodates your planned inhabitants, using rinsed dry rock and sand to prevent unwanted debris or bacteria. Place biological media, such as bio-balls or ceramic rings, in high-flow areas to encourage bacterial colonization. Fill the tank with RO/DI water mixed to reef salinity, ideally 35 parts per thousand (ppt) or a specific gravity (SG) of 1.025, measured with a calibrated refractometer. Maintain a temperature between 77 and 79°F, which supports bacterial growth without stressing the system. Ensure circulation pumps, return pumps, and heaters run continuously to keep conditions stable. Keep lighting at minimal levels or turned off during cycling to prevent algae buildup and dust from dry rock settling into the water. Maintaining proper water chemistry is essential during this process to prevent setbacks. Stable water quality, adequate oxygenation, and effective filtration create an optimal environment for beneficial bacteria to establish and thrive, and ensuring proper tank stability supports a healthy growth of microbial colonies. Proper tank setup promotes faster biological filtration development, helping you achieve a stable and thriving reef tank more efficiently.
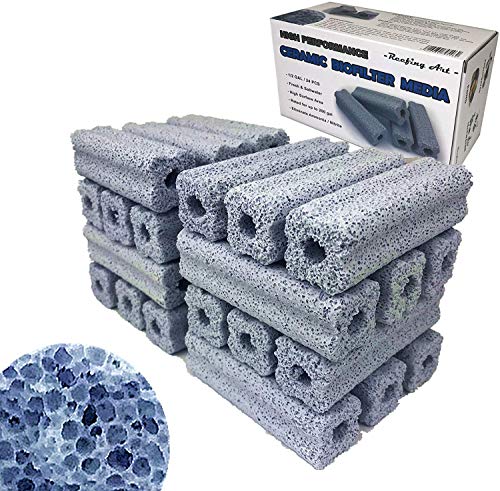
Each box: 24 pcs / half gallon / 1.75lbs

Made in United States
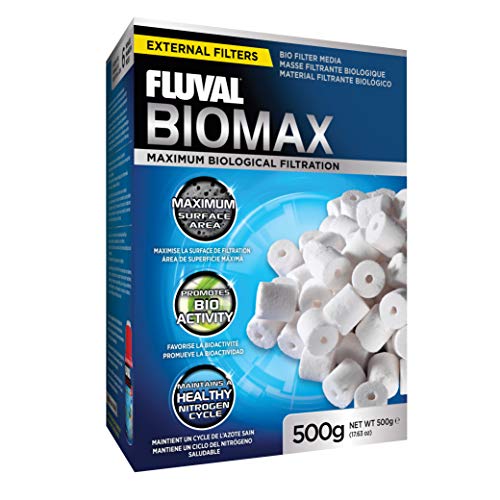
Filter Compatibility: Compatible with Fluval Filter Series 106, 206, 306, 406, FX5, FX6, 105, 205, 305, 405, 104, 204, 304, and 404.
How to Choose and Dose Ammonia Safely
Choosing the right ammonia source and dosing it correctly are essential for safely cycling your reef tank. The best option is pure ammonium chloride, as it allows for precise measurement and consistent dosing, helping you maintain ammonia levels within a safe range. Organic sources like raw shrimp or fish food can start the cycle but have unpredictable ammonia output and slow control, which can complicate your process.
Be cautious when using liquid ammonia solutions; always check the ingredients for additives such as surfactants or perfumes that can harm your tank. To prevent ammonia toxicity, dose slowly and evenly in a high-flow area of the tank to ensure proper dispersal. Waiting for thorough mixing before testing ammonia levels again is critical for accurate readings. Keep your dosing consistent by recording each amount, and only re-dose once ammonia drops near zero.
Aim for an initial ammonia level of 1.5 to 2.0 parts per million (ppm). Never exceed 3 to 4 ppm, as higher concentrations can inhibit bacterial growth and delay the cycle. After ammonia levels fall close to zero, confirm that it has been fully processed before adding more. This careful approach helps establish a healthy biological filter without risking tank harm. Monitoring your ammonia levels regularly is crucial for maintaining effective biological filtration during cycling. Furthermore, understanding your tank’s ammonia levels can help you adjust your dosing strategy effectively.

FISHLESS CYCLING AQUARIUM CLEANING TREATMENT: The ammonium chloride solution from DrTim’s Aquatics offers a chlorine-free method for sanitizing new aquaria or when cycling water when fish or coral are not present. This powerful solution makes fishless cycling mess free.

Patience is key. Each aquarium is different. It may take approximately 7 to 30 days to completely cycle the aquariu (ammonia and nitrite are both 0ppm)

Essential for Nitrifying Bacteria: Provides a precise ammonia source required for beneficial bacteria such as FritzZyme or TurboStart to thrive and complete the nitrogen cycle when fish are not present
Monitoring Nitrogen Levels During Cycling
Monitoring ammonia daily early in the cycling process is essential to accurately track bacterial development. Once ammonia levels begin to decline, switch to testing nitrite daily to observe its rise and subsequent fall. Expect a temporary nitrite spike, which indicates the nitrification process is underway correctly. Regular testing of water parameters—aiming for ammonia and nitrite to reach zero—marks significant progress in establishing a stable cycle. When nitrate levels start to increase, it shows the cycle is advancing, but high nitrate concentrations should be avoided as they can promote algae growth and compromise water quality. Test for nitrates weekly, or more frequently if necessary, to maintain balanced levels. Understanding the nitrogen cycle and consistent monitoring help ensure a stable nitrogen cycle, helps control algae, and prepares the environment for healthy marine life. Ensuring the water parameters remain within optimal ranges is crucial for maintaining water stability and overall aquarium health.

Contains one (1) API AMMONIA TEST STRIPS Freshwater and Saltwater Aquarium Water Test Strips 25-Test Box

Seachem sensor technology

5-in-1 Master Test Kit: Monitor all 5 critical water parameters – pH, nitrite, nitrate, ammonia, and phosphate – in one comprehensive aquarium test kit. The rigorous analysis helps you maintain an ideal haven for your aquatic friends
How to Speed Up Cycling With Live Rock and Bacteria
Using cured live rock significantly shortens your cycling time because it already hosts established nitrifying bacteria that quickly begin processing ammonia and nitrite. To speed up this process, add bottled nitrifying bacteria to increase bacterial concentrations rapidly. Placing the live rock in high-flow areas helps disperse bacteria evenly, supporting faster colonization. Maintaining environmental conditions such as a stable temperature around 78°F and salinity at 1.025 SG optimizes bacterial activity. Keep lights off or very dim during cycling to minimize nuisance algae growth and allow bacteria to establish without competition. Removing excess dead matter from the live rock before starting reduces decay-related ammonia spikes. Controlling algae growth through lighting adjustments is crucial during this phase and helps speed up the overall cycle. Monitoring and adjusting water parameters regularly ensures optimal bacterial activity and prevents unwanted algae outbreaks during cycling. Additionally, paying attention to water parameter stability is essential for maintaining a healthy environment as the bacterial population establishes itself. Ensuring proper water circulation and oxygen levels also enhances bacterial growth efficiency, contributing to a quicker and more successful cycle. Incorporating techniques such as moderate dosing of beneficial bacteria can further accelerate the process.

🐟 Live Nitrifying Bacteria for Rapid Cycle: FritzZyme 7 Freshwater contains live, species-specific strains of nitrifying bacteria, proven to quickly reduce toxic ammonia and nitrite levels, significantly reducing fish loss and cycle time in new and established aquariums.

Contains one (1) API QUICK START Freshwater and Saltwater Aquarium Nitrifying Bacteria 4-Ounce Bottle

Easy to dose gel ball
How to Know When Your Reef Tank Is Fully Cycled
Your reef tank is fully cycled when ammonia and nitrite levels are at 0 ppm, and nitrates reach at least 10 ppm. To confirm this, dose the tank with ammonia to 1–2 ppm and re-test after 24 hours. If after this period both ammonia and nitrite are undetectable, it indicates your biofilter is functioning properly. Maintaining stable water parameters during this process is essential to ensure an accurate reading. Keep an eye on algae growth, as excessive algae can interfere with test results or signal nutrient imbalances that need addressing. Adjust your lighting to control algae if necessary. Once nitrates increase steadily and remain above 10 ppm, and ammonia and nitrite stay at zero, your tank is ready for adding livestock. Regular testing and monitoring of water parameters help ensure a successful cycle, including checking the beneficial bacteria levels to confirm the growth of helpful microbial colonies. Additionally, monitoring nitrate levels closely can prevent potential issues associated with nutrient spikes.
Post-Cycle Nitrate Reduction Before Adding Fish
Lowering nitrate levels after the initial cycle is crucial before adding fish. Water change techniques are the most effective method for this purpose. Large water changes—removing 75–90% when nitrates exceed 40 ppm—quickly bring nitrate levels down. Smaller, daily water changes of 25–50% also work well until nitrates fall below 20 ppm. A typical goal for fish-only systems is to keep nitrates under 20 ppm. Regular testing helps you monitor water quality and determine the right timing for introducing livestock. When performing water changes, ensure the new water matches the tank’s salinity and temperature. Aim for a specific gravity around 1.025–1.026 and a temperature within 2–3°F of the tank’s current temperature to prevent stressing or shocking the fish. During this process, nitrate reduction through water changes helps stabilize levels, gradually preparing your tank for livestock. Using proper testing methods also ensures accurate readings and better control over nitrate levels. Once nitrates remain consistently below the target level, you can transition to routine maintenance and introduce fish safely. Monitoring nitrate levels regularly allows you to know when it’s safe to add fish and ensures your tank remains in optimal condition.
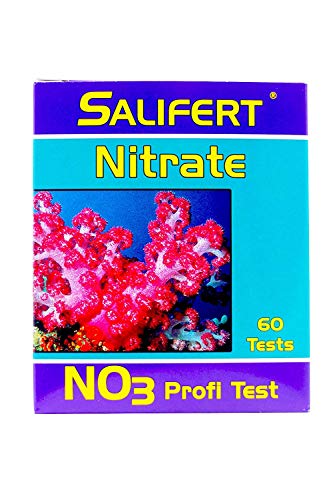
Premium liquid test kit for precise nitrate measurement in aquariums

Contains one (1) API NITRITE TEST KIT 180-Test Freshwater and Saltwater Aquarium Test Kit, including 1 bottle of testing solution, 1 color card and 1 test tube with cap
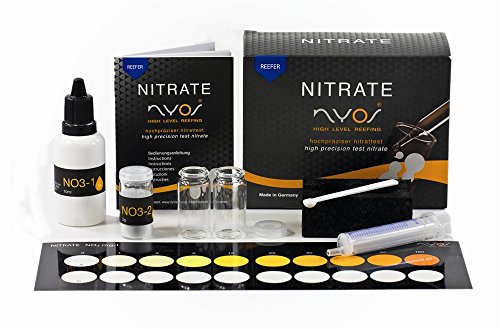
Precise Nitrate Testing: Developed for saltwater, this kit offers highly sensitive measurements ranging from 1–160 mg/l NO3.
Troubleshooting Common Cycling Problems
If ammonia and nitrite levels remain high beyond 24 hours, you need to troubleshoot your cycle. First, ensure your water parameters are stable: salinity should be between 1.025 and 1.026 specific gravity, pH should be in the range of 8.0 to 8.3, and temperature should stay consistent between 76 and 80°F. Check for signs of algae overgrowth, which indicates excess nutrients and poor water quality that can slow down bacteria development.
Lighting plays a key role here. Too much light can promote algae growth, disrupting the cycling process. Reduce or modify lighting to help control algae. Also, confirm that you are dosing 1 to 2 ppm ammonia daily and that both ammonia and nitrite levels drop to zero within 24 hours before moving forward. If levels stay stagnant, try using established biomedia from an existing tank or adding bacterial supplements designed to boost your cycle’s progress.
Finally, avoid making sudden changes to temperature or salinity, as these can further stress bacteria or slow their activity. Maintaining consistent environmental conditions and monitoring water parameters regularly are crucial steps in troubleshooting and successfully completing your cycle. Ensuring proper bacterial colonization on all surfaces can significantly improve the cycling process, especially if you’re using dead substrate or rock.