Struggling with how to create an effective sponge filter for your aquarium? Building your own can be straightforward and budget-friendly while keeping your fish healthy.
With just a few common materials like PVC pipes, aquarium-safe foam, an air pump, and some simple assembly steps, you can make a reliable filter that fits perfectly in your tank.
Keep reading to see how all the pieces come together.
Why Use a DIY Aquarium Sponge Filter?
A DIY aquarium sponge filter is an effective choice for small or lightly stocked tanks because of its gentle biofiltration. Its large surface area encourages beneficial bacteria to grow, which helps convert harmful ammonia and nitrite into less toxic compounds. This creates a healthier environment for your fish and fosters a balanced ecosystem. Beneficial microorganisms colonize the sponge, enhancing biological filtration. In addition to biological filtration, sponge filters provide gentle mechanical filtration by trapping debris and particles. This keeps the water clearer without creating strong currents that could stress sensitive fish or fry. This low-cost filtration option offers excellent value for hobbyists seeking an affordable setup. Their discreet appearance means they blend into the tank’s background, maintaining an attractive look. The simplicity of their design and low cost make DIY sponge filters accessible for hobbyists. They operate quietly and require minimal maintenance, making routine cleanup straightforward. Their soft flow prevents injury to delicate species, promoting overall fish health and reducing stress. Additionally, easy DIY construction allows hobbyists to customize and maintain their filters at a low cost.
What Materials and Tools Do You Need to Build It?
You will need the following materials and tools to build a DIY aquarium sponge filter. Select PVC pipes in 1/2-inch or 3/4-inch diameter based on your tank size, since larger tanks require bigger pipes for adequate filtration. Aquarium-safe end caps are necessary to seal the pipe ends securely. For stability, a sturdy base such as tile, rock, or similar flat material is recommended to keep the filter in place.
The filter media primarily includes a dense foam sponge cut to fit around a perforated pipe or tube—this is what traps debris and provides surface area for beneficial bacteria. An air pump is essential for driving water flow, paired with airline tubing to connect the pump to the filter. An optional diffuser like an air stone can help distribute air bubbles evenly, increasing oxygenation. Choosing the right sponge porosity can significantly impact filtration efficiency and biological capacity. Additionally, selecting appropriate filtration media can enhance biological filtration and overall health of your aquarium. It’s also important to consider how different biological filtration options can support the growth of beneficial bacteria essential for a healthy aquatic environment.
Tools needed comprise a drill with a small bit for drilling pilot holes into the PVC pipe, a hobby knife or sharp cutter to shape and size the sponge filter media, and a PVC cutter for adjusting pipe lengths. Additional hardware such as a marker for precise measurements, suction cups for attaching the filter to tank walls, and a hammer or nail to punch small holes into the pipe for better water flow are also useful for assembly.

Essential Aquarium Filter Guard: the precision-engineered grille structure effectively blocks small fish, shrimp, snails, and large debris such as leaves from being pulled into the filter pump intake; As a reliable aquarium filter intake guard, it prevents clogging, protects your filtration system, and maintains stable water circulation

【Accurate 1/2 Inch SCH40 Size】Each package includes 6 pcs 1/2 PVC pipes, each measuring 17 inches long. This 1/2 inch diameter PVC pipe is made to standard SCH40 sizing with a 0.84 inch outer diameter and 0.64 inch inner diameter. Please confirm the actual pipe size before purchase, as this item is not a 2 inch, 3 inch, 6 inch or 7 inch pipe.

VERSATILE PURPOSE:Use as a strainer in tubing system such as biotope aquarium water circluation,pond pumping and irrigation system.
Build Your Aquarium Sponge Filter Step by Step
To assemble your sponge filter properly, begin with the main components: the foam sponge, the inner strainer or lift tube, and the base. Join the strainer pieces securely to ensure that airflow passes through the center, which is crucial for effective filtration. Attach the weighted base firmly to keep the filter stable and prevent it from floating or tipping, both of which can disturb your aquarium environment. Position the air stone or outlet at the bottom or center of the assembly, depending on your specific model. Double-check that all parts fit snugly to maintain maximum airflow efficiency, as loose connections can reduce filtration and promote algae buildup. Always verify that the assembly is secure and fish-safe before submerging the filter to prevent any issues once it’s in use. Additionally, ensure that the sponge itself is placed securely over the opening so water can flow through all areas without bypassing the filter media, which optimizes biological filtration and enhances water quality. Paying attention to proper assembly techniques can help prevent potential issues and extend the lifespan of your filter. Properly maintaining your sponge filter through regular cleaning can also improve its performance and longevity.
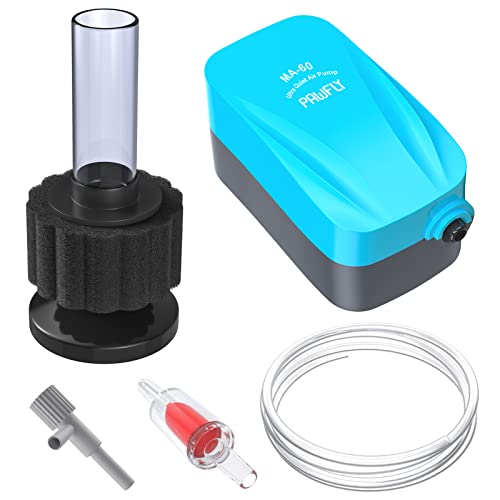
Fine Filtration Set: Driven by 40 GPH air pump, the sponge filter (1.5" D x 3" H) produces dense bubbles to increase oxygen content. Also trap and break down impurities to keep your tank crystal clear.
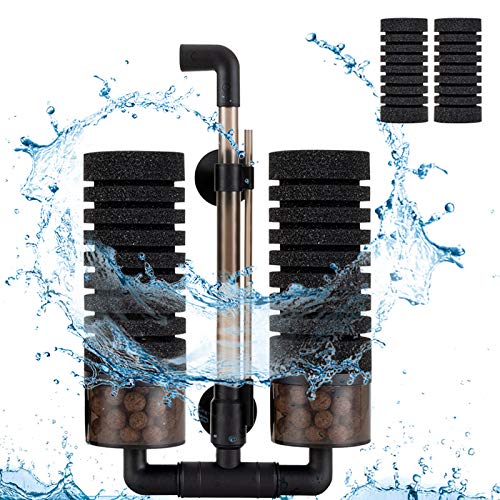
Biochemical Filtration: With an air pump as the power source, combined with mechanical filtration, the principle of biological filtration utilizes multi-level filtration to produce good things, and the sponge can absorb fine particles to achieve the effect of purifying water. The water flow is controlled by the airflow, which is small and slow and does not impact the fish

Easy Installation: Pass the lower column of the bracket through the pump hook, then clip the bracket on the wall of fish tank and rotate the knob to fasten the pump tightly.
Where and How to Place Your Sponge Filter in the Aquarium
Place your sponge filter near the bottom of the aquarium to ensure effective removal of debris and waste that settle low. Position the outlet close to the water surface to create a stronger upward flow and surface agitation, which enhances oxygen exchange. Keep the filter unobstructed by rocks, plants, or decorations, as blockages can limit water circulation and disturb fish behavior. Ensure the uplift tube is positioned vertically for steady bubble production and stability. The filter should sit firmly on the substrate without tipping or floating during setup. Place the air pump outside the tank, above the water surface, to prevent backflow. Route the airline tubing neatly to avoid kinks, which helps maintain consistent airflow and optimal filtration performance. Proper placement of the sponge filter also promotes water circulation, crucial for maintaining a healthy aquarium environment. You can also support the growth of beneficial bacteria by adding beneficial bacteria supplements to aid in biological filtration. Both styles are easy to set up and operate.

Sponge filter provide both mechanical and biological filtration
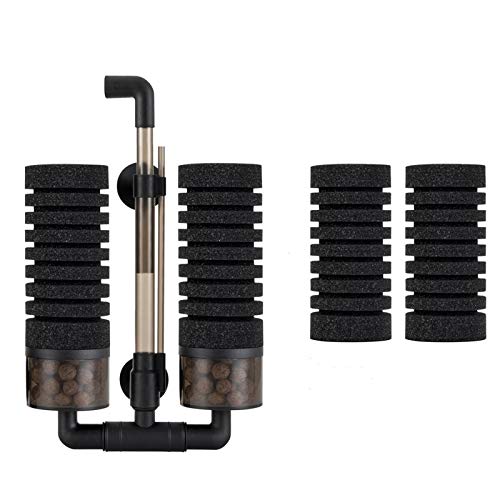
【Multi-filtration functions】this sponge aquarium filter combines bio-filtration, oxygenation and physical filtration in 1 and also makes small water flow, which can ensure the excellence of the water quality. Helps your small fish or shrimp to live a happy, healthy life
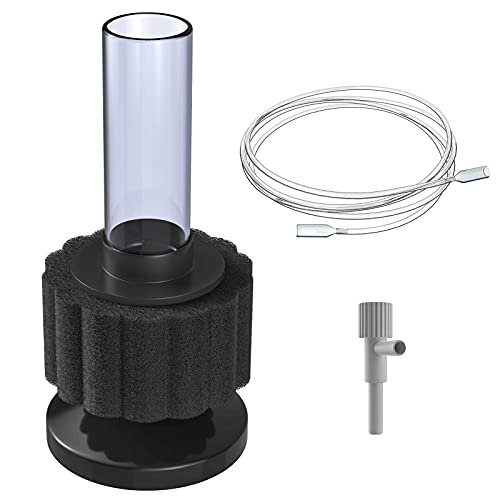
Fine Sponge Filtration: The bio sponge filter provides mechanical and biological filtration and traps debris or waste without sucking up your fish, keeping a crystal clear water tank.
How to Maintain and Clean Your DIY Sponge Filter
Maintaining and cleaning your DIY sponge filter is crucial for consistent filtration and healthy aquarium conditions. You should base your cleaning frequency on noticeable flow reduction or visible buildup, rather than following a fixed schedule. During water changes, remove the sponge and rinse it in old tank water to protect beneficial bacteria and avoid chlorine damage. Use gentle squeezing, not twisting, to remove trapped debris; rinse until the water runs mostly clear. Don’t expect the sponge to look spotless—residual dirt is normal. If your filter has removable parts, clean each component separately to help preserve beneficial bacteria. After rinsing, reassemble the sponge, ensuring water flows smoothly through the system. Proper cleaning prevents debris buildup, keeps bacterial colonies healthy, and ensures your filter functions properly without risking a mini-cycle. Additionally, understanding the appropriate cleaning frequency can help maintain optimal biological filtration and avoid unnecessary disturbances to your aquarium’s ecosystem. Regularly monitoring water parameters can also help detect early signs of filtration issues before they impact your aquatic life.
Troubleshooting Common Issues With Your Filter
When your sponge filter isn’t functioning properly, the first step is to identify the root cause quickly. Start by checking the air pump—ensure it is running and delivering sufficient airflow. Examine the airline tubing for kinks, disconnections, or blockages; any of these can restrict airflow. Use fine tools like a needle or pin to clear minor obstructions and rinse all removable parts thoroughly to remove debris or slime buildup. Proper water flow indicates functional filtration, so monitoring the flow can help you determine if the filter is working correctly. Poor circulation often results from an undersized filter or incorrect positioning of the outlet. Adjust the outlet’s placement to promote better water flow, or consider adding a second filter if circulation remains weak. Improper installation can lead to flow issues or surface agitation; double-check that all components are assembled according to the manufacturer’s instructions. Regular maintenance, including cleaning the sponge and inspecting the airline, is essential for optimal performance. Monitoring water quality and replacing or cleaning parts as needed helps maintain a healthy environment and ensures your filter functions effectively. Additionally, algae growth or debris buildup can cause clogging, so performing routine filter maintenance routines is crucial for avoiding these common issues. Performing routine water parameter testing can also help you catch issues early and prevent future problems.
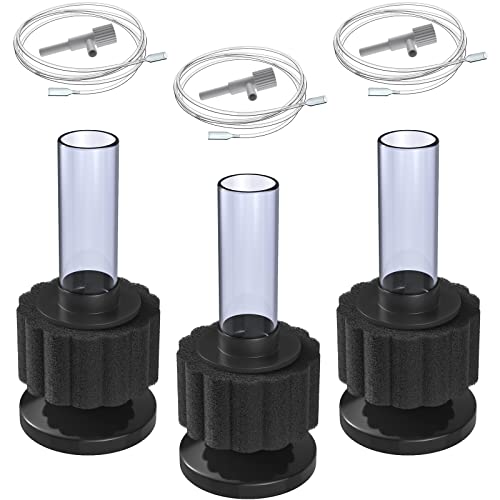
Fine Sponge Filtration: It provides mechanical and biological filtration and traps debris or waste without sucking up your fish, keeping a crystal clear water tank.

This sponge filter is super mini size, takes up a little room, perfect for fish tanks up to 2 gallon

Dimension: 8x4.5cm/3.2” x1.8”, the inside hole diameter is 2cm/0.8”; for a snug fit, check the size you need carefully before placing an order. The sponge's inner diameter accommodates filter intake within 0.8-1 inches (20–25.4 mm) due to its elastic properties.
Easy Upgrades and Variations to Enhance Your Filter
Enhancing your sponge filter with simple modifications can significantly improve its performance. Cutting internal spokes inside the sponge cage creates larger passages, making it easier for an airstone to introduce bubbles without restricting water flow. Positioning the airstone deep within the lift tube or PVC core ensures more even bubble distribution, which improves lift efficiency and water circulation. Using tight airline fittings helps maintain consistent bubble output and reduces noise during operation. Implementing appropriate filtration media can further enhance biological or mechanical filtration efficiency depending on your aquarium’s needs.
For multi-stage filtration, stacking two sponge filters or setting up a dual-filter system can be very effective. One filter can focus on debris removal while the other enhances biological filtration, increasing media volume and promoting nitrifying bacteria growth. Replacing disposable cartridges with reusable foam and bio media extends the filter’s lifespan and reduces ongoing costs. Adjusting the shape of the uplift tube can further optimize water movement, while adding prefilters prevents debris from clogging the main sponge, maintaining steady water flow and overall filtration performance. Incorporating custom modifications like adjustable lift tubes or additional media chambers allows tailored optimization to suit your specific aquarium setup.

Comprehensive Package Contents: this under gravel aquarium filter set includes 6 black undergravel filter plates, 2 adjustable lift tubes, 2 straight air tubes, and 1 customizable activated carbon filter sponge; All components are designed to work together for efficient filtration in various aquarium setups

Complete Filter Kit: Includes 12 interlocking filter plates, 1 adjustable lift tube set (with fitting), 1 check valve, 1 regulator, 1 extra air stone, 1 x 39" extra airline tubing, and all required connectors—everything to build your undergravel system. (Please note: air pump and tank are not included and must be prepared separately.)
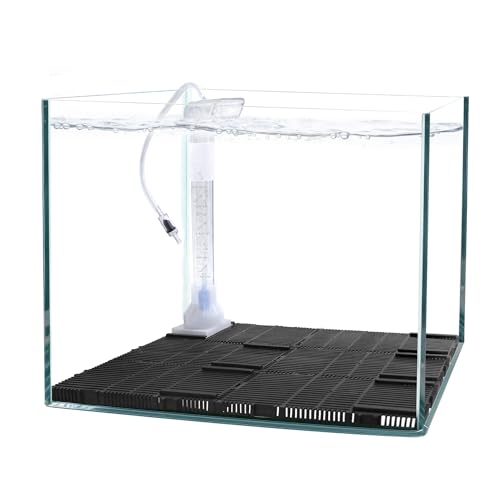
Complete Filter Kit: Includes 6 interlocking filter plates, 1 adjustable lift tube set (with fitting), 1 check valve, 1 regulator, 1 extra air stone, 1 x 39" extra airline tubing, and all required connectors—everything to build your undergravel system. (Please note: air pump and tank are not included and must be prepared separately.)
Safety Tips for Building and Installing Your Filter
To build and install your aquarium sponge filter safely, follow these key precautions. First, ensure electrical safety by keeping all electrical connections dry and elevated away from splash zones. Adding a drip loop to power cords helps prevent moisture from traveling into outlets, reducing the risk of electrical shocks or short circuits. Keep the air pump positioned above water level or in a protected area to prevent siphoning that could cause flooding. Confirm that airline and check-valve placements are correct; improper airflow direction can impair filter performance. Use aquarium-safe silicone and non-toxic plastics when bonding parts to avoid contamination and ensure water compatibility. Fully snap or connect all components before submerging the filter in water, and saturate the sponge beforehand to check stability. Always unplug the pump before cleaning or making adjustments to avoid electrical shocks. Proper maintenance also involves regularly inspecting the filter components for wear or damage, which can prevent leaks or malfunctions. Following these safety measures helps create a secure and efficient DIY filter setup.
The Benefits of Making Your Own Sponge Filter at Home
Making your own sponge filter at home is highly cost-effective, often costing just a few dollars in total. You can use inexpensive materials like sponge, PVC pipe, airline tubing, and an air pump, which are readily available and affordable. This approach saves you significantly compared to buying a commercial filter, especially if you need multiple units or a larger setup.
DIY sponge filters are highly customizable, allowing you to adjust size and flow rate to match your tank’s specific needs. Their large surface area supports beneficial bacteria, which help maintain water quality by breaking down harmful ammonia and nitrite. This biological filtration makes them particularly suitable for breeding, quarantine, or delicate tanks where gentle filtration is important.
In addition to biological filtration, sponge filters mechanically trap debris, keeping the water clear with minimal maintenance. The soft flow produced by an air pump creates a calm environment, reducing stress for sensitive fish and fry. The simple design means components are easy to clean and reuse, making maintenance straightforward and cost-saving in the long run. Overall, a homemade sponge filter offers an efficient, flexible, and budget-friendly solution for your aquarium.