
Struggling to find a sturdy, affordable stand for your 10-gallon aquarium? Building one yourself can be a simple, cost-effective solution that ensures a perfect fit and added safety.
With just basic materials like wood, screws, and glue, you can create a custom stand that’s both stable and stylish.
Keep reading to see how easy it is to make your own.
Why Building Your Own Aquarium Stand Saves Money and Ensures a Safe, Custom Fit
Building your own aquarium stand can save you money by costing around $100 in materials like wood, screws, and glue. This is often less expensive than purchasing a pre-made commercial stand, especially when you customize the size to perfectly fit your tank. A DIY stand allows you to tailor the dimensions for a snug, secure fit, which helps prevent uneven weight distribution and minimizes the risk of tipping or instability. Ensuring proper load support is crucial; horizontal frames and vertical supports distribute the weight evenly, safeguarding your tank from structural failure. You can also calculate your load capacity to ensure your stand is strong enough to support the weight of your aquarium safely. Additionally, building your own stand gives you control over the height, improving your viewing experience and making maintenance easier. It also offers the flexibility to choose lighting and filtration setups that integrate seamlessly with your specific stand design, optimizing your entire aquarium setup. Designing the stand carefully can help prevent common issues such as wobbling or uneven surfaces, which are often caused by poor construction or improper weight distribution. Proper planning and using quality materials can greatly enhance the stand’s durability and stability. Customizing the design allows for adjustments to fit different tank sizes and configurations, further enhancing stability and usability.
Choose the Right Materials for Your DIY Aquarium Stand
Selecting the right materials is crucial for a sturdy, long-lasting DIY aquarium stand. For load-bearing parts, use straight, dry wood free of defects—such as 2×4 or 2×6 lumber, or square timber—to ensure structural integrity. These materials provide the strength needed to support the weight of the tank safely. The top platform should be made from ¾-inch plywood or marine plywood, with thicker options recommended for larger tanks to prevent bowing or flexing. Fasteners like construction screws combined with wood glue create strong joints, while drilling pilot holes helps prevent splitting.
Using moisture-resistant materials such as marine plywood and applying protective finishes like water-resistant polyurethane can significantly extend the stand’s lifespan. Cost-effective options include standard framing lumber and plywood, which offer a good balance between affordability and durability. Proper material selection ensures your stand remains stable over time, reducing the risk of failure and keeping your aquarium safe. Additionally, choosing aquarium-safe materials prevents potential damage from water exposure and ensures the safety of your fish. Incorporating moisture-resistant materials also helps combat humidity and spills that are common in aquarium setups, and selecting materials with environmentally friendly features can be beneficial for sustainability.
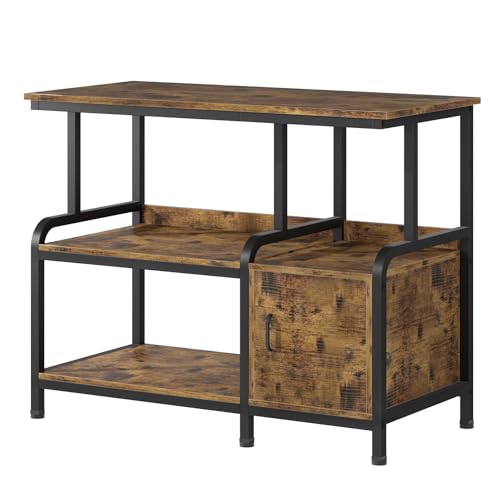
Fits 20-37 Gallon Aquarium Setups: The spacious 36.8 x 15.7 in top platform accommodates common 20, 29, 30 and 37 gallon tank setups. Please check your aquarium base dimensions before ordering for a proper fit.
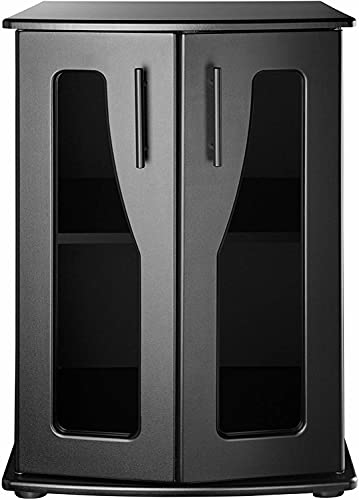
Features door with black tinted acrylic panel for added elegance and slim handle

Fit for 10-30 Gallon Fish Tank Stand: Measuring 30”L x 11.8”W x 30.5”H, this heavy-duty aquarium stand is suitable for 20, 29, and 30-gallon tanks. The top shelf supports up to 350 lbs—safe for fully loaded tanks with water, substrate, and decor. Pro tip: Double-check your tank dimensions before purchasing for a seamless fit!
Plan Your Stand Dimensions for a 10-Gallon Tank
The stand for your 10-gallon tank should measure approximately 20 to 24 inches in width and 10 to 12 inches in depth. These dimensions ensure the stand provides adequate support by distributing the tank’s weight evenly. Since standard 10-gallon tanks typically measure around 20 inches by 10 inches by 12 inches, your stand’s base should closely match or slightly exceed these measurements to prevent unsupported edges. Some commercial stands are built larger, around 22.8 inches by 10.6 inches or even 24 inches by 12 inches, offering added stability and room for placement. Always verify your tank’s exact dimensions before cutting or building your stand to ensure a proper fit. Proper sizing of the support structure is key to maintaining stability and preventing accidents. The increased dimensions also help accommodate minor variations in tank manufacturing tolerances, ensuring a secure and stable setup. Understanding the importance of tank support weight distribution can help you choose the most suitable stand size for your aquarium.
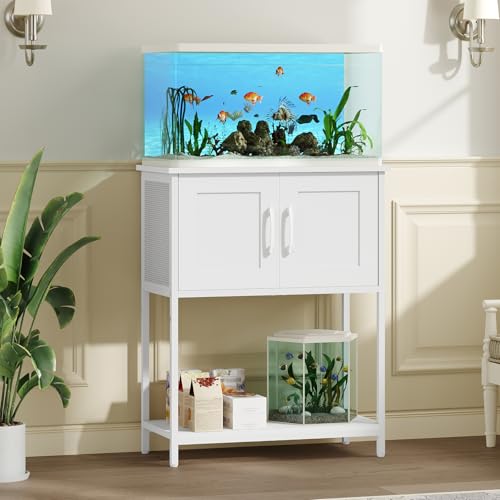
Fits 10 Gallon Aquariums: This fish tank stand features a 23.6"L x 11.8"W surface for common tank sizes, supporting up to 450 lb while the lower shelf supports 150 lb, providing a stable base for both rectangular and bowed-front aquariums (Measure your tank first for a proper fit)

Dual-Tank 2-Tier Design for Multi-Use Convenience: MZNZ 10 gallon fish tank stand now features an upgraded 2-tier structure with a built-in storage cabinet—place a full 10 gallon display tank on top and a small 2-5 gallon breeding/isolation tank on the bottom shelf. The enclosed cabinet keeps your space tidy while the open lower shelf maintains easy access for tank maintenance. Perfect for aquarium enthusiasts who want a multi-level aquatic setup without cluttering their space.

Dual-Tank 2-Tier Design for Multi-Use Convenience: MZNZ 10 gallon fish tank stand now features an upgraded 2-tier structure with a built-in storage cabinet—place a full 10 gallon display tank on top and a small 2-5 gallon breeding/isolation tank on the bottom shelf. The enclosed cabinet keeps your space tidy while the open lower shelf maintains easy access for tank maintenance. Perfect for aquarium enthusiasts who want a multi-level aquatic setup without cluttering their space.
Build Your Aquarium Stand Step-by-Step
To start assembling your aquarium stand, gather all the lumber and tools you’ll need, making sure to cut and prepare your pieces accurately. Use 2×4 lumber for the main frame and legs to ensure strength and stability. Pre-drill screw holes in each piece to prevent splitting when assembling. Lightly sand all edges and surfaces so that parts fit together smoothly and to achieve a polished finish. The precision in measuring and cutting reduces the risk of misalignment during assembly, ensuring a sturdy and professional-looking stand. Paying attention to correct measurements and cuts is vital for a seamless assembly process and a durable final product. Proper planning and structural integrity are essential components of a successful build that can support the weight of your aquarium confidently. Ensuring material quality and sturdiness from the start can greatly influence the longevity and safety of your stand.
Dry-fit the components first by assembling the main frame and legs without glue or screws. This step confirms proper alignment and ensures your corners are square. Build two rectangular frames—one for the top and one for the bottom. Join these frames securely with screws and wood glue to add rigidity and strength to the structure.
Attach the vertical legs at each corner of the frames, ensuring they are flush and properly aligned. For wider tanks, add extra supports or braces between legs for added stability. Install a plywood top panel, making certain it is level and securely fastened. For additional functionality, consider adding a lower shelf beneath the main frame to hold equipment or store supplies like aquarium decor or cleaning supplies.
Before placing your aquarium on the stand, test its stability by applying weight and verifying that it remains level and wobble-free. A stable, level stand is crucial for the safety of your fish and the longevity of your setup.

Heavy Duty & Stable Frame: Made from sturdy metal and P2-grade engineered wood, this terrarium stand with six legs, and is used to securely secure heavy glass, PVC, or acrylic snake enclosure.

Fit for 120 Gallon Reptile Terrarium: With a desktop size of 48" X 24", ideal for reptile tanks or aquariums. The bottom 31" x 22" space accommodates a smaller reptile cage, creating a double terrarium stand.
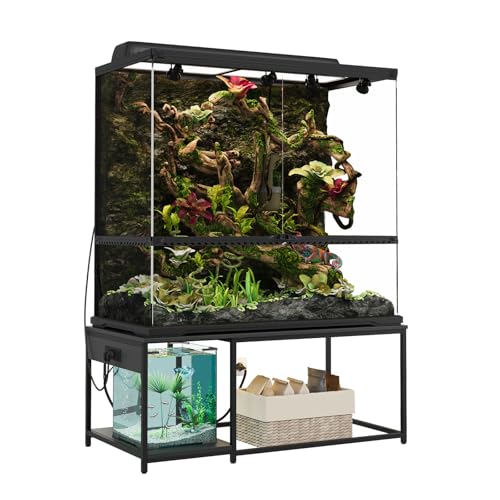
Heavy Duty & Stable Frame: Made from sturdy metal and P2-grade engineered wood, this reptile tank stand with six legs, and is used to securely secure heavy glass, PVC, or acrylic reptile enclosures.
Reinforce and Strengthen Your Stand for Safe, Long-Lasting Support
To reinforce and strengthen your aquarium stand for safe, long-lasting support, focus on precise measurement and alignment during reinforcement. First, check the diagonals corner-to-corner to ensure the frame is square; this prevents racking under load. Use a level to verify that each leg is plumb and the top surface is perfectly flat before installing braces. After placing each support, recheck the alignment, as uneven reinforcement can distort the frame. Concentrate reinforcement on stress points such as corners and mid-span areas where twisting or sway may occur. Adding plywood panels enhances shear strength and distributes weight more evenly, which increases overall material durability. Strengthen joints with screws, wood glue, and metal brackets to ensure lasting support. Proper reinforcement maintains balanced weight distribution, providing a safe, durable foundation for your aquarium. Additionally, ensuring the entire structure is free from water damage before reinforcement is crucial, as compromised material can weaken the entire stand. Being aware of potential structural weaknesses allows you to address vulnerabilities before they escalate. Recognizing signs of material deterioration can help prevent future failures and extend the lifespan of your stand.

VIVO Reinforcement Brackets: We create affordable solutions designed with creativity and quality to transform your unique workspace. This product is a steel reinforcement bracket kit that adds extra support to your desk clamp and monitor setup
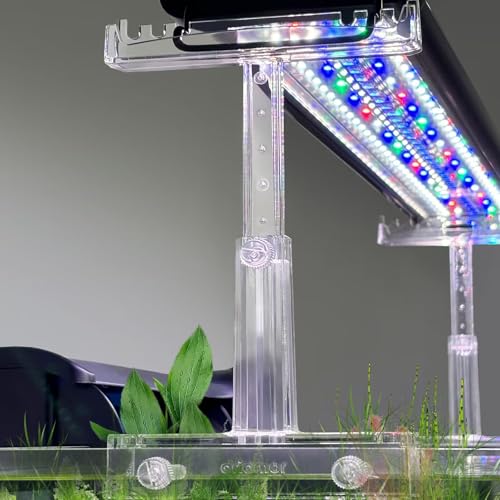
Better Compatibility: Compare with the regular riser, The plus one is best compatible with bigger fish tanks with rim thickness less than 3CM,Our aquarium light holder adopt clear acrylic material, it stands seems to blend in with your fish tank, it will not prevent you from enjoying the view of your fish tank. For aesthetics, we offer 3 sizes of screws to fix the pedestal, please choose according to your fish tank thickness

BENEFITS - hygger aquarium light riser is designed to lift up aquarium light over the fish tank up to 8.3 inches tall, spreading the light out, making everything crystal clear and leaving no dim corner. Great for planted tank to help control alg-ae growth. It also avoids aquarium led light from getting too close to water surface, thus rising water temperature
Attach Legs and Additional Supports for Stability
Attach the legs securely and position the supports correctly to ensure a stable aquarium stand. Place the legs at each corner, directly underneath load-bearing points, to effectively transfer weight. Use two legs per corner for added stability, making sure they sit flush against both the top and bottom frames. This alignment helps prevent twisting or racking when under load. For wider stands, especially those exceeding 60 cm in width, add mid-span support braces along the longer sides to reduce flexing. Secure support braces snugly at each corner before fastening with screws to strengthen the joints. For enhanced lateral stability, incorporate diagonal cross braces on the outer faces of the stand, which help prevent side sway and improve overall support. Incorporating features like aquarium stand stability ensures your setup remains secure and safe for your aquatic life. Additionally, using proper construction methods enhances the durability and safety of your DIY stand.

What is it used for: It is use for hanging and adjusting the height of the aquarium lamp. We have make 5 point location on the bracket for your reference,to make sure the same height of the left and right side holder (Please make the two side on the same height to keep the balance of the aquarium light). Confirm the height and fix it with screws

High-quality material: plastic material, strong and durable, easy to use

Dual-Tank 3-Tier Design for Multi-Use Convenience: MZNZ 5-10 gallon fish tank stand is designed for aquarium and reptile enthusiasts alike—its vertical 3-tier structure lets you place a full 10 gallon display tank on top and a small 2-5 gallon breeding/isolation tank on the bottom shelf. Perfect for aquarium enthusiasts who want a multi-level aquatic setup without cluttering their space.
Add a Top Deck to Distribute the Tank’s Weight Evenly
Adding a top deck to your aquarium stand is essential for distributing the weight evenly across the entire structure. It provides a continuous bearing surface that helps spread the load of your tank, which is crucial for maintaining stability and preventing point loading. Use a flat, rigid material like plywood or OSB sheathing, cut slightly larger than your aquarium footprint. This overhang ensures proper support and aids in weight distribution. Secure the deck tightly with screws, making sure there is no movement or sagging that could stress the tank’s bottom. A well-built top deck also aligns with the outer frame, improving load transfer and reducing wobble. When combined with sturdy supports, it keeps your aquarium level, safe, and ready to accommodate lighting and other equipment properly. Measuring carefully before cutting ensures a proper fit and prevents errors that could compromise stability. Additionally, understanding the importance of water quality can help prevent unnecessary stress on your setup, ensuring your tank remains stable over time. Being aware of load distribution principles can further enhance the stand’s durability and safety.
Finish Your Stand With Painting or Staining for a Professional Look
Thorough surface preparation is essential before applying paint or stain. Sand the surface with 100–150 grit to remove roughness and create a good bonding surface. Follow up with 180–220 grit sandpaper to smooth the surface further, which helps stain or paint adhere evenly and reduces the appearance of brush marks. Lightly sand along edges and corners to prevent splintering and improve coverage. After sanding, remove dust with a damp cloth to ensure a clean, dust-free surface. When selecting a finish, consider how the color matches your room’s style—darker stains like walnut add richness, while natural wood stains highlight grain and texture. Apply thin coats using a brush or rag, brushing with the grain to achieve a smooth, even finish. Multiple coats enhance durability and improve the final appearance. Good ventilation and allowing adequate drying time between coats are crucial for a professional, flawless look. Proper surface preparation is also important to prevent peeling or uneven absorption over time. Additionally, understanding the types of finishes suited for woodworking projects can help you achieve the desired look and protection.
Common Mistakes to Avoid When Building Your Aquarium Stand
Accurately measuring your aquarium’s dimensions is essential for selecting the correct stand size. The stand’s footprint should closely match the tank’s base measurements to prevent overhang and uneven weight distribution. When calculating the stand’s load capacity, include the weight of water, substrate, and equipment—use an estimate of 1.2 to 1.4 kg per liter of tank volume. Choosing a stand that’s too small or too large can cause instability, increasing the risk of wobbling or tipping. Always double-check measurements before construction, and confirm that the stand can support the full weight of your filled aquarium for a safe and stable setup. Proper measurement techniques are critical to ensure the stand will adequately support the tank without risk of failure.
Level and Secure Your Stand for a Safe Aquarium Setup
Ensuring your stand is level and secure is crucial for a safe aquarium setup. Begin by checking the floor beneath the stand with a bubble level to confirm it’s even; an uneven surface can shift stress into the tank’s base, risking damage. Clear debris from all four corners and the center of the stand’s footprint to spot low spots before placing the tank. Place a bubble level on the top surface of the stand and check at multiple points to ensure accuracy. Use shims made of wood or plastic to raise any uneven corners, tapping them snugly into place, and recheck the level regularly during adjustments. Tighten all adjustable legs and braces to eliminate wobbling and guarantee even support across the entire stand. Once assembled, perform a final level check and confirm the stand’s stability before filling the tank, securing long-term durability and safety.