Starting a saltwater aquarium can feel overwhelming, especially if you’re new to the hobby. The key is choosing the right size tank—around 20 to 40 gallons—so you can manage it without too much hassle.
With the right equipment and careful setup, you’ll be able to create a healthy environment for your fish and enjoy a vibrant underwater world.
The steps to get there are simpler than they seem, and the full guide below will walk you through each one.
Decide on the Right Aquarium Size and Setup Space
Choosing the right aquarium size is crucial for a successful saltwater setup. A good starting point is a tank between 20 and 40 gallons, which provides manageable chemistry stability and easier maintenance. Tanks around 40 gallons or larger, such as a 60 cube or breeder tank, offer more swimming space and better opportunities for aquascaping, making them suitable for beginners looking to progress. Measure your space carefully to ensure the tank and stand fit comfortably and consider future access points for maintenance. Avoid tanks that are too tall, as they can be harder to access and maintain. Planning your size and shape thoughtfully creates a strong foundation for a healthy, stable saltwater aquarium. Keep in mind that larger tanks, generally over 80 gallons, require more time and experience to manage effectively, which may not be ideal for beginners just starting out. Additionally, selecting an appropriately sized aquarium can reduce the likelihood of issues related to water chemistry fluctuations. Understanding tank volume and its impact on water parameters is essential for maintaining a balanced environment for marine life. It’s also helpful to research space requirements to ensure your setup is sustainable.

360° FLEXIBLE HEAD: build in a 360-degree rotatable ball joint design, the wave maker can easily adjust any direction of water current to satisfy different angle needs, has helped keep tank clean by reducing dead corners

🐟【Leaves Water? Power Cuts Instantly — Auto Restarts When Submerged】 Most aquarium heaters keep running when exposed to air during water changes or evaporation — causing meltdowns, cracked glass, or fires. This heater’s built-in sensor detects the moment it leaves the water and immediately cuts power, with an audible alarm to alert you. When you place it back in the water, it automatically resumes heating at your previous temperature setting. No reprogramming, no panic, no dead fish.
🌻【Leaves Water? Power Cuts Instantly — Auto Restarts When Submerged】 Most submersible aquarium heaters keep running when exposed to air during water changes or evaporation — causing meltdowns, cracked glass, or fires. This aquarium water heater has a built-in sensor that shuts off power the moment it leaves the water, with an audible alarm to alert you. When re-submerged, it auto-restarts at your previous setting. Your fish and turtles stay safe even when you’re not watching.
Choose Essential Equipment for a Saltwater Tank
A comprehensive filtration system is essential for a saltwater tank’s stability and health. It should include mechanical filters to trap debris, chemical filters such as activated carbon to remove toxins, and biological filters that house beneficial bacteria to process waste. The filtration capacity must match your tank’s volume to ensure effective cleaning without overloading the system. A high-quality protein skimmer is also crucial; it removes organic waste before it breaks down, helping keep water clear and preventing foul odors. Proper water circulation prevents dead spots where debris and waste could accumulate. Use at least two powerheads or flow pumps to create even movement across the tank, which enhances overall filtration and circulation. This helps distribute heat, oxygen, and nutrients while discouraging the growth of algae in stagnant zones. For temperature control, install a reliable heater paired with a digital thermometer or controller to maintain a consistent 75 to 82 degrees Fahrenheit. Lighting is just as important; aim for around 8 watts per gallon, choosing fixtures that provide appropriate spectrum and intensity for your chosen marine life. When adding decor, select live rock or artificial structures that promote beneficial bacteria colonization and provide hiding spaces for your aquatic inhabitants. Proper equipment selection combined with thoughtful setup ensures a stable, thriving saltwater environment. Having reliable testing kits allows monitoring water parameters regularly, ensuring your tank remains within ideal conditions. Additionally, understanding the importance of proper filtration can significantly enhance the overall health of your aquarium. Proper filtration and water quality management are critical elements to prevent issues such as algae blooms and harmful toxin buildup.

High-Efficiency Aquarium Protein Skimmer – Powerful protein skimmer for aquarium generates dense micro-bubbles to quickly remove organic waste, proteins, and impurities from saltwater, reef, and marine fish tanks, keeping water crystal clear and healthy for your fish and corals.
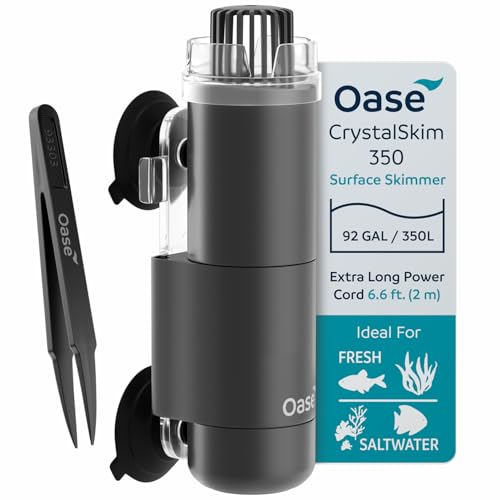
QUICKLY CLEARS SURFACE DEBRIS – Removes biofilm, floating plant matter, and dust from the water’s surface to improve water clarity and support healthy oxygen exchange. Designed for use in both freshwater and marine aquariums.

【Space-Saving】Protein skimmers for saltwater aquariums, this unit features a compact design that provides efficient filtration even in limited spaces. With a built-in pump and an innovative bottom-opening outlet structure, the protein skimmer maintains an ultra-small footprint of just 5.5 x 4.5 inches and is suitable for 50-gallon (high bioburden) to 100-gallon (low bioburden) aquarium systems.
Prepare and Mix Saltwater for Stability
To prepare stable saltwater, start with 5 gallons of RO/DI water in a clean, food-grade container. Use this precise volume to ensure accurate salinity levels later. Add the synthetic sea salt mix gradually, following the manufacturer’s instructions, to prevent clumping and dissolve it evenly in circulating water. Maintain the water temperature around 78°F (25.5°C) with a heater, and use an air stone or powerhead for circulation. This ensures proper gas exchange and helps the salt dissolve thoroughly. Leave the mixture aerating overnight to promote complete dissolution and oxygenation. Once dissolved, measure the salinity using a calibrated refractometer or hydrometer. Adjust the salinity to a specific gravity of 1.025 to 1.026 before use, adding small amounts of freshwater or saltwater as needed to reach the target. Proper salinity measurement is essential for creating a stable environment for marine life. Additionally, understanding saltwater mixing techniques can help achieve more consistent results.
Cycle Your Tank and Test Water Quality
To cycle your tank, you need to establish the nitrogen cycle by introducing ammonia sources such as pure ammonia, ammonium chloride, raw shrimp, or decomposing fish food. Aim for an ammonia level of 1–2 ppm, testing water regularly with reliable test kits. Expect ammonia to spike quickly and then decline as beneficial bacteria grow. After that, nitrite levels will rise, appearing after ammonia decreases, and then fall as nitrates increase. Perform tests every few days, or daily in the beginning, to monitor progress closely. When both ammonia and nitrite reach zero and nitrates stay below 20 ppm, your tank has successfully cycled and is ready for fish. It is important to maintain consistent testing throughout the process to catch any fluctuations early and ensure a smooth cycle. Regular monitoring helps prevent toxic conditions, which can be caused by unstable water parameters that could harm your aquatic inhabitants. Additionally, understanding water parameters like pH and temperature can further support a stable environment during and after cycling.

Professional Quality Testing Kit: The AAwipes Aquarium test kit (50 strips) is developed by experts for fish enthusiasts. It offers 8-in-1 testing capabilities, made with high-quality fiber paper and non-bleeding colors. The kit measures key parameters like Free Chlorine, Nitrate, Nitrite, Hardness, Sodium Chloride, Total Alkalinity, pH and Ammonia nitrogen. By identifying potential issues, our fish tank testing kit helps prevent hidden water problems and ensures the safety and well-being of your fish.

Professional Quality Testing Kit: The AAwipes Aquarium test kit (100 strips) is developed by experts for fish enthusiasts. It offers 8-in-1 testing capabilities, made with high-quality fiber paper and non-bleeding colors. The kit measures key parameters like Free Chlorine, Nitrate, Nitrite, Hardness, Sodium Chloride, Total Alkalinity, pH and Ammonia nitrogen.

𝗛𝗼𝗺𝗲 𝗔𝗾𝘂𝗮𝗿𝗶𝘂𝗺 𝗪𝗮𝘁𝗲𝗿 𝗧𝗲𝘀𝘁 𝗞𝗶𝘁 - Ensure the health of your fish with aquarium water testing kit & ammonia test strips for fish tank. This complete freshwater & saltwater tank test kit provides a reliable water tester for ammonia, pH, iron, chlorine, total hardness (GH), carbonate, nitrate, nitrite, total alkalinity, copper, and temperature, allowing you to have a complete understanding of your aquarium water quality. Trusted by fish enthusiasts, it adapts to your needs, making it an essential tool for aquarium care.
Safely Introduce Fish and Maintain Your Aquarium
Introducing new fish carefully is crucial to maintaining a healthy aquarium environment. Begin with a quarantine period of at least two weeks, but preferably up to 30 days, to observe signs of illness and prevent disease outbreaks. Set up a separate quarantine tank before adding new fish, ensuring its temperature and salinity match the display tank to reduce transfer stress. During this period, closely monitor your fish for any abnormal behavior or physical symptoms such as spotting, swelling, or fin rot. Fish showing signs of illness should undergo treatment in the quarantine tank and not be introduced into the main display aquarium until fully recovered. Choosing reputable sources and selecting healthy, captive-bred fish can significantly reduce the risk of disease transmission. Use drip acclimation to gradually introduce new fish, which helps minimize shock caused by rapid changes in water parameters. Keep the water temperature stable and dim the lights during transfer to reduce stress. Upon release into the display tank, monitor the new fish carefully for at least an hour and continue regular checks over the following days. Additionally, implementing a proper quarantine process can help prevent the spread of parasites and bacteria that might be present on new arrivals. To support ongoing health and prevent disease, space out new additions by at least two weeks, allowing your aquarium environment to stabilize between introductions. Regular water testing and maintaining optimal water quality are essential components of a successful quarantine process.

13.5 gallon glass aquarium for saltwater fish
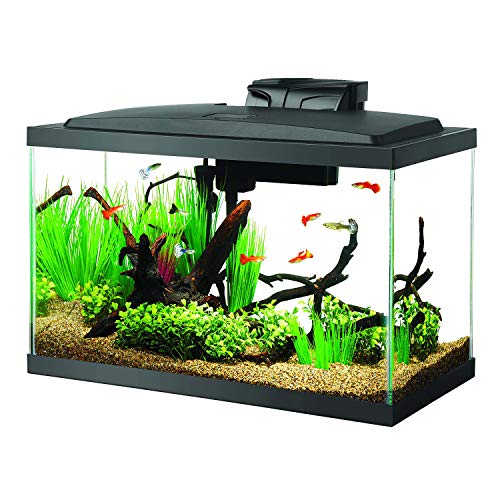
PERFECT FOR BEGINNERS AND SEASONED aquatic hobbyists; user-friendly setup designed for quick assembly

5 gallon glass aquarium starter kit