Thinking about installing a pond liner yourself? It’s easier than you might think and involves a few key steps to get it just right.
From planning your shape to securing the edges, everything needs to be done carefully for a leak-proof and lasting pond.
Keep reading to learn the straightforward process so you can create your own peaceful water feature.
How to Prepare Your Site for Pond Liner Installation
To prepare your site for pond liner installation, start by marking the pond shape with hose, rope, or paint to confirm your desired footprint before digging. Excavate to the planned depth, including shelves for plants or wildlife habitats, ensuring side slopes are between 20 and 45 degrees to prevent soil collapse and facilitate liner placement. Remove all debris such as roots, rocks, and loose soil to reduce the risk of puncturing the liner later. Measure the dimensions carefully to allow space for slopes and anchoring zones. Add a 1 to 2-inch layer of soft soil or sand at the base to cushion the liner, and then lay down a non-woven geotextile fabric for additional puncture protection. Proper site preparation ensures a smoother installation process and a durable, long-lasting pond. Incorporating the right plants can also help stabilize soil and enhance the pond’s ecosystem over time. Additionally, selecting the appropriate salt for your water conditioner may support maintaining a healthy aquatic environment. Using a suitable pond liner designed for your specific pond size and conditions will also contribute to a successful installation.

Having This Barrier Makes You Less Worried About Punctures Over Time: As a dedicated cushioning layer for pond liners, it effectively isolates sharp stones, tree roots, glass fragments and other hard objects, preventing punctures to the upper waterproof liner.

Heavy Duty 9oz Geotextile Fabric: made from non-woven polyester, this pond underlayment provides superior strength and durability, offering reliable long-term protection for your pond liner
Heavy Duty 9oz Geotextile Fabric: made from non-woven polyester, this pond underlayment provides superior strength and durability, offering reliable long-term protection for your pond liner
Choosing the Best Underlayment for Your Pond
Non-woven geotextile fabric is the best underlayment option for your pond because it effectively cushions the liner against stones, roots, and sharp debris. It protects the liner from punctures, abrasions, and ground movement, which can significantly extend the lifespan of your pond. For small ponds, a thickness of 200–300 gsm is usually sufficient, providing enough protection without adding unnecessary bulk. Larger or rougher areas, however, benefit from 400–600 gsm underlays, which offer increased durability and resistance to pressure points. Eco-friendly options made from sustainable materials are also available, allowing you to choose a more environmentally conscious setup. Ensure that your underlayment fully covers the entire pond bed, overlaps seams by at least 3–4 inches, and extends beyond the pond edge to maximize protection. Proper underlayment selection plays a vital role in preventing damage to the liner over time. Additionally, considering aquarium filter performance when installing your pond can help maintain water quality and clarity. Using the right geotextile fabric can also enhance overall durability and reduce maintenance needs.
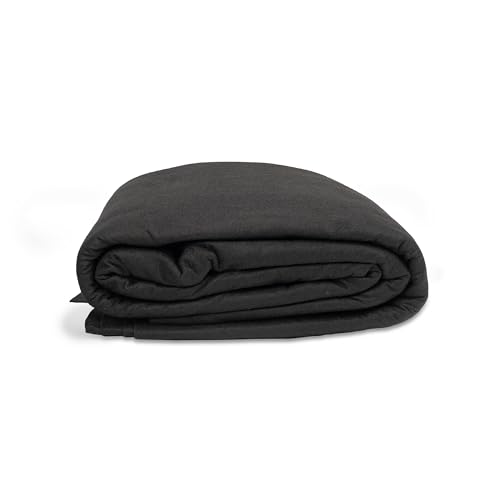
Enhanced Pond Liner Protection: Designed to safeguard against sharp rocks, roots, and uneven soil, this heavy-duty underlayment provides a durable barrier to extend the life of your pond liner.
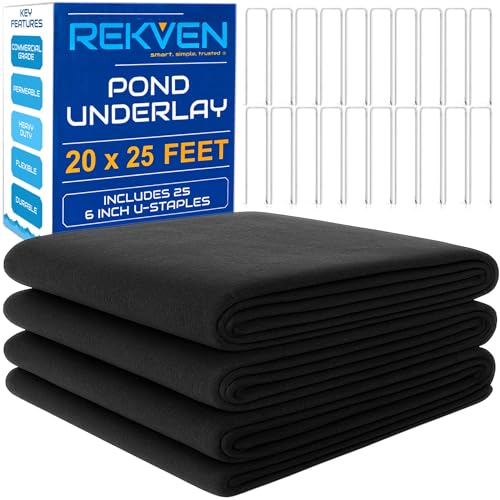
Pond-Tex Puncture Protection: Engineered 4.5 oz non woven geotextile underlayment cushions your pond liner or preformed pond tub against punctures from rocks, roots, stones and rough terrain. Works with EPDM rubber, HDPE, LLDPE, RPE, LDPE and PVC liners. Lays underneath your liner as a protective layer, not a water barrier.

Product Includes: Measures 10 feet wide by 15 feet long. Includes 15 garden staple U-pins to stake fix the non-woven fabric pond underlayment.
Planning and Marking Your Pond Shape Before Digging
Before digging, you need to clearly mark out the pond shape on the ground. Use canes and string, or alternative markers like rope, hosepipe, or spray paint to outline your design. Mapping the layout on a plan or aerial image ensures you transfer the shape accurately to the site. Check that the outline matches your desired pond size and fits within the available space; larger ponds generally support better plant growth and attract more wildlife. Establish a height reference using a benchmark or laser level, and mark the inner and outer limits to stay on track during excavation. Incorporate gentle slopes and shelves into the design to facilitate easier digging and liner placement. Finally, leave an extra allowance of about 30 to 50 centimeters around the edge for liner overlap and natural finishing touches with stones or turf. Understanding the importance of aquascaping can help you create a beautiful and functional pond environment. It’s also helpful to consider the appropriate pond liner to ensure durability and proper fit for your specific pond shape. Paying attention to pond design principles ensures your pond is both aesthetically pleasing and environmentally beneficial.
How to Properly Place and Fit Your Pond Liner
To ensure your pond liner fits properly, start by loosely draping it over the excavated pond. Allow the material to fall naturally into place without pulling it tight, which helps prevent tears and creases. Begin installation at the deepest point and work outward, guiding the liner to settle smoothly into the basin’s contours. Keep the liner centered with about 30 to 40 centimeters of overlap around the edges; this excess provides room for adjustments and proper edge finishing. Temporarily hold the liner in place with stones or bricks, distributing the weights evenly to avoid damaging the material. Fill the pond gradually with water, pausing periodically to recheck the fit and adjust tension as needed. As you fill, smooth out wrinkles and folds to allow the liner to conform naturally to the shape of the pond. After each phase, stop to verify the placement and make necessary adjustments before proceeding, ensuring a snug and evenly fitted liner throughout.

1.3 Feet x 6.6 Feet (0.4m x 2m), Natural Stone Liner, Weighs 7.1 pounds (3.2 kg)
1.9 Feet x 6.6 Feet (0.6m x 2m), Natural Stone Liner
Securing and Anchoring the Pond Liner Effectively
To secure and anchor your pond liner effectively, use an anchor trench that is about 6 to 12 inches deep and positioned roughly one foot behind the pond edge. The liner should extend into this trench without being pulled taut, allowing some slack for movement and settling. Backfill the trench with soil, gravel, or rounded rocks, then compact the material firmly to prevent shifting. To further stabilize and conceal the edge, place coping stones or border stones over the trench. Temporary weights like rocks or bricks can help hold the liner in place during installation, especially on windy days. Combining a well-constructed trench, proper backfilling, and decorative edging ensures your pond liner remains secure and stable over time. Proper installation techniques are essential to prevent future issues such as liner tears or pond leaks. For optimal results, consider using aquarium filters for turtle tanks designed to provide additional filtration and stability in pond setups. It’s also helpful to ensure that the liner material used is appropriate for pond environments to maximize durability and prevent leaks over the long term.

PROTECT YOUR LINER: The underlay protects the pond liner from being punctured by rocks or other debris, as well as damage from rodents.

Size - 7 x 10 Feet Pond Liner is ideal for small ponds, up to 200 gallons of water; Easy installation, no tools required
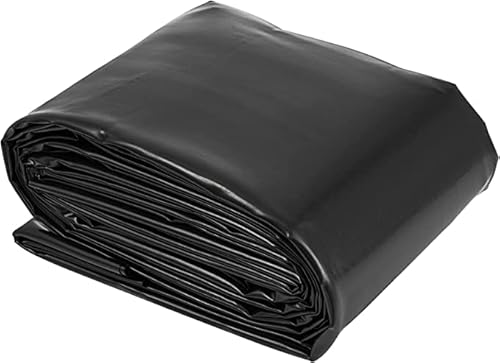
Quality Materials: HDPE pond liners are the most heavy-duty and long-lasting option, made of a thick, high-density plastic material that is resistant to punctures and tears. HDPE liners, which are more leak-proof than LDPE liners, are ideal for large is of utmost importance.ications where durability is of utmost importance.
Filling the Pond and Smoothing Wrinkles for a Perfect Fit
Gradually filling your pond from its deepest point is the best way to ensure the liner conforms properly. Start slow to allow water pressure to help the liner settle into curves and contours naturally, reducing the risk of overstretching or misalignment. This careful approach also minimizes the formation of air pockets that can cause wrinkles later.
Keep a close eye on wrinkles during filling. Small adjustments, such as gentle pulling or pushing, can prevent these folds from becoming permanent. Use soft tools or your hands to smooth out the liner, which helps prevent damage and marks. For complex shapes, controlling where and how you create pleats and folds improves the liner’s fit around curves and corners.
A level, debris-free, and sharp-object-free base supports the liner’s proper placement. Filling and smoothing the liner carefully at this stage saves significant effort later, reducing the need for repair or adjustment once the pond is full. Taking your time during this process ensures a secure fit and a healthier pond environment. Proper preparation of the base is essential to prevent damage and ensure longevity of the liner. Additionally, understanding how water pressure helps the liner settle can guide your filling pace and technique. Being aware of the liner’s durability can help you avoid unnecessary tears or stretching during installation.
Digging and Backfilling the Edge Trench
To dig the edge trench correctly, aim for a depth of about 6 to 12 inches and a width that provides enough slack for the liner to extend into it, typically matching the trench’s dimensions around the pond perimeter. Proper drainage planning is crucial and helps determine the trench’s size, ensuring water flows away from the edges to prevent erosion and water damage. Before digging, test your soil to identify whether it is rocky, clay, or loose, which guides your backfilling approach. Clear the excavated area of debris, rocks, and sharp objects to prevent puncturing the liner. If your soil is uneven or rocky, add a layer of sand or sifted topsoil to create a smooth base for the liner. During backfilling, use compacted soil or gravel to hold the liner securely in place and prevent shifting over time, ensuring long-term stability** of your pond structure. Proper soil compaction is essential to eliminate air pockets and provide a stable foundation for the liner and overall pond integrity. Additionally, understanding soil type helps you choose the best backfilling materials for durability and stability, and assessing drainage patterns** can further enhance the longevity of your pond.
Trimming and Protecting Your Pond Edges for Longevity
Once the liner is properly placed and secured in the trench, focus on trimming and protecting the edges to ensure your pond’s longevity. Start by trimming the excess liner at the rim, leaving a safe overlap—about 4 to 6 inches—to allow for secure sealing and adjustments. Avoid cutting the liner flush with the waterline; instead, make controlled, rounded cuts once the pond shape is finalized to create a neat, stable edge. Add protective layers by installing underlayment beneath the liner and extending it into the edge folds. This prevents punctures from sharp stones or soil beneath the liner. Cover the tucked edges with soil, gravel, or small stones to soften the transition and shield the liner from shifting or damage. Dig a narrow trench along the edge to tuck and anchor the liner, then backfill the trench firmly to hold everything in place. Using proper edging techniques can help prevent UV damage, erosion, and shifting over time. Additionally, selecting appropriate protective materials can further enhance the liner’s durability. Proper edging not only improves the pond’s appearance but also extends the lifespan of your pond liner, ensuring long-term enjoyment. Finish by placing stones or pavers over the edge, concealing the liner and creating a smooth, durable shoreline that resists shifting and supports long-term stability.

【THICKER 7.5OZ POND LINER UNDERLAYMENT】 Convivium geotextile fabric is 250GSM / 7.5 oz/yd², thicker than common 4.5–6 oz pond liner padding. Built to create a tougher protective base under pond liners for koi ponds, fish ponds, water gardens, and landscaping

Keep Your Fish Secure: By using a pond liner, you can prevent water and soil from seeping out of the pond and contaminating water resources. This will create a better living environment for your fish. Moreover, you can add aquatic plants, rocks, and wildlife to make your pond more attractive.
Quality Pond Liner Fabric: the pond liner employs dependable fabric that acts as an effective barrier safeguarding pond liners from sharp objects, tree roots, and rocks; This fabric is harmonious with various materials like EPDM rubber, LDPE, HDPE, LLDPE, RPE, and PVC liners
Final Steps: Stabilizing the Pond Before Adding Plants or Fish
Stabilizing your pond involves ensuring the water level remains consistent and the water chemistry is within the ideal range before adding plants or fish. After filling the pond, check for leaks and top up water as needed until the levels stay steady for at least 7 to 21 days. Regularly test water chemistry; the pH should be between 6.0 and 9.0, ideally around 7.0 to 8.2. Ammonia levels should be near zero, and nitrate and nitrite levels must be safe for aquatic life. Biological cycling is crucial — add beneficial bacteria to establish bacteria populations that efficiently process waste. You should introduce aquatic plants first, as they help stabilize nutrients and create habitat. Only once the water chemistry is stable and biological cycling is functioning properly should you gradually add fish. Throughout this process, continuously monitor water parameters to prevent any sudden changes that could harm your pond’s ecosystem.