Wondering how to keep your fish tank filter sponge clean? Regular cleaning is key to maintaining a healthy, balanced aquarium without harming beneficial bacteria.
When done right, it’s a quick process that helps your filter work efficiently and keeps your fish happy. Keep reading for simple steps to clean your sponge effectively and safely.
How to Prepare Your Aquarium and Gear for Sponge Filter Cleaning
Before cleaning your sponge filter, it’s crucial to prepare your aquarium and gear to ensure a smooth process and protect your aquatic life. First, turn off the air pump and any other electrical equipment connected to the filter to prevent backflow or splashing. Keep your heater and tank lighting off only as long as necessary, since abrupt changes in temperature or lighting can stress your fish and shrimp. Understanding filter maintenance essentials can help prolong your sponge filter’s lifespan and keep your aquatic environment healthy.
Plan the cleaning during a regular water change so you can use treated or old tank water for rinsing your sponge. This helps avoid introducing unnecessary chemicals or disturbances. Choose a stable work area close to the tank to minimize spills and handling time. Gather all tools before starting: a bucket filled with aquarium water, a towel, gloves, and a soft brush for gentle agitation. Inspecting filter components for any signs of wear or damage before beginning can prevent potential issues and ensure your cleaning process is efficient. It’s also helpful to familiarize yourself with the beneficial bacteria residing in your filter to prevent disrupting your tank’s biological balance.

FUNCTION --- Easy to control, convenient to siphon fish faeces, impurities, turbid water out of fish tank.

HOW IT WORKS? – Water is pulled up through the intake and into the transparent tube. Stainless steel rotary drum sieves out large particles. The water flows through multiple stages of filtration. Ultimately, clean water flows through the spray bar (or directional spout) outlet back into the tank. Surface skimmer removes floating oils

Siphon Function Desigh --- Perfect for regular water changes, easy to control, convenient to suck up food, fish waste, turbid water out of fish tank
How to Carefully Remove Your Sponge Filter From the Aquarium
To carefully remove your sponge filter from the aquarium, start by unplugging the air pump and any related equipment to prevent electrical hazards and pressure changes. Gently lift the filter, holding it over the aquarium or a container to catch any drips or loose debris. Lift slowly and steadily to reduce clouding and debris dispersal. If the filter feels stuck, try a gentle twisting motion instead of forceful pulling to avoid disturbing the substrate or releasing trapped waste. Keep filter accessories like the air collar or top assembly attached whenever possible, detaching only what is necessary for cleaning. Handle the filter carefully, avoiding squeezing or crushing the sponge, and inspect it for any signs of damage during removal. Proper care during removal helps preserve the filter’s functionality and maintains the best sponge filters for betta fish, ensuring a healthy aquatic environment. Additionally, understanding water parameters and how to manage them can help keep your filter and tank cleaner for longer periods.
How to Rinse Your Sponge Filter Without Damage
To rinse your sponge filter without causing damage, use only tank water from a recent water change. This water maintains the beneficial bacteria on the sponge, which are crucial for biological filtration. Avoid using tap water because it may contain chlorine or other chemicals that kill bacteria. When rinsing, gently squeeze and release the sponge in the tank water, repeating this process 2–3 times or until debris diminishes and water flow improves. Do not twist, wring, or scrub the sponge harshly, as these actions can tear the material and reduce its filtering capacity. Stop rinsing once the flow is restored and debris release slows, noting that a light brown tint is normal. Regularly aquarium plants and filter maintenance helps keep your sponge filter clean and functioning optimally. Following these steps helps keep your sponge filter clean without overcleaning, supporting its long-term effectiveness.

Pack of 4 sponges for hygger aquarium double sponge filter medium size (15-55 gallon)

Size: S-High 4.37 inch,diameter 1.97 inch,Inner round hole diameter 0.4 inch; M-High 5.12 inch,diameter 2.36 inch,Inner round hole diameter 0.59 inch

Dimension: 8x4.5cm/3.2” x1.8”, the inside hole diameter is 2cm/0.8”; for a snug fit, check the size you need carefully before placing an order. The sponge's inner diameter accommodates filter intake within 0.8-1 inches (20–25.4 mm) due to its elastic properties.
Multi-Stage Cleaning: Replacing Water and Repeating Rinses
To thoroughly clean your sponge filter without harming beneficial bacteria, follow a multi-stage rinsing process using stored old tank water. Start by submerging the sponge in the old water, which is free from chemicals like chlorine and safe for the bacteria. Gently squeeze the sponge to remove debris, avoiding twisting or harsh scrubbing that can damage the bacteria colonies. Repeat this process multiple times, adding fresh water each cycle, especially if the sponge is heavily clogged or debris has accumulated on roots from floating plants. Regularly inspecting and maintaining your filter ensures optimal filtration performance, which is crucial for a healthy aquatic environment. It’s also important to understand how beneficial bacteria contribute to maintaining good water quality and biological stability in your tank.
For optimal habitat stability, it’s important to understand how reptile thermostats contribute to a healthy environment. Avoid using tap water or aquarium salt during rinses, as these can disrupt the biological balance by killing beneficial bacteria. Each rinse should be done with clean, stored water to prevent disturbance. If debris persists after several rinses, repeat the process until the sponge is sufficiently clean. When finished, discard the used rinse water immediately and do not return it to the tank, ensuring you maintain a healthy environment for your aquatic life.

Efficient Filtration: The high-density and unique structure of the sponge provide exceptional mechanical filtration. It effectively captures and removes impurities, suspended particles, and waste from the water, maintaining a clear and stable aquatic environment for the well-being of your aquatic organisms.
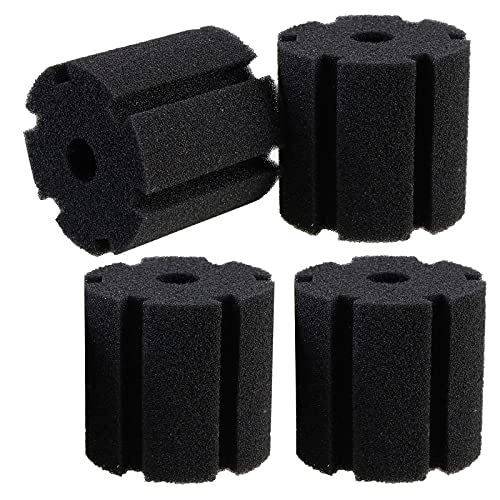
Replacement sponge for sponge filter
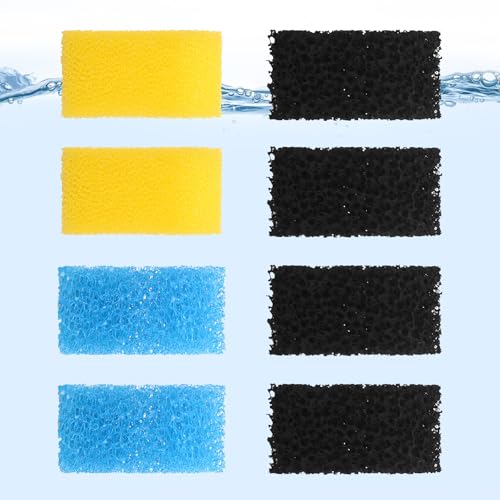
FILTER SPONGE SET - Includes: 2 x coarse sponges, 2 x fine sponges & 4 x carbonized sponges for multi-stage filtration.
How to Inspect Your Sponge and Filter Components for Wear and Damage
Before reinstalling your sponge filter, you must carefully inspect all components for signs of wear or damage. Start by examining the sponge itself for tears, cracks, or missing chunks. Damaged foam reduces filtration effectiveness and may need to be replaced. Ensure the sponge retains its shape; if it appears compressed, collapsed, or deformed, water flow could be restricted. Look closely at the edges and seams for fraying, crumbling, or splitting, indicators of structural breakdown. Proper equipment maintenance is essential for optimal filter performance and longevity.
Next, inspect the support pieces, including the housing, base, attachment points, and clips. Check these for cracks, wear, or warping to ensure they continue to hold the filter securely. Verify that suction cups and intake nozzles are intact and firmly attached; loose or damaged parts can compromise the filter’s stability and performance.
Finally, examine the impeller housing and connected parts for any buildup, cracks, or damage. A clean, undamaged impeller ensures proper water circulation. Conducting thorough inspections of all components helps maintain the integrity of the sponge material and guarantees reliable filter operation.

Perfect Compatibilty -- These 12-pack filter pads are perfectly compatible with Aqueon Quietflow 20 & 75 LED PRO Aquarium Fish Tank Power Filter. Our compatible with aqueon ammonia reducer is 3.7 inch long, 0.78 inch wide and 0.63 inch high

Perfect Fit: Compatible with AquaClear/Fluval 50 or 20 to 50 gallon power filters

★ Dimension ★: 2.95x2.76x2.44in / 7.5x7x5.7cm. The aquarium filter media can be cut arbitrarily, suitable for fishkeeper FK030 series aquarium sponge filter → B0CGQVLLKJ.
How to Reassemble and Test Your Filter for Optimal Performance
After reassembling your filter components in the correct order, carefully place the filter back into your aquarium to ensure everything fits securely and functions correctly. During reassembly, verify that the sponge, basket, collar, and housing are aligned properly and seated firmly to prevent leaks or dislodgement. Reconnect the airline tubing to the air collar or stone connection, making sure fittings are tight to avoid leaks and weak water flow. Gently lower the filter into the water, taking care to minimize turbulence that could stir up debris. Once the filter is submerged, restart the air pump and observe the system—look for steady bubbles and water movement through the sponge to confirm proper operation. Check that water flows evenly through the sponge and out of the outlet without sputtering or restrictions, adjusting connections if needed. Finally, run the filter briefly and inspect all connections before leaving it unattended, ensuring it operates smoothly and efficiently. Regular monitoring helps maintain filtration efficiency and promotes a healthy environment for your aquatic life such as shrimp or Betta fish, ensuring your setup remains optimal.
Troubleshooting Common Filter Problems and When to Replace Your Sponge
To troubleshoot a filter that isn’t working properly, start by checking the airflow. Verify the air pump is running smoothly. Then, inspect the air line tubing for kinks, disconnections, or blockages that could restrict airflow to the sponge. Make sure the tubing is securely attached at both ends. Also, examine the check valve for correct orientation and cleanliness, as reversed or clogged valves can stop airflow. For clogging issues, check the air passageway inside the sponge for debris or obstructions—using a toothpick can help clear narrow holes. Additionally, inspect the impeller and inlet areas for debris that could reduce flow. If flow remains weak despite these checks, upgrading to a more powerful air pump might be necessary. Regular inspection and maintenance help ensure your filter continues to work efficiently and prolongs the lifespan of the sponge by preventing buildup of debris. It’s also important to consider the water quality, as poor water conditions can contribute to clogging and reduced flow. Maintaining optimal water parameters supports a healthy environment for your fish and can help improve filter performance. Replace the sponge when it is damaged, overly degraded, or no longer maintains its shape, as these issues hinder effective filtration.
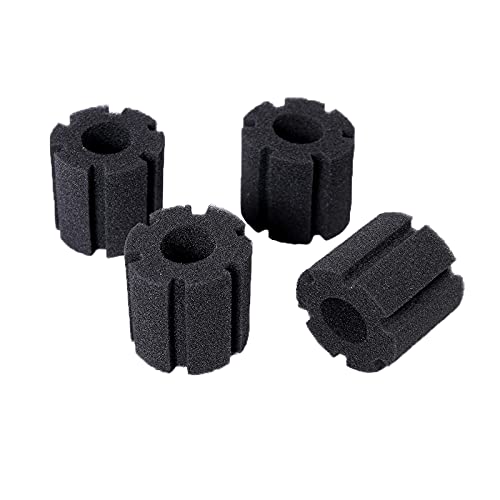
Replacement sponge for sponge filter

Compatible Replacement: Sized at 2.5” x 2.9”, each piece of the SainSmart Aquarium Filters Biochemical Cotton Replacement Sponge is designed to seamlessly replace worn-out filters in Sainsmart Aquarium Filters and other brands with the appropriate size.

for Brand: TARARIUM Mpdel: JQP-2500F, JQP-1500F